Deploying to production
Contents
In this chapter you will launch cloud instances of both Enonic and Next - link them together, and see the glorious result.
Introduction
To complete this chapter, you’ll be using Enonic to host the XP side of things, and Vercel for the front-end - Vercel are the makers of Next.js.
| Both Enonic and Next.js are open source software projects and can be deployed more or less anywhere. Have a look at the Enonic platform hosting page for more details. |
Task: Sign up to Enonic
Create an account to get a free developer instance of Enonic XP
-
Sign up for a free developer account.
-
Create a new solution using the
CMS essentialstemplate. This will install applications likeContent StudioandGuillotineautomatically.
When the new solution has started, launch Enonic XP Admin to verify that everything is up and running.
Task: Install your app
-
Connect Enonic CLI to the cloud by running this command, and follow the instructions:
enonic cloud login -
Install your enonic app directly from the app folder by running this command:
enonic cloud app install -
Verify that the app was installed from
Solution→Applicationsin the Enonic Console. -
From XP Admin, open Content Studio to verify that your app automatically initialized the
Movie DBproject and imported content on the server, just like on your local machine. -
Just like you did it locally , create a new site called
Hmdband move all imported content there. -
Lastly, remember to create a localized version of the site as you did before.
Task: Expose API via route
The purpose of routes is to expose APIs and other endpoints in Enonic XP like :8080/site/<project>/<branch> to the internet.
-
Create a new route called "API" from
Solution→Routes.Use the following settings:
- Internal path
-
/site - Public path
-
/api - ID provider
-
-empty-
-
Make a note of the route URL - you will find it in the route details.
The URL should look something like this: https://account-solution-environment.enonic.net/api. |
Task: Add your front-end to Git
Vercel (which will be hosting your front-end) will need write access to a Git repo with your code.
-
Create a new Git repo - Vercel supports Github, Gitlab and Bitbucket.
-
Commit and push your Next.js app files to the new repo.
Task: Deploy Next app
You are now ready to deploy the the front-end application.
-
Sign up to Vercel: https://vercel.com/
-
Create a new project
enonic-tutorialand connect it to the repo you created in the previous step. -
Add the following environment variables to the project (name: value):
-
ENONIC_API: <enonic route URL>
-
ENONIC_API_TOKEN: <yourSecret>
-
ENONIC_PROJECTS: moviedb/hmdb,no:moviedb-no/hmdb
-
-
Verify the result. The front-page of your app should now display a 404 - as you haven’t published any content yet.
Make a note of the URL to the Vercel app, you will need it later 
Check the Vercel function logs if you are not getting the expected result.
Task: Link Content Studio to Vercel
With the front-end running, you can link it to Content Studio to activate the preview, and start building pages once again.
| To save time, you may export content from your local machine and import it to the server using the Data Toolbox app. |
-
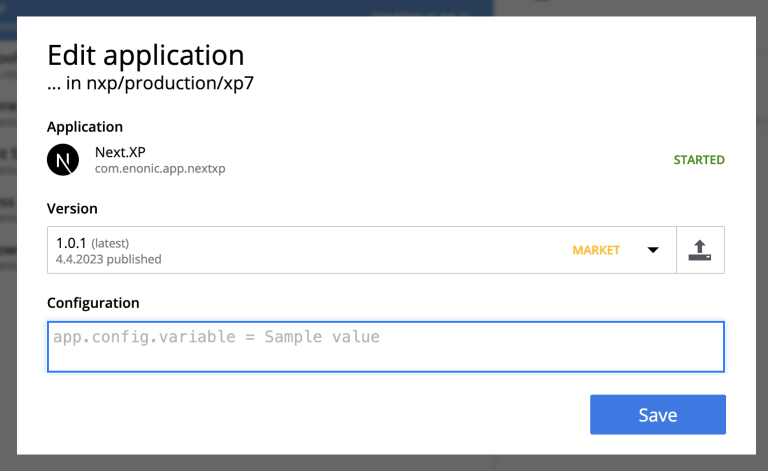
Install the Next.XP app
Solution→Applications→Install→ Search forNext.XP, select it an click install -
Add configuration.
 Add the following lines to the app config field to override the default values:
nextjs.default.url = <Vercel application URL>
nextjs.default.secret = <yourSecret>
Remember, you can also create named configurations if needed. If you imported content from your local environment, the following two steps can be skipped -
Add the Next.XP app to the site to activate preview.
-
Save and verify that the configuration is working by testing the Content Studio preview.
Task: Publish a page
It’s time to test that everything is working.
-
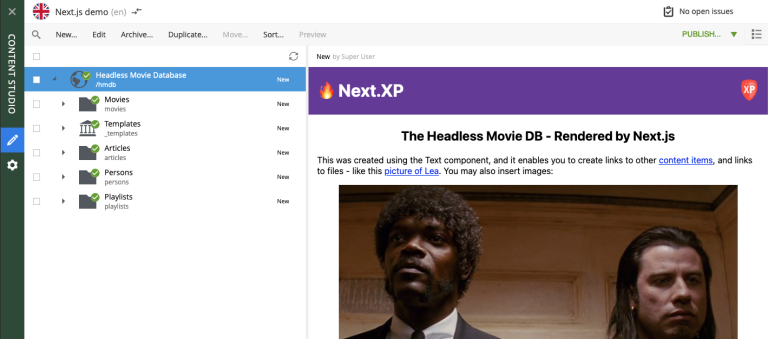
If you did not import content, create the front-page (once again) by using the page editor. Maybe something like this will do?

-
Go live by publishing the new page, and verify that your live site gets updated. Voila!

Summary, and whats Next?
🎉 Congratulations 🥳 - You’ve reached the end of this tutorial - we hope you enjoyed it!
There are other aspects of Enonic and Next.js that will never be covered by this tutorial - to learn more about Enonic check out the following resources: