Create and configure an ADFS client
Contents
-
We assume that a server with an Active Directory Federation Services has been set up.
-
The steps and screenshots presented below have been performed on AD FS 4. Except minor renaming, the steps on AD FS 3 are similar.
-
The steps and values are given as an example. Please adapt to your situation
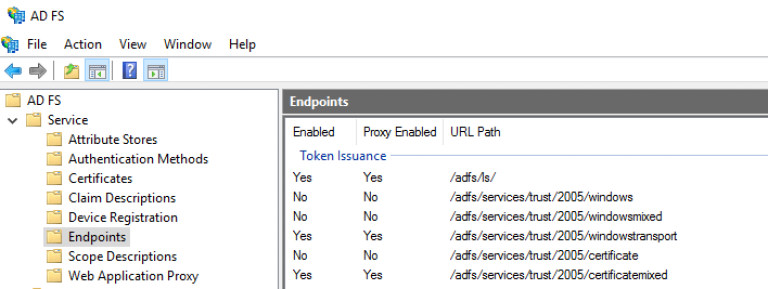
Check that the endpoints are enabled
-
In AD FS Management, check that the endpoints "/adfs/ls" and "/adfs/oauth2" are enabled
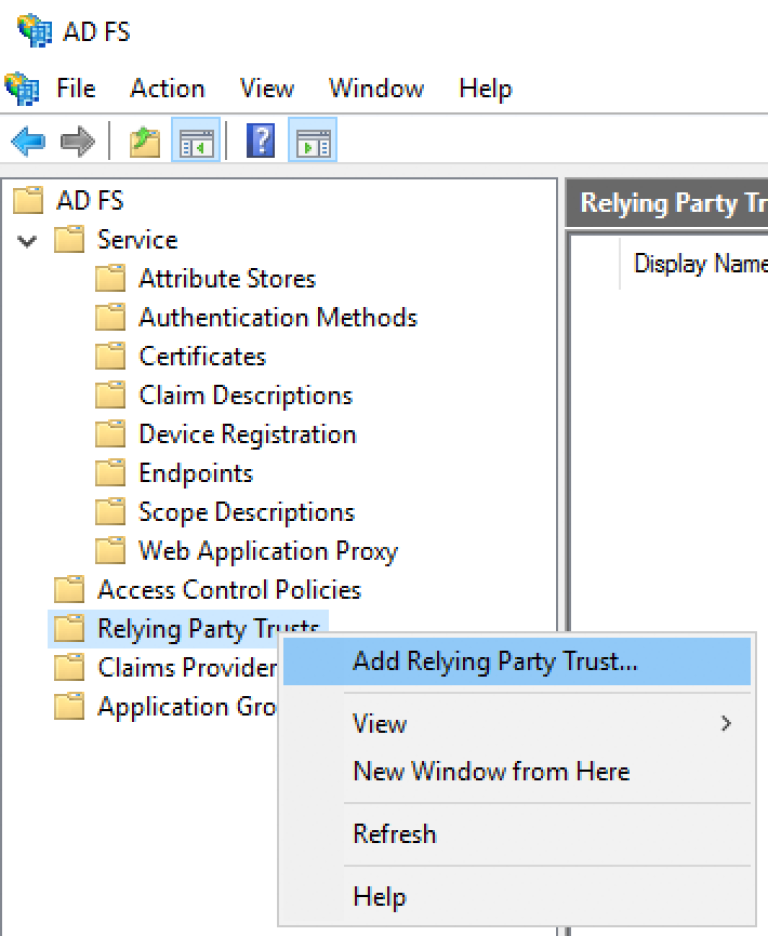
Create a Relying Party Trust
-
In AD FS Management, add a Relying Party Trust.
-
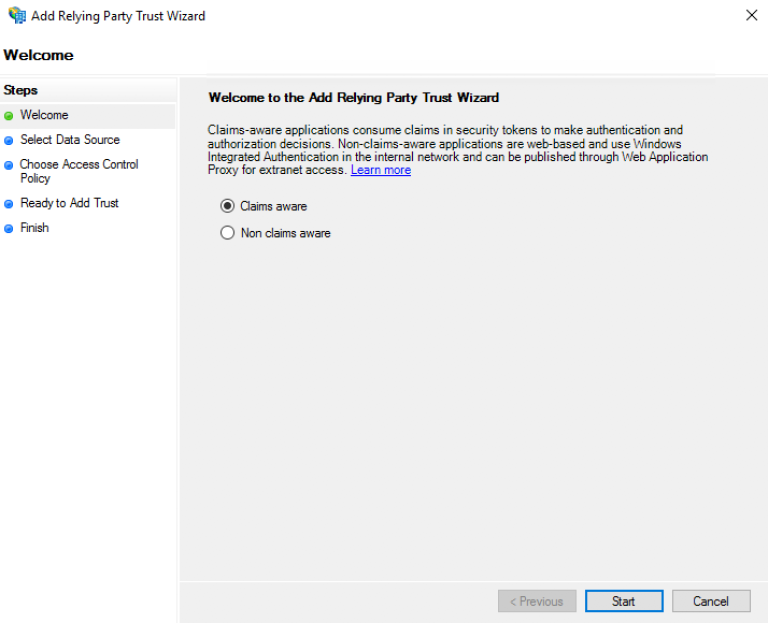
On the "Welcome" page, choose "Claims aware" and click "Start".
-
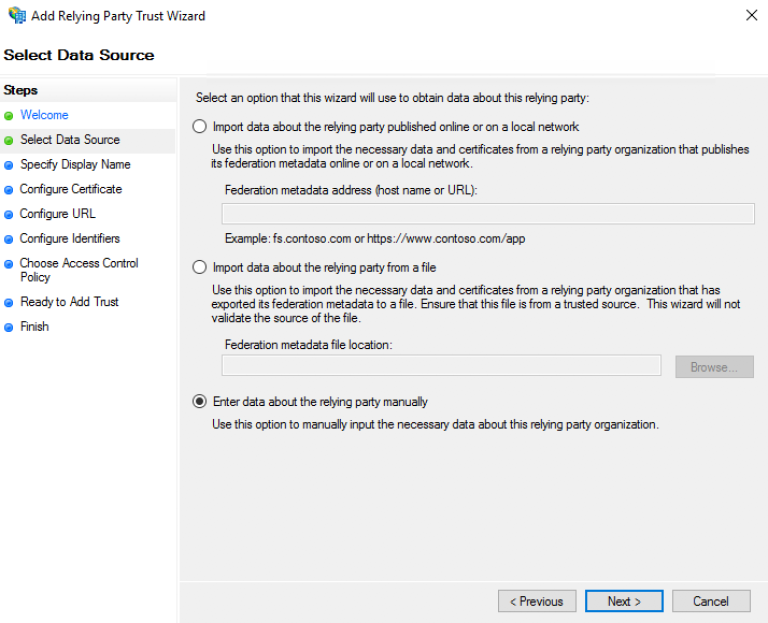
On the "Select Data Source" page, click "Enter data about the relying party manually", and then click "Next".
-
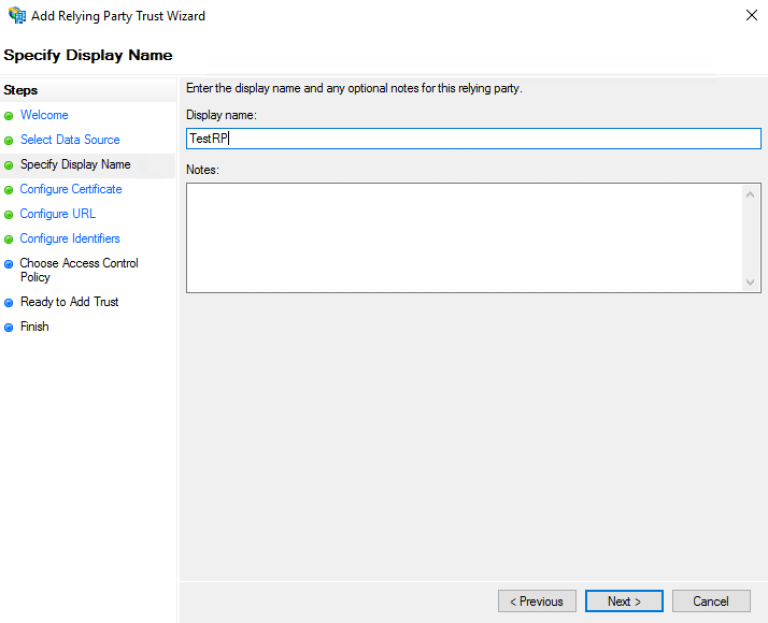
On the "Specify Display Name" page, type a name in "Display name" and then click Next.
-
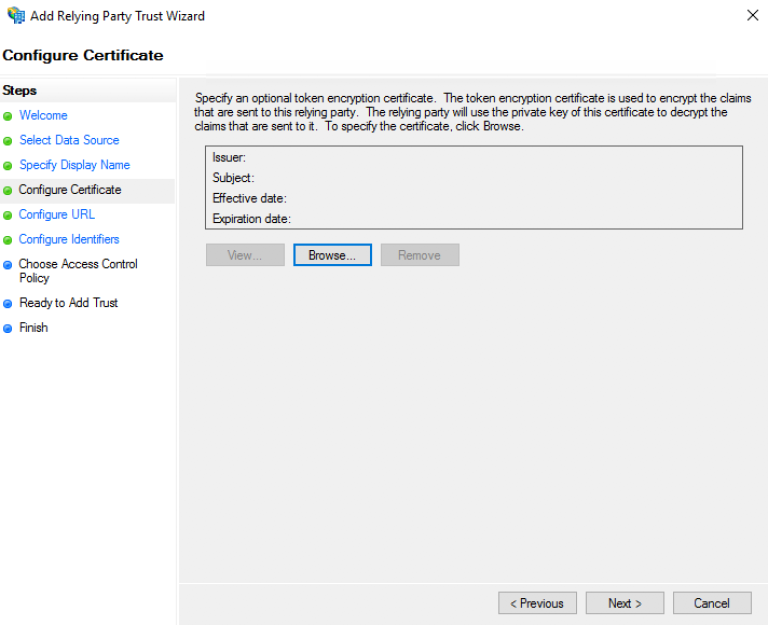
On the "Configure Certificate" page, click "Next".
-
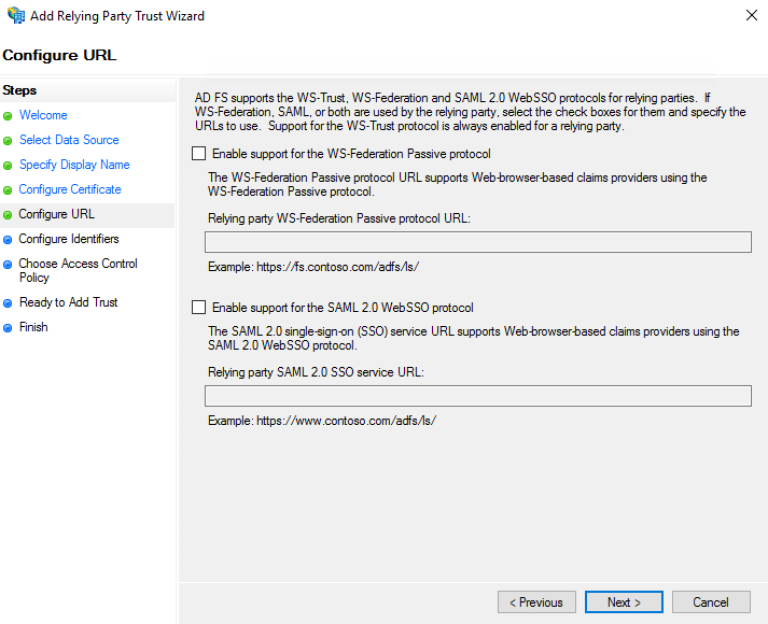
On the "Configure URL" page, click Next (Do not use SAML or WS)
-
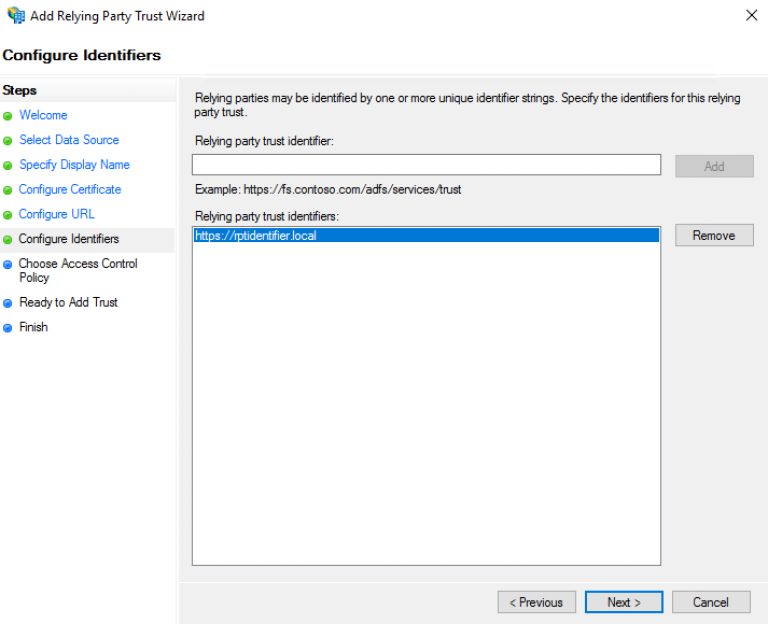
On the "Configure Identifiers" page, specify an identifier for this relying party, click "Add" to add it to the list, and then click "Next".
-
Keep this information as it will be required for the ID Provider configuration as "resource"
-
-
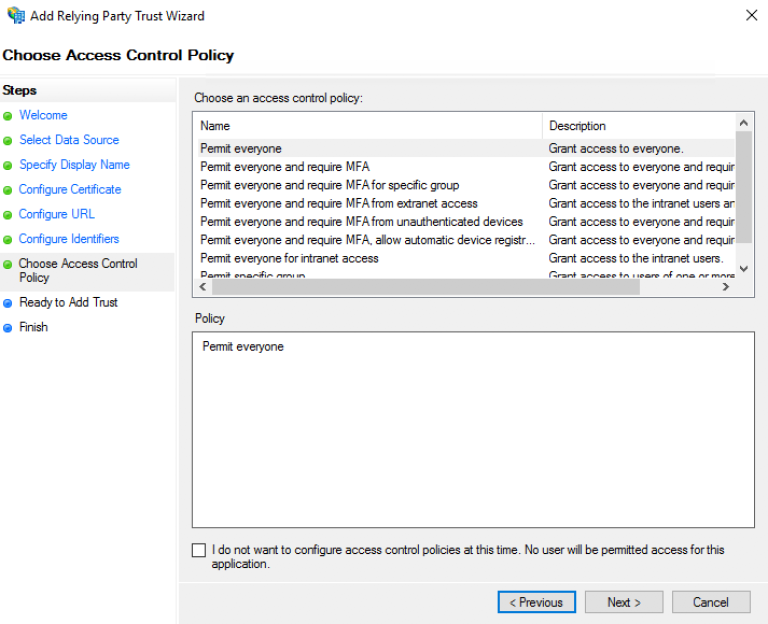
On the "Choose Access Control Policy" select a policy and click Next. For more information about Access Control Policies, see Access Control Policies in AD FS
-
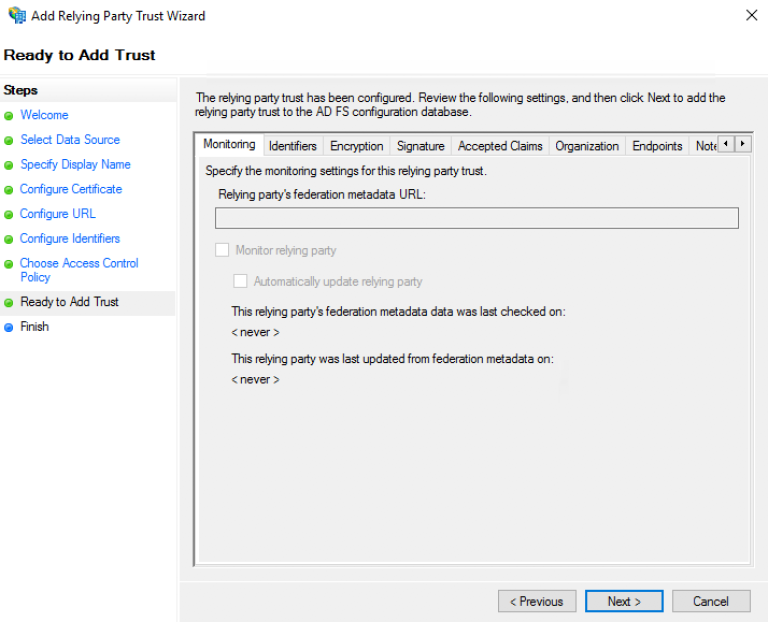
On the "Ready to Add Trust" page, review the settings, and then click "Next" to save your relying party trust information
-
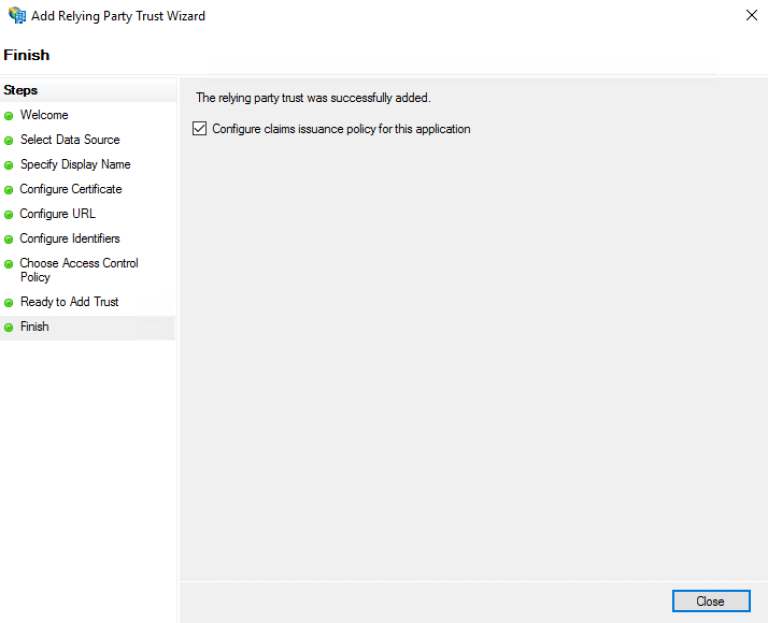
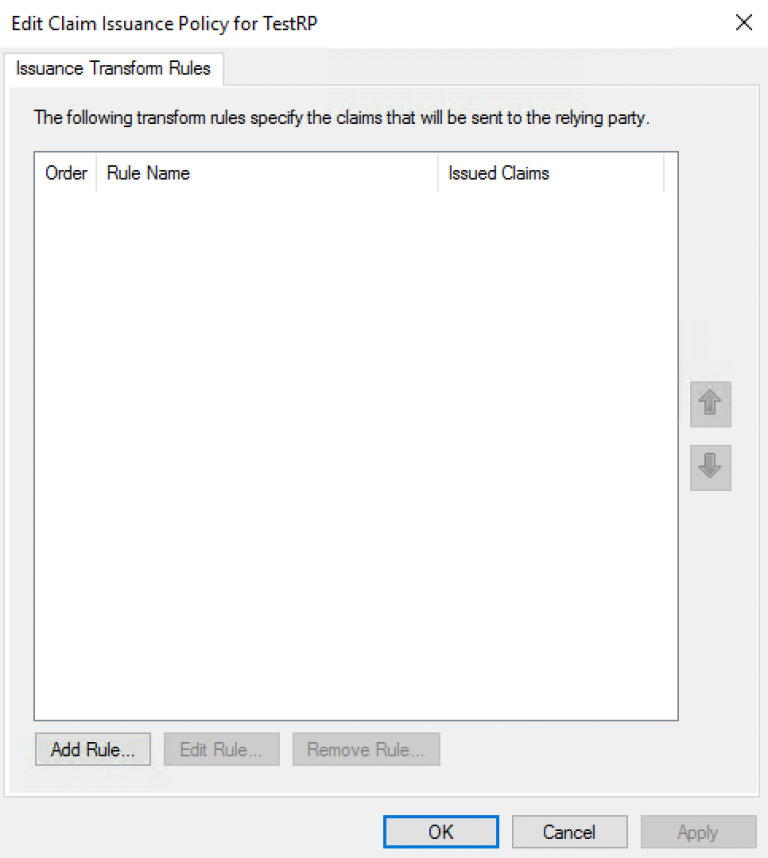
On the "Finish" page, click "Close". This action automatically displays the "Edit Claim Rules" dialog box
Create a rule to send the LDAP attributes as claims
-
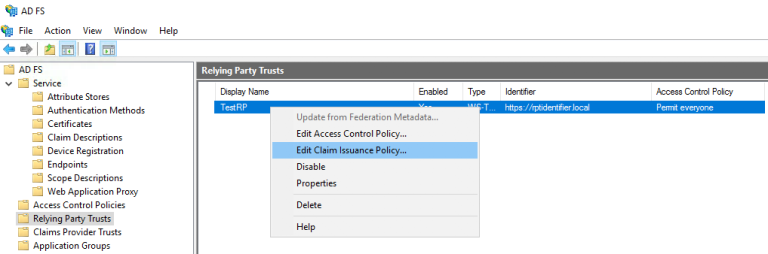
A dialog box "Edit Claim Issuance Policy" must have opened on the previous step.
-
Otherwise, right-click the created Relying Party Trust, and then click "Edit Claim Issuance Policy…"
-
-
In the "Edit Claim Issuance Policy" dialog box, under "Issuance Transform Rules" click "Add Rule" to start the rule wizard.
-
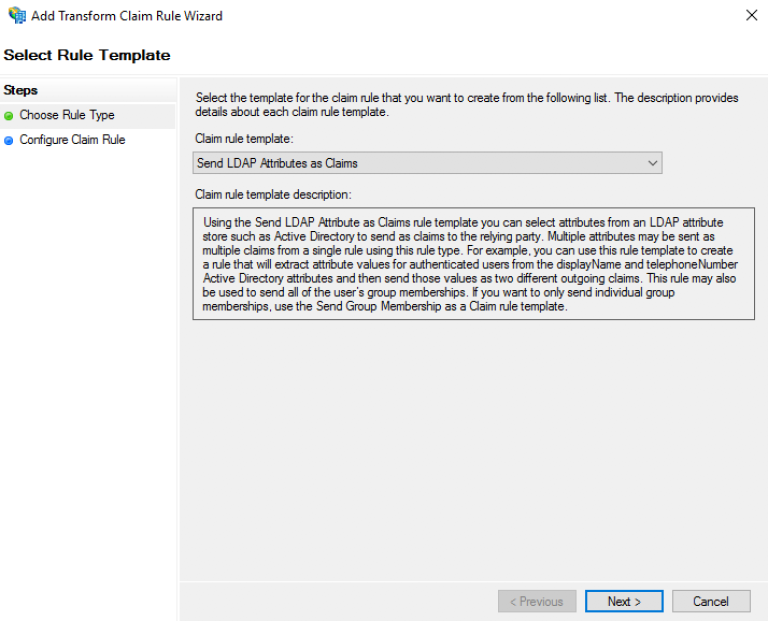
On the "Select Rule Template" page, under "Claim rule template", select "Send LDAP Attributes as Claims" from the list, and then click Next.
-
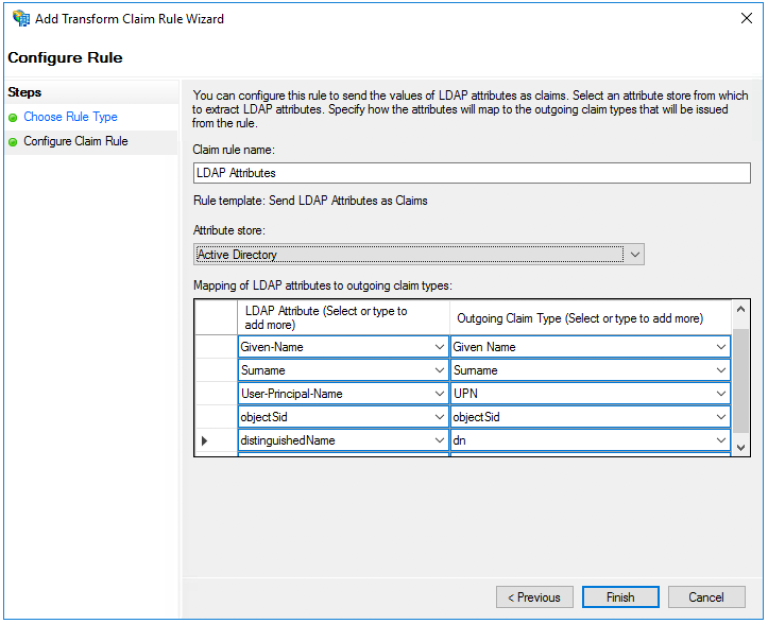
On the "Configure Rule" page under "Claim rule name" type the display name for this rule, select the "Attribute Store", and then select the LDAP attribute and map it to the outgoing claim type.
-
By default, the ID Provider is expecting the 5 mappings below (You will notice that the 2 last values are not present in the list of possible values but are valid values)
-
Given-Name → Given-Name
-
Surname → Surname
-
User-Principal-Name → UPN
-
objectSid → objectSid
-
distinguishedName → dn
-
-
-
Click the "Finish" button.
-
In the "Edit Claim Rules" dialog box, click "OK" to save the rule.
Add an AD FS Client
-
Using PowerShell, add an AD FS Client
-
Choose a Client ID
-
You can either come up with this or use a generator Online GUID Generator
-
Keep this information as it will be required for the ID Provider configuration as "clientId"
-
-
The redirect URI to specify is "_/idprovider/<idprovidername>" appended to your Enonic VHost mapping source (your site URL).
-
Add-AdfsClient -RedirectUri "https://www.example.com/_/idprovider/adfs-idprovider" -ClientId "5d51f771-b86a-419e-ad25-27696aafc02e" -Name "MyADFS4Client"Grant the AD FS Application permission to the resource (Not necessary for ADFS 3.0)
-
Using PowerShell, grant the AD FS Client permission to the resource
-
ClientRoleIdentifier: ClientId used in the command above
-
ServerRoleIdentifier: Relying Party Trust identifier
-
Grant-AdfsApplicationPermission -ClientRoleIdentifier "5d51f771-b86a-419e-ad25-27696aafc02e" -ServerRoleIdentifier "https://rptidentifier.local"