Google AI search agent for Enonic sites
Contents
Introduction
Google’s AI agent is a RAG-based AI that optimizes its answers on content from your website.
This application exposes the agent via a customizable icon on all pages of your website.
AI agent setup
Follow the steps below to create an AI agent that will use the content of your web site.
-
Log in to Google Cloud: https://console.cloud.google.com
-
Use an existing project, or create a new.
-
From the
Solutionsmenu, chooseArtificial Intelligence→AI builder -
Click + CREATE APP. Select the
Searchapp type and give it suitable identifier. -
Use the standard settings, but fill in
App nameandCompany namebefore you move on -
In the next screen, click + CREATE DATASTORE and select
Website content -
Check
Advanced indexing, fill in the URL to your website and continue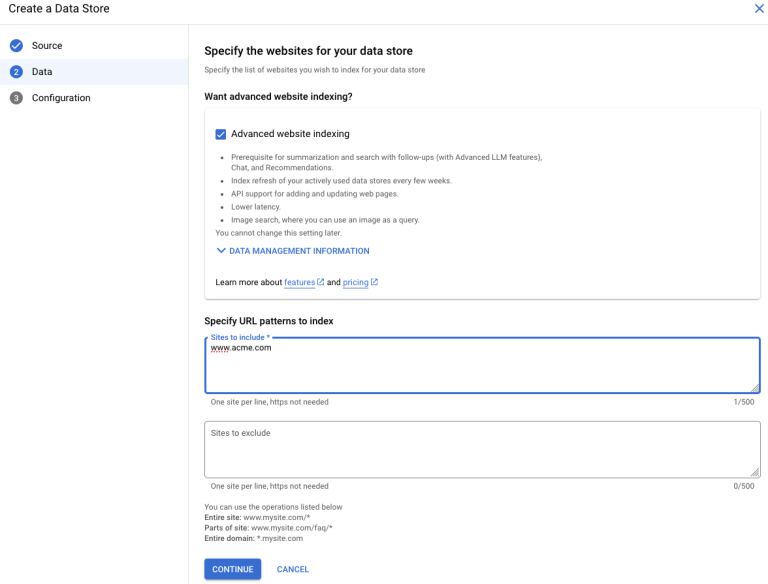
-
Give the datastore a suitable name and click Create. This will take you back to the list of available datastores.
-
Select the freshly created datastore, and click Create once more. This will add the datastore to your search agent, and create it.
You may need to verify your ownership of the website, follow the instructions to complete this 
-
Once the datastore is fully indexed (may take quite a while) you can try the agent from the preview panel.
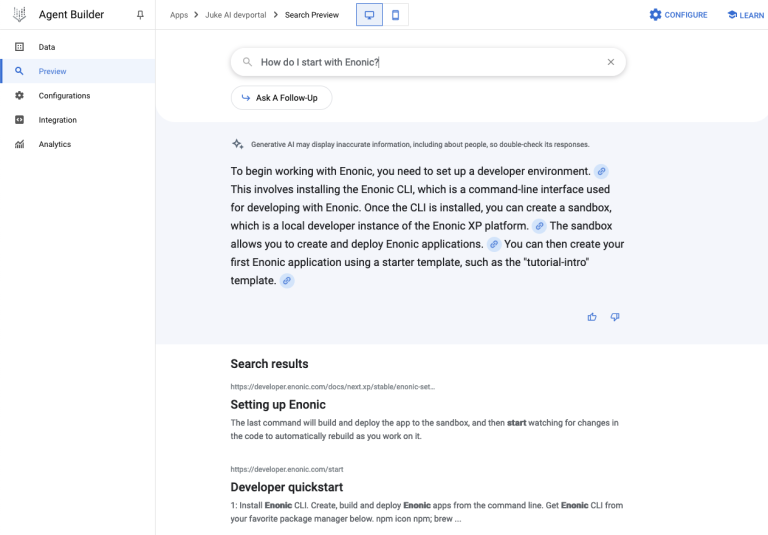
| You may also fine-tune the search agent via the configuration tab |
Service account setup
Once the Agent is working, you must create a service account in order to access it safely.
-
In the Google Cloud menu, go to
IAM & Admin→Service Accounts -
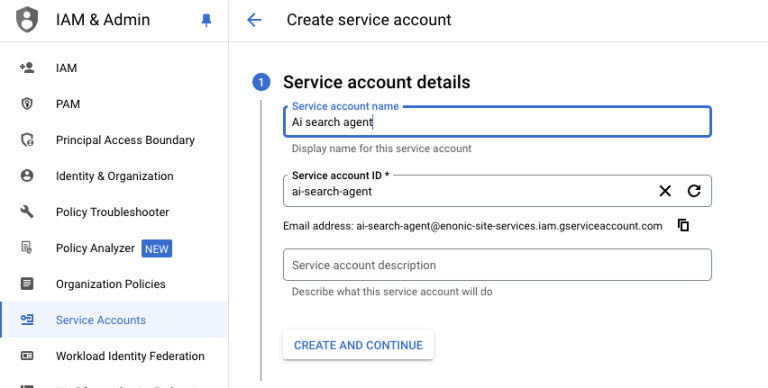
Click + CREATE SERVICE ACCOUNT. Give it a suitable name and continue
-
Select the role
Discovery Engine Service AgentandVertex AI Service Agentand create the service account.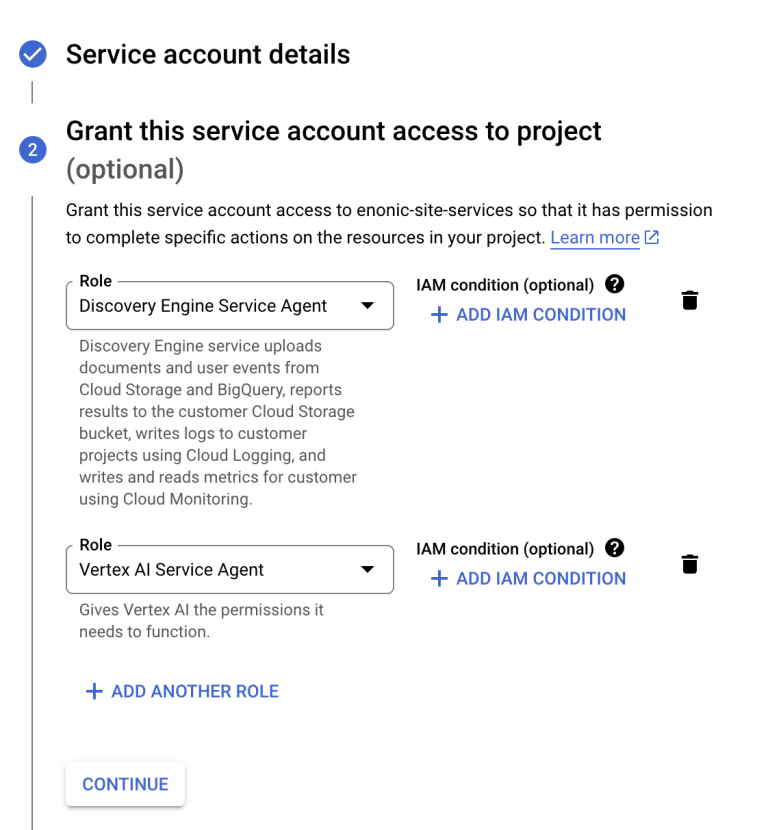
-
Open the freshly created service account, and select the
Keystab -
Create a new key in JSON format. The key will automatically be downloaded to your machine by your browser.
Look for the key file in your computer’s Downloads folder
App installation
You are now ready to install the "Google AI Search Agent" app. It is available on Enonic Market.
Add service account key
You must now add the JSON key file to your XP configurasjon. This will allow the application to communicate with Google.
Rename the JSON key file to google-service-account.json and place it in your XP configuration folder.
|
Optionally specify a different location or file name by adding an app configuration file that overrides the default location:
com.enonic.app.googleaisearchagent.cfg
|
Site deployment
The final step is about adding the app to your site.
Agent builder integration
Start by opening your Agent in Google Cloud one final time
-
Select the
Integrationstab. Make sureJWT/Oauthis selected (should be default)
-
Type in the domain name where you will be hosting the agent, and click ADD
-
Copy the
configIDvalue listed in the script, you will need it soon.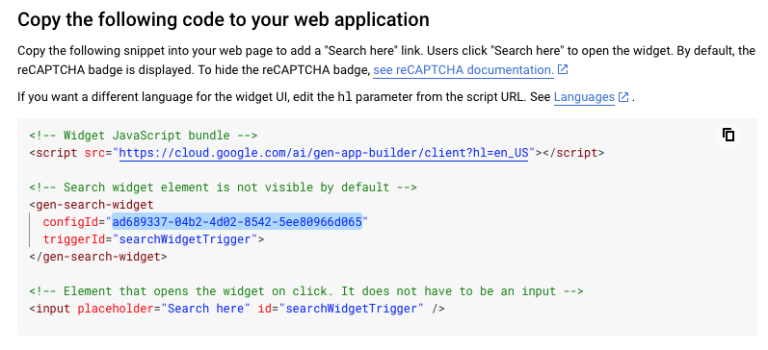
Content Studio
The final step is adding the app to your site.
| The AI agent icon is currently hidden in Content Studio Preview. |
In Content Studio, open the site where you want to deploy the search agent.
-
From the applications field, click Add, and select the
Google AI search agentapp. -
From the app list, click the pencil icon to edit the app configuration
-
Fill in the
configIDyou grabbed in the previous step, and optionally tune the Agent visuals using the other options in the form.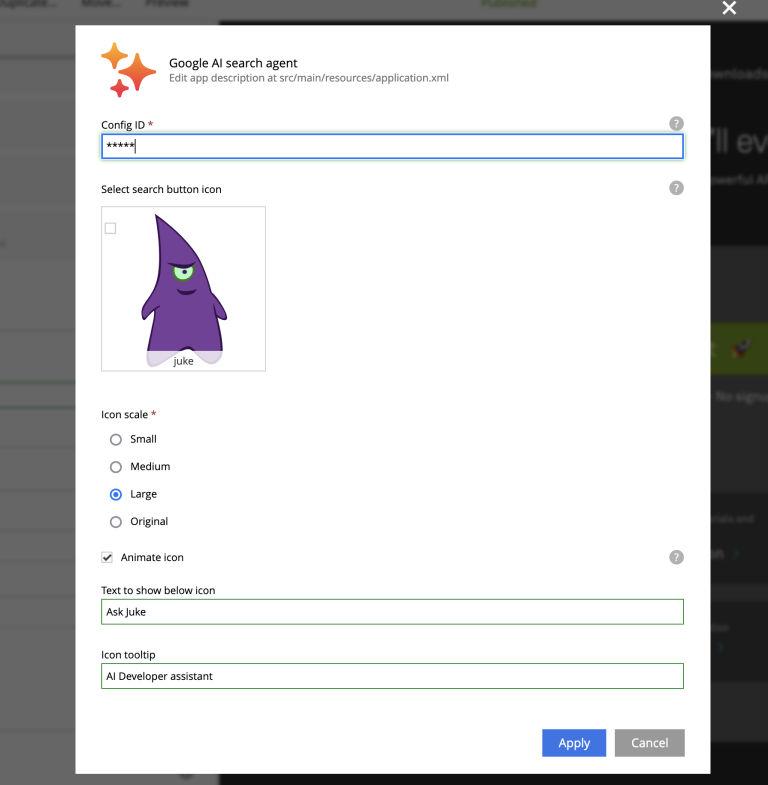
-
Save and publish the changes.
You should now be able to see the AI agent on your live website!
