Content Studio preview
Contents
In this chapter, you’ll enable Content Studio to load the preview directly from the Next.js app.
Task: Enable preview
To enable the preview, install version 6 of the Next.XP app and add it to your site. The app provides a preview widget, titled "Next.js Preview", for the sites it has been added to.
| The Next.XP app requires Enonic XP 8.1 or later. |
-
Install the Next.XP app:
From
XP menu→Applications→Installand search forNext.XP -
Add the Next.XP app to your site:
Edit the
HMDBsite, selectNext.XPin theApplicationsfield - in addition to your own app - and clickApply, just like you did in the Sites chapter.The preview is only available for sites the Next.XPapp has been added to.By default Next.XP uses the following values:
-
secret:
mySecretKeyThis matches your setup, so no further configuration is needed. We will get back to tuning these values in the Static pages, Multi language and Deployment chapters.
Content Studio ships with a strict Content Security Policy that blocks loading pages from third-party URLs, including http://localhost:3000. The Next.XP app automatically adds its configured Next.js origins to this policy, so no manual configuration is needed. The defaulthttp://localhost:3000origin is only allowed when XP runs in dev mode - like your sandbox. In production, only explicitly configured URLs are allowed.
-
Select any content in the "Persons" folder: the preview pane now shows the page rendered by Next.js. The preview toolbar’s widget selector is set to
Automatic, which picks the first preview that can render the item - chooseNext.js Previewexplicitly if another preview shows up.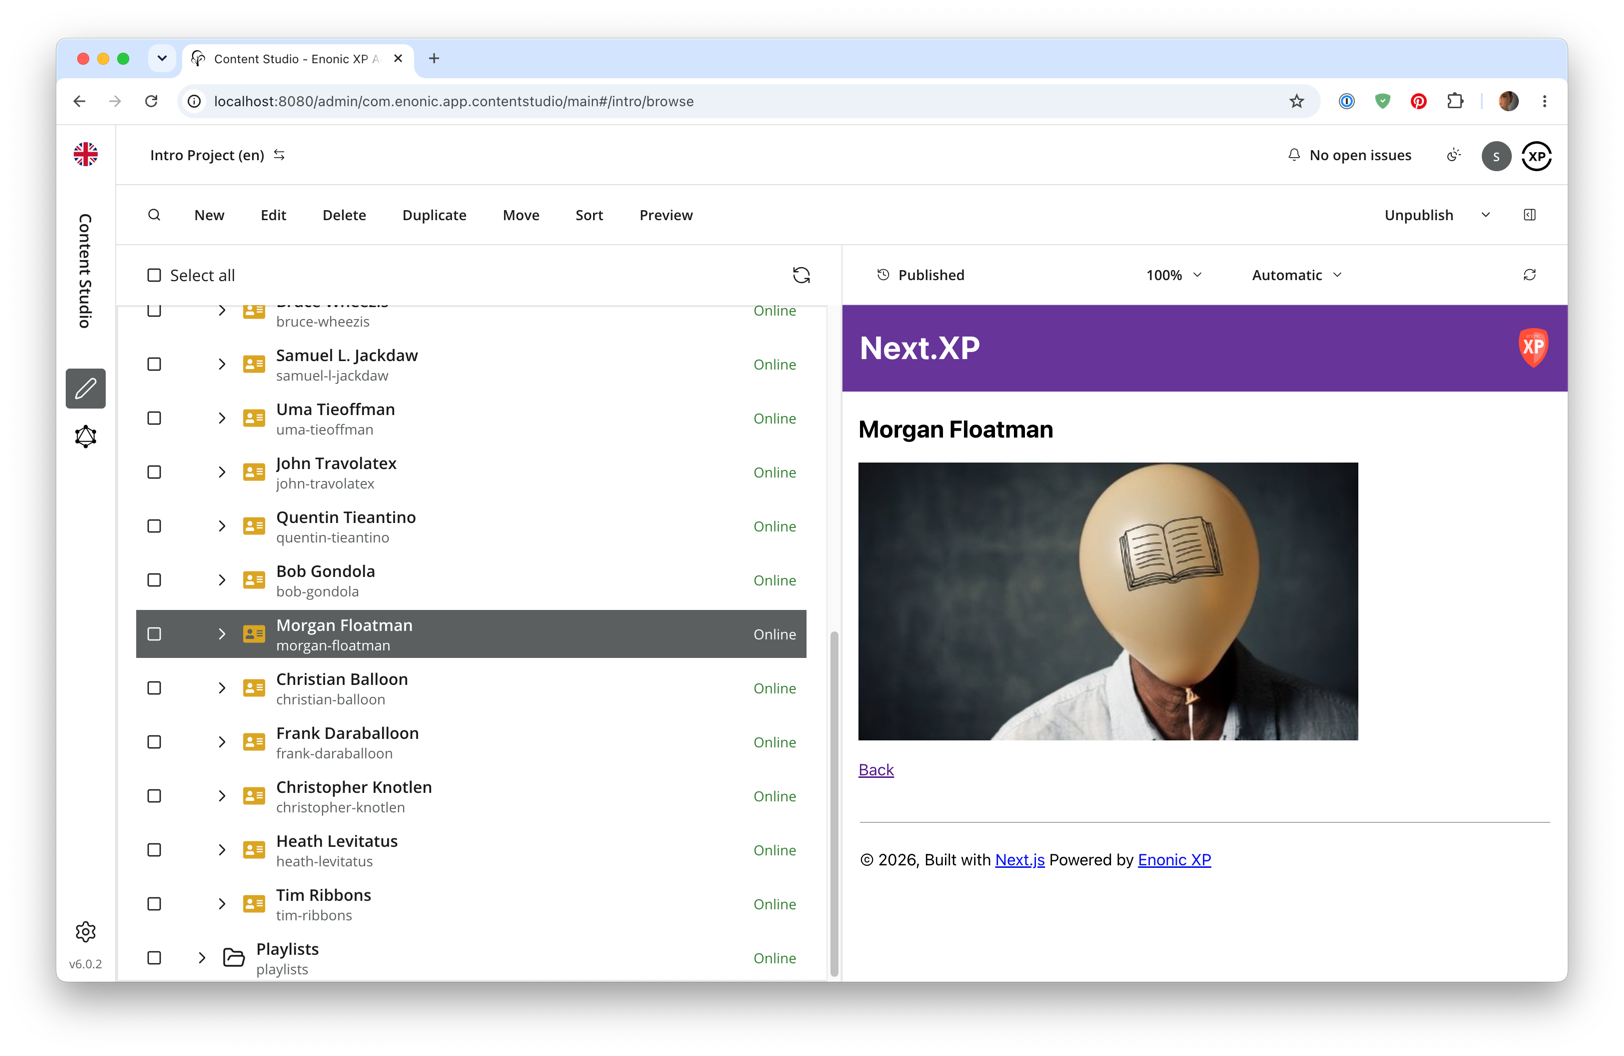
How does it work?
The Next.XP app adds a preview widget, titled "Next.js Preview", to Content Studio that loads pages directly from the Next.js server. When an editor selects a content item in a site the app has been added to, the widget:
-
Fetches URL mapping rules for the current project from the Next.js server’s
/api/mappingsendpoint (the request carries the encrypted project id, and the route prefixes the targets with that project’s locale unless it is the default locale) -
Resolves the content item to a Next.js URL using those mappings
-
Encrypts request parameters with the shared secret and sends a request
-
Loads the resolved page in the preview pane
On the Next.js side, the proxy (src/proxy.ts) validates the encrypted xp parameter on every handoff: when preview setup is needed, the request goes through /api/preview, which enables Next.js draft mode and redirects to the same URL without the parameter. Later requests carrying the parameter are redirected straight to the clean URL, as long as the payload is valid, the draft cookie belongs to the running build, and the frontend XP-session cookie matches the payload: /api/preview records the BUILD_ID defined in next.config.js in a second cookie, so a cookie issued by another build (dev vs prod, a redeploy), which Next would ignore, is refreshed automatically. The route also stores the XP session in an HTTP-only cookie and refreshes it on the next handoff if the session changes after an XP logout/login. From then on the preview runs on clean public URLs (no prefix for the default locale): the project follows from the locale in the URL and draft mode from Next’s cookie, so the page renders unpublished content. The iframe src set by Content Studio carries the parameter; after the redirect, the iframe location and ordinary navigation use clean URLs. The proxy also routes prefix-less URLs to the internal [locale] segment and redirects /en/… to /….
The app also extends Content Studio’s Content Security Policy with every Next.js origin from its configuration plus 'self' (the frame-src, connect-src and style-src directives), allowing the preview iframe to load pages from those servers.
Live page editing
In addition to preview, Content Studio supports live page editing - where editors can drag-and-drop components, edit text inline, and select components directly within the rendered page.
All you need as a frontend developer is the PageEditorScript client component, which handles all interaction - and the starter already includes it. Have a look at the page component to see how it is wired up:
import PageEditorScript from '../../../components/views/PageEditorScript';

// ...

return (
    <>
        <MainView {...data}/>
        <PageEditorScript meta={data.meta}/>
    </>
)
PageEditorScript (in src/components/views) initializes @enonic/page-editor in edit mode and loads single components on request, so Content Studio can update a component without reloading the whole page.
Link handling
Since the preview widget loads pages directly from the Next.js server, links within the rendered page need to work correctly inside Content Studio’s preview as well.
Media fields (imageUrl, mediaUrl, attachmentUrl) are queried with the *UrlQuery() helpers and rendered with the matching imageUrl(), mediaUrl() and attachmentUrl() functions, passing the content metadata (e.g. imageUrl(photo.imageUrl, meta)). Published media uses absolute URLs to XP’s media API (ENONIC_MEDIA_CDN, defaulting to ENONIC_API); draft media uses same-origin /api/media/… URLs. Content links use pageUrlQuery() and pageUrl(data, meta), which returns a relative URL prefixed with the current locale unless it is the default one, so links work both in standalone mode and inside the Content Studio preview.
In preview, the browser loads draft media through the Next.js /api/media/[…path] route, which delegates to proxyMedia(). The server forwards the frontend XP-session cookie to the configured media endpoint while draft mode is enabled. |
That completes the preview setup; moving forward, we’ll look into rendering Html Area fields.