Media - files are content too
Contents
In this chapter, you’ll upload an image, inspect how it is stored as content with an attachment, and use Guillotine to get URLs for its original file and for cropped and filtered versions. The media APIs deliver the files at those URLs.
Upload a file
Start by uploading an image that you’ll use throughout the chapter.
Task: Upload an image
-
Choose a photograph - Download this lion photograph by Keyur Nandaniya, or choose a JPEG with its main subject away from the center. Save it as
lion.jpgif you want the filename to match the examples. -
Create the Images folder - In your "My First Project" content project, create a folder named "Images" at the root, with the path
/images. -
Choose the upload destination - Select the Images folder, click New, and choose the Media tab. Check that the destination shown is
/images/. -
Upload the file - Click the upload area to select your file, or drag the file onto it.
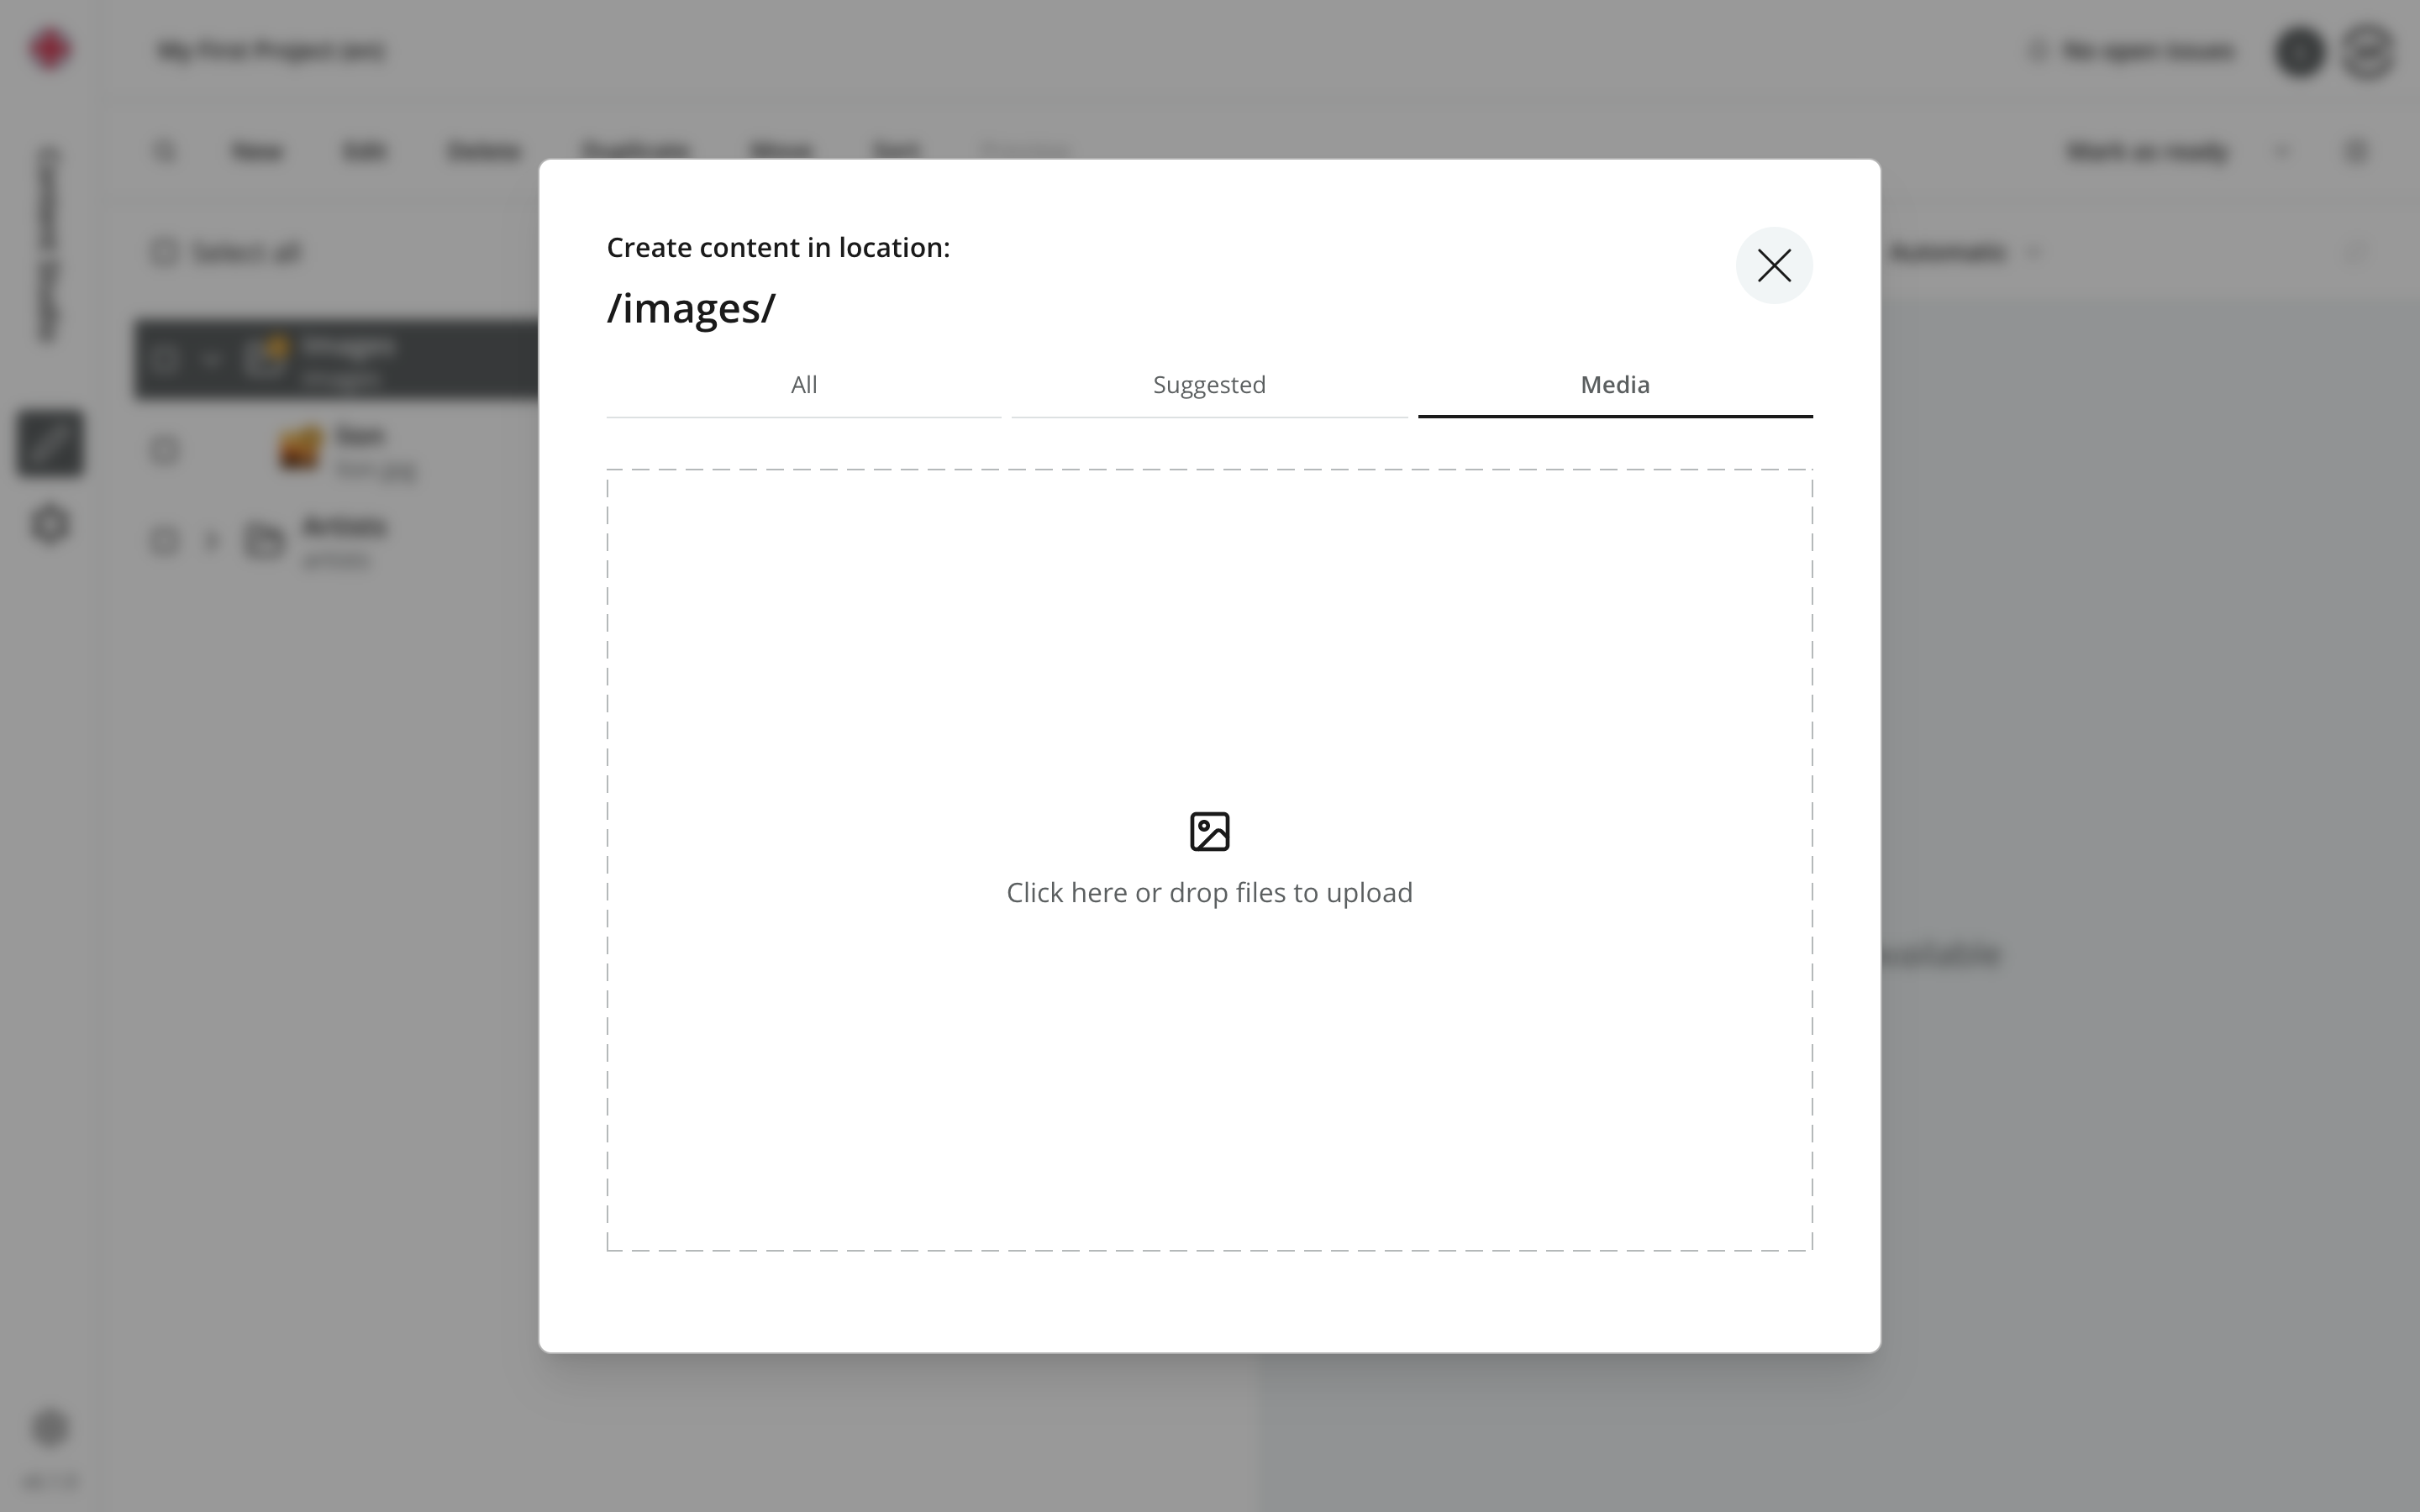 Figure 1. The Media tab in the New Content dialog
The uploaded image now appears as a content item in the Images folder. It is saved in Draft and has not been published.
Inspect the uploaded content
Your uploaded image is now a content item, just like the artists you created earlier. Let’s inspect its data and find the file attached to it.
Task: Find the image and its attachment
-
Find the uploaded image - Open Query Playground, select "My First Project" and keep Draft selected throughout this chapter. Run this query to find up to ten images anywhere in the project:
{
  guillotine {
    queryDsl(
      query: {
        term: {
          field: "type"
          value: { string: "media:image" }
        }
      }
    ) {
      displayName
      _path
      type
      dataAsJson
      attachments {
        name
        label
        mimeType
        size
      }
    }
  }
}
Below is one item from the
data.guillotine.queryDslarray. This example shows the image immediately after upload; your filename, dimensions, file size and additional metadata may differ:The image content and its attachment{ "displayName": "lion", "_path": "/images/lion.jpg", "type": "media:image", "dataAsJson": { "media": { "imageWidth": 2400, "attachment": "lion.jpg", "imageHeight": 1600 } }, "attachments": [ { "name": "lion.jpg", "label": "source", "mimeType": "image/jpeg", "size": 550171 } ] } -
Keep the content path - Copy your image’s
_pathfor the following queries.
The dataAsJson field shows the stored content data, as it did for your artists. The attachments field lists the attached files and their metadata. Both are common content fields, so this query does not need an inline fragment.
Notice how the content and file fit together:
-
typeismedia:image: XP detected the uploaded file and created an image content item. -
dataAsJson.mediaholds image data, including dimensions and the name of the source attachment. -
attachmentscontains an entry with that same name,lion.jpg. Itslabelissource, identifying it as the original uploaded file;mimeTypeandsizedescribe its format and size in bytes. The file’s binary data is stored as an attachment; it is not embedded in this JSON response.
This upload-and-retrieve pattern is the same for any kind of file, including a PDF, an audio recording or a video. Each upload creates a media content item with the original file attached and labeled source. XP maps the file to the appropriate media content type: an image becomes media:image, while other files become types such as Audio, Video or Document. The type and its metadata fields vary, but the attachment structure and the mediaUrl field used to retrieve the original file work the same way. The CMS media reference explains media structure, type mapping and file handling in more detail.
XP automatically extracts readable text from known file formats, such as PDF, and indexes it for search. See Media indexing for what becomes searchable and how to query it.
Retrieve the attached file
You’ve found the attachment’s metadata; now retrieve the file itself. For media content, mediaUrl gives you the URL components for its source attachment, lion.jpg in this example. The attachment API, media:attachment, delivers the file at that URL. Like Guillotine, it is a Universal API: on your sandbox, its address starts with http://localhost:8080/api/media:attachment.
Task: Open and download the attachment
-
Fetch the attachment URL - Use
getwith the content path from your response. Replace/images/lion.jpgif your image has a different path:{ guillotine { get(key: "/images/lion.jpg") { displayName ... on media_Image { mediaUrl { path queryString } } } } }The
data.guillotine.getobject looks like this, with your own content ID, fingerprint and filename:The source attachment’s URL components{ "displayName": "lion", "mediaUrl": { "path": "/media:attachment/my-first-project:draft/3cff3960-08e9-4c92-828e-917187c1dc20:927e557892810fabb5e2c76cd686a7e7/lion.jpg", "queryString": "" } } -
Build the attachment address - Use your own response: start with
http://localhost:8080/api, then appendmediaUrl.pathandmediaUrl.queryStringexactly as returned. An emptyqueryStringadds nothing. For the example above, the address would be:http://localhost:8080/api/media:attachment/my-first-project:draft/3cff3960-08e9-4c92-828e-917187c1dc20:927e557892810fabb5e2c76cd686a7e7/lion.jpg
-
View the original file - Open your assembled URL in a new tab in the same browser where you are logged in to Content Studio. It displays the original uploaded image. Draft media requires an authenticated request; copying the example URL above will not retrieve your own image.
-
Download the attachment - Change
mediaUrltomediaUrl(download: true)and run the query again. Assemble and open the new URL, including itsqueryString; the browser will download the attachment.
The CMS content type is media:image; its GraphQL object type is media_Image. As with Artist in the previous chapter, the inline fragment gives access to fields belonging to that GraphQL type. mediaUrl is available on all media types.
The content item’s _path, such as /images/lion.jpg, identifies the item in queries. The media URL’s path identifies the attached file through the attachment API.
Request a cropped image
The imageUrl field returns a URL served by the image API, media:image. It can resize, crop and filter images when delivering them, while the original attachment remains unchanged.
The scale argument controls resizing and cropping. For example, width(600) scales proportionally to a width of 600 pixels; block(400,600) fills a 400-by-600-pixel rectangle, cropping what does not fit. Omitting scale means no resizing, but other processing and saved image edits can still affect the result. Use mediaUrl when you need the original uploaded file.
Task: Open a portrait crop
-
Request a portrait crop - Use
getto retrieve the image whose content path you copied above. Replace/images/lion.jpgif your image has a different path:{ guillotine { get(key: "/images/lion.jpg") { displayName ... on media_Image { imageUrl(scale: "block(400,600)") { path queryString } } } } }The
data.guillotine.getobject contains:Image with a crop URL{ "displayName": "lion", "imageUrl": { "path": "/media:image/my-first-project:draft/3cff3960-08e9-4c92-828e-917187c1dc20:4f827305024b80384b0aa939496e4688/block-400-600/lion.jpg", "queryString": "" } } -
View the crop - Assemble the URL from
http://localhost:8080/apiplus your returnedimageUrl.pathandimageUrl.queryString, then open it in your browser. Without a focal point, the crop is centered, which can cut off an off-center subject: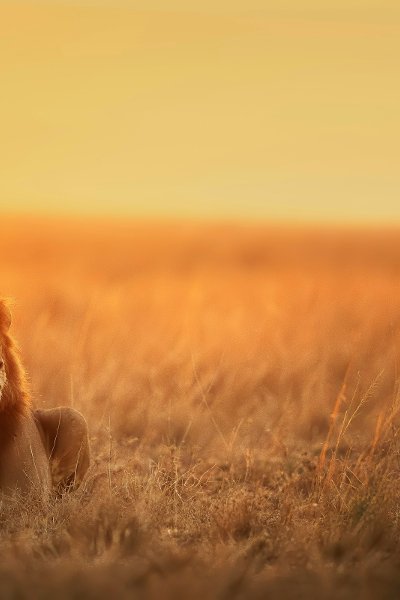 Figure 2. Portrait crop before setting a focal point
Guide cropping with a focal point
A focal point identifies the subject to prioritize when the image API crops an image to a different aspect ratio. It guides the crop; it does not guarantee that the entire subject fits every shape.
Task: Set a focal point and compare
-
Open the image editor - Return to Content Studio, select your image and click Edit. The content form contains fields such as Caption and Alternative text, and the image preview includes editing controls.
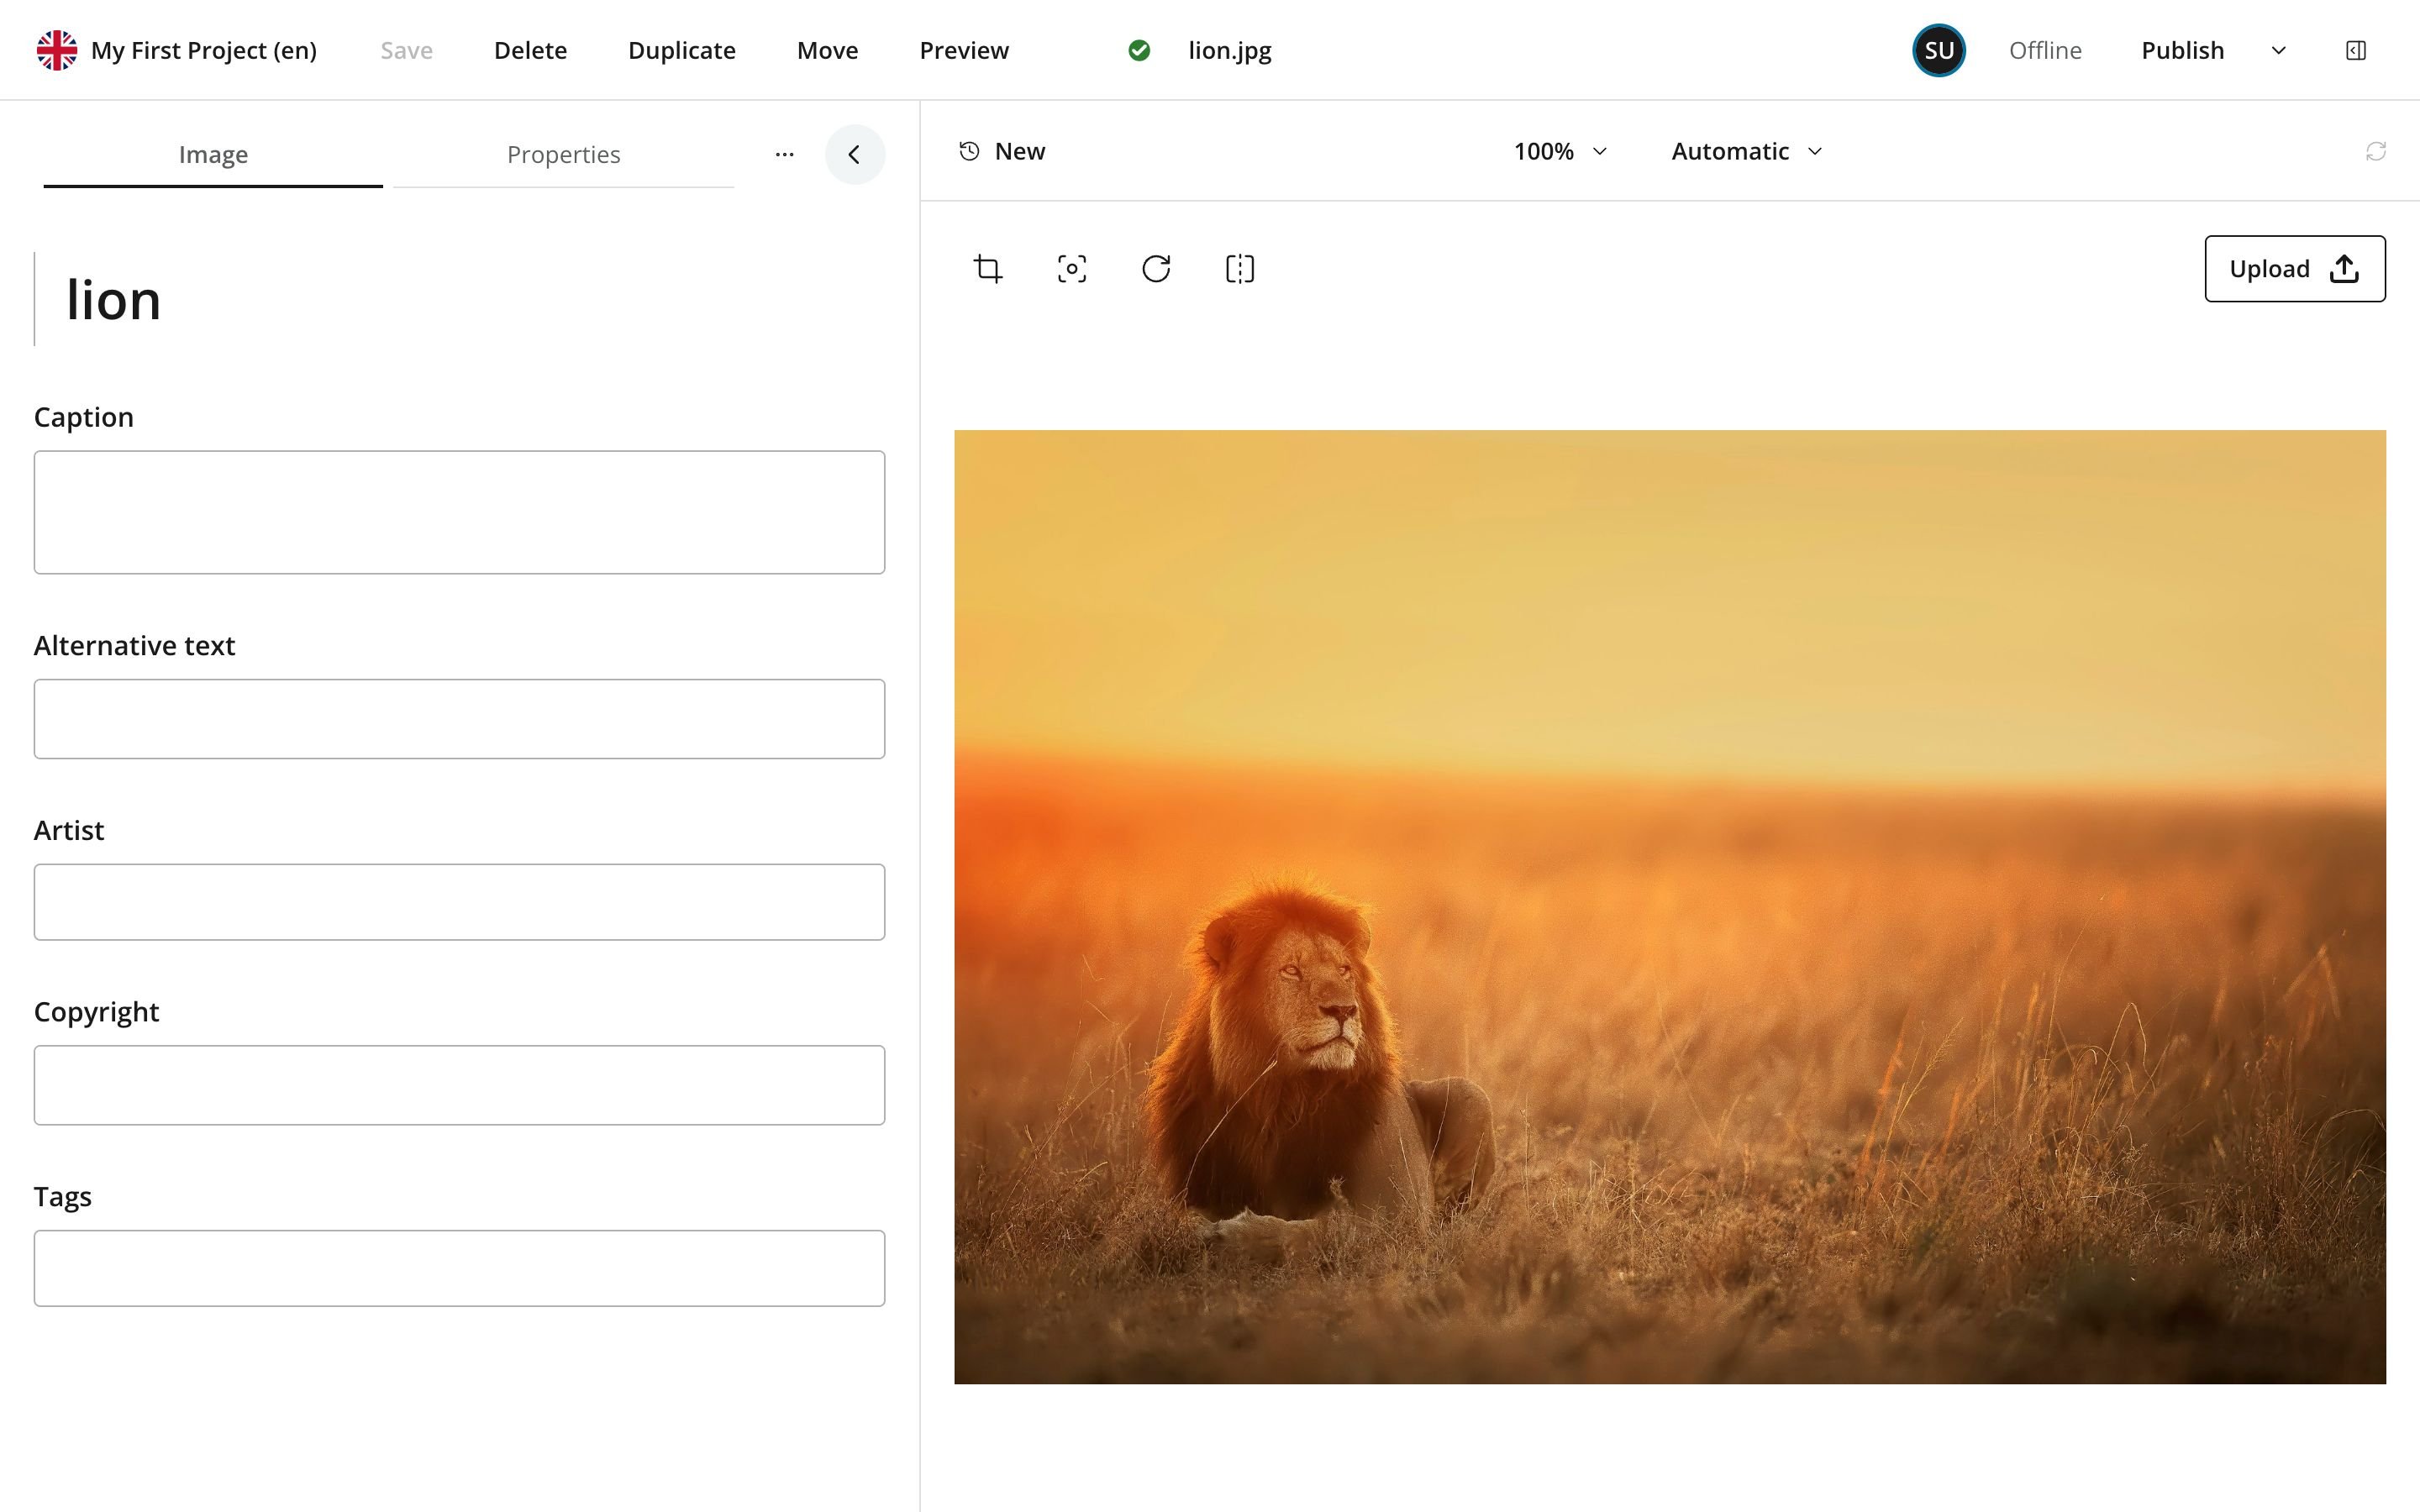 Figure 3. The image content form and preview
-
Position the focal point - In the toolbar above the image preview, click Set Autofocus to edit the focal point. Click the lion’s face, or drag the marker onto the subject of your own image.
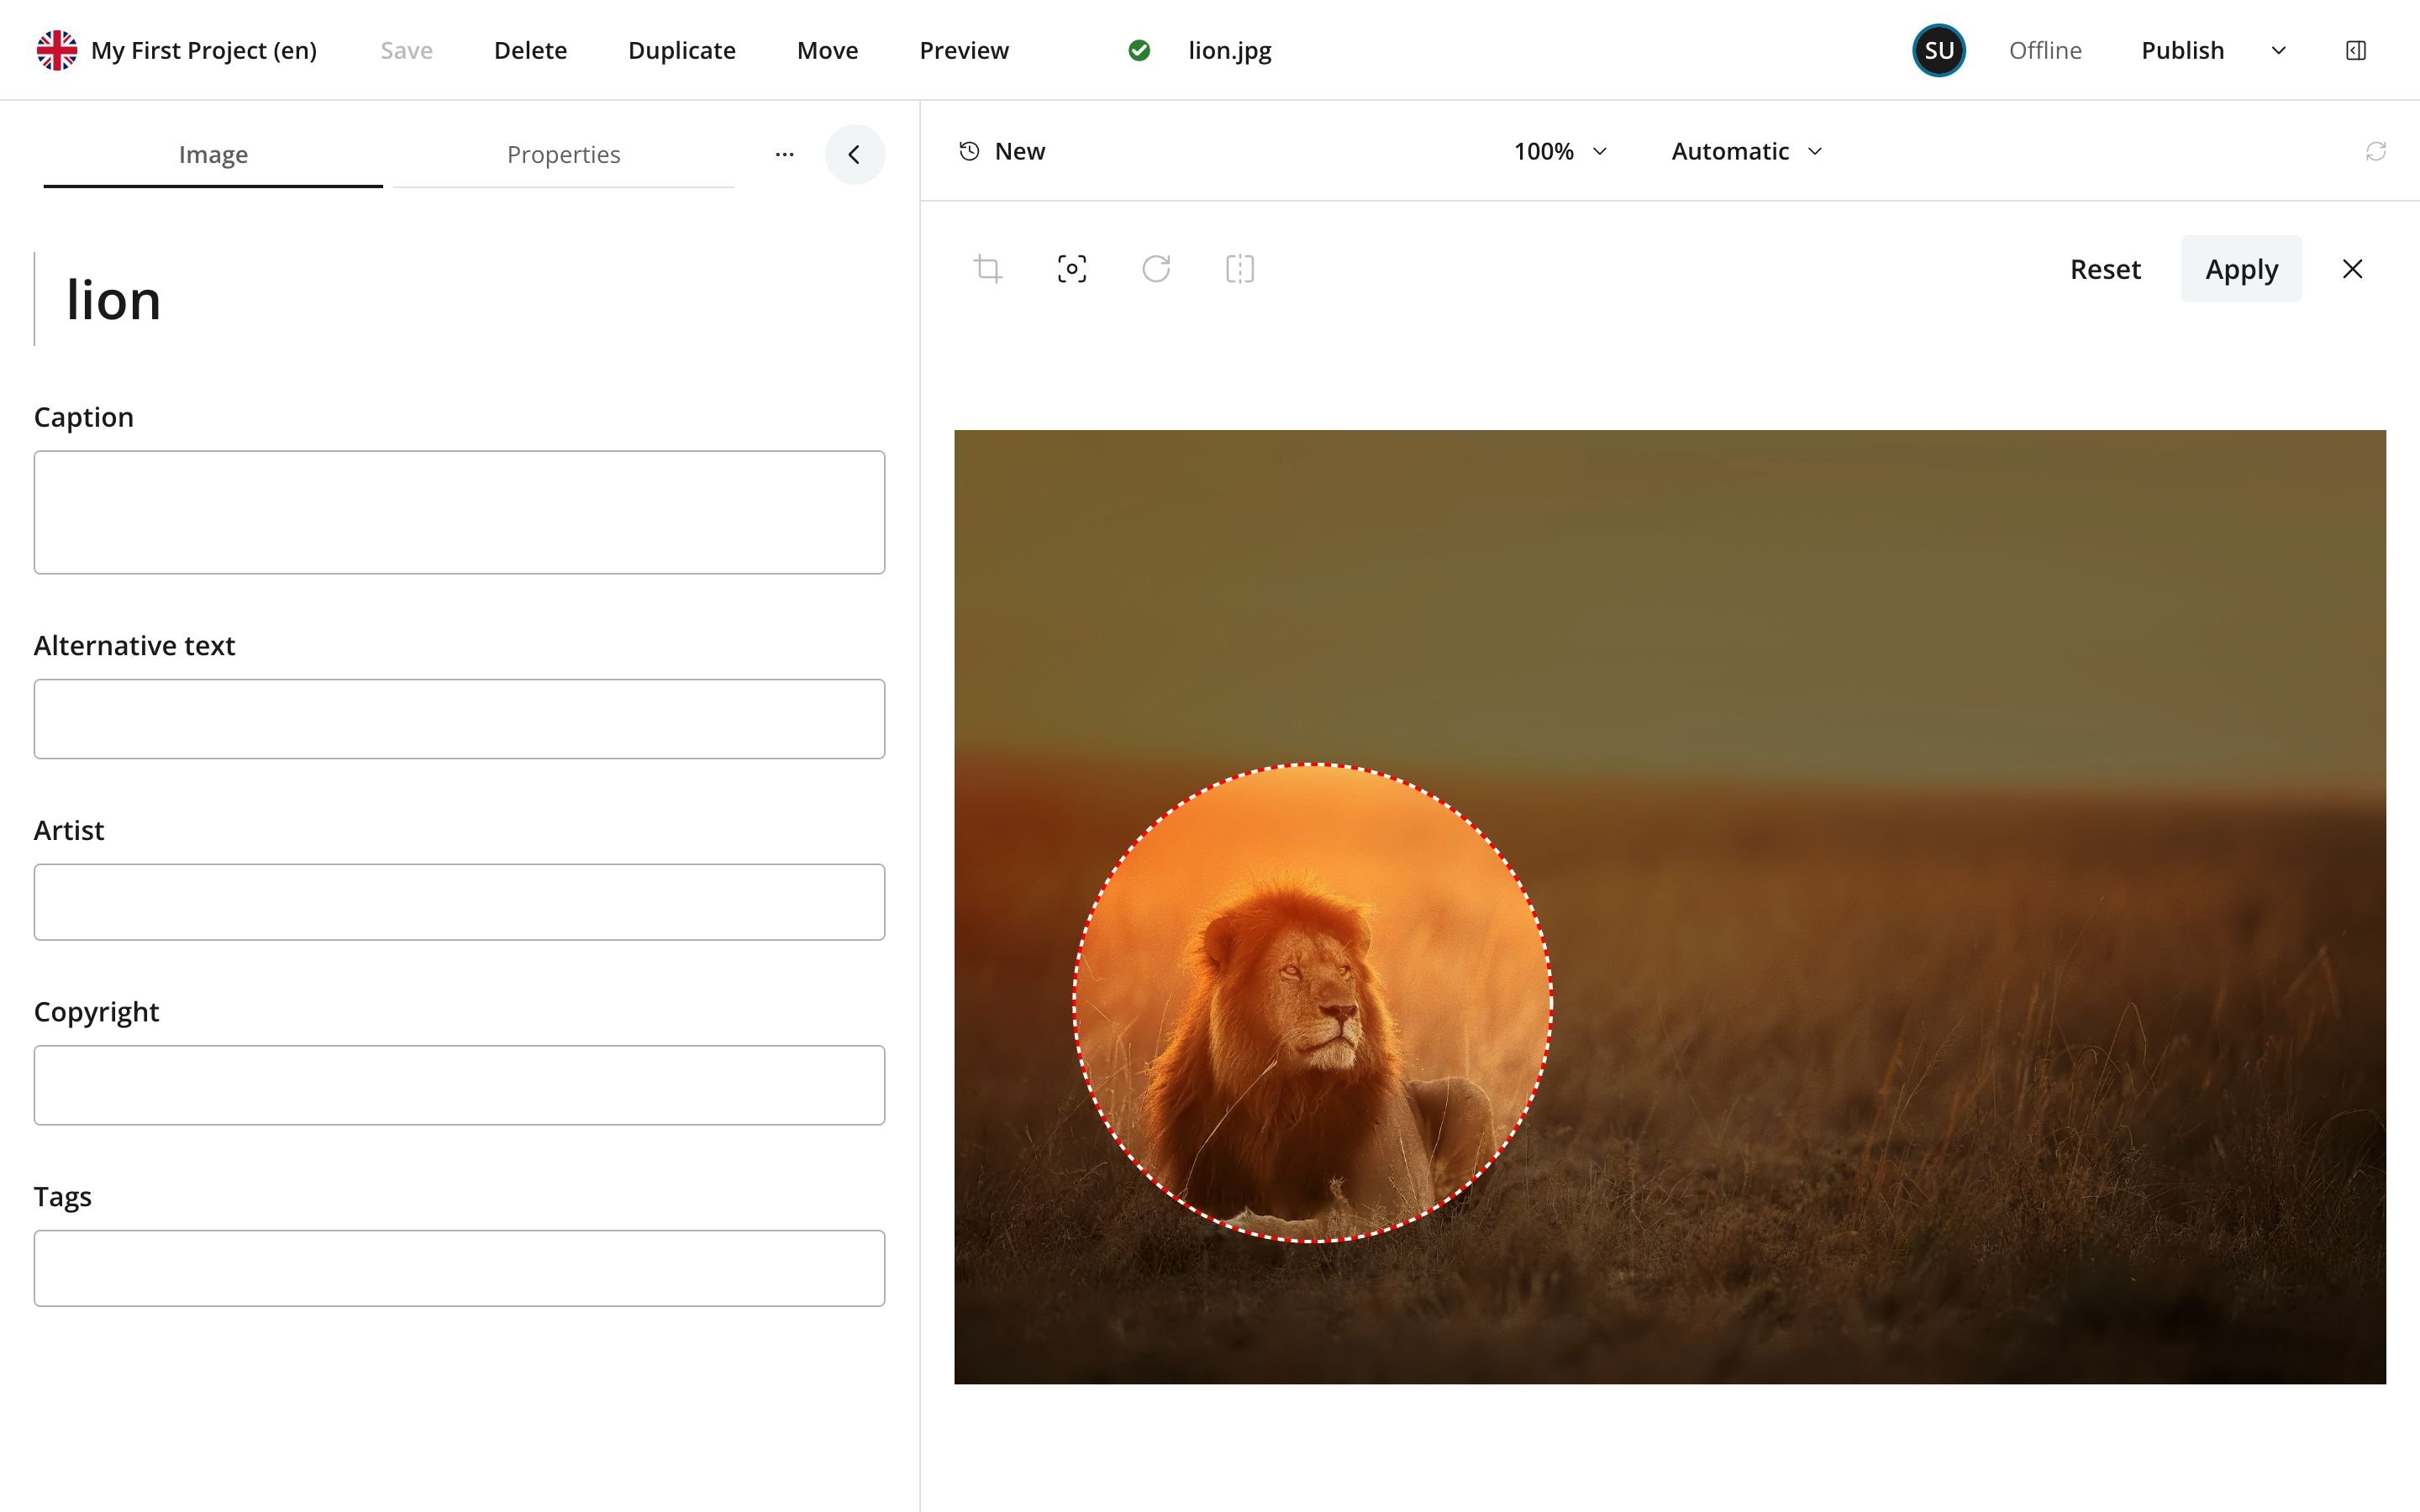 Figure 4. Positioning the focal point
-
Save the focal point - Click Apply to accept the position, then Save in the Content Editor toolbar to save the content item.
-
Compare the new crop - Return to Query Playground and run the same portrait-crop query again. Assemble and open the newly returned URL so you see the saved change.
The new crop prioritizes the selected subject:
 Figure 5. The same portrait crop with a focal point
Image edits are stored on the content item; they do not rewrite the original attachment. The Content Studio image documentation covers cropping, rotation, resetting edits and image metadata.
Task: Add a filter
-
Request image filters - Keep the same image and scale, and add a
filterargument:{ guillotine { get(key: "/images/lion.jpg") { displayName ... on media_Image { imageUrl( scale: "block(400,600)" filter: "grayscale(); border(10, 0x000000)" ) { path queryString } } } } }Use your image’s content path if it differs from the example. The semicolon separates two filters: grayscale and a black border.
-
View the filtered image - Build and open the URL as before, including the complete
queryStringreturned by Guillotine.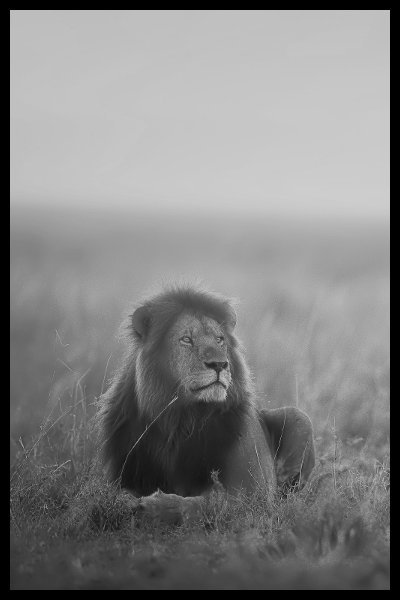 Figure 6. The cropped image with filters
The Image API reference describes the available scaling methods and filters.
| For presentation effects such as grayscale or borders, consider CSS or similar client-side styling. Use server-side filters when the effect needs to be part of the delivered image file, for example in a download or an email. |
Media URLs and caching
The returned paths identify the content project and branch. In these examples, my-first-project:draft selects Draft; published content uses my-first-project without a branch suffix. Let Guillotine generate these paths and query strings rather than constructing or editing their internal parts yourself.
The fingerprint in a media URL identifies a version of the file or processed image and supports caching. After changing an image or its editing settings, query again for the current URL. Actual caching follows the response’s Cache-Control header, with different settings for public and private content; a fingerprint does not make draft content public.
Returning URL components also lets your front-end use a separate base URL for media, for example when serving published images and downloads through a content delivery network (CDN). GraphQL requests can still go directly to the Enonic server. The platform’s virtual host configuration reference explains how to give the media APIs their own address.
Coming up
You’ve uploaded an image, inspected its content data and attachment, downloaded the original file, and requested cropped and filtered versions that use a focal point. In the next chapter, you’ll take a closer look at form items, the building blocks of content forms.