Editorial data and props
Contents
Lesson overview
Here we’ll spice up our react component a little bit, by using props to insert editorial data from XP into the react component.
We’ll modify the same files you created previously:
site/pages/hello-react/
  hello-react.xml
  hello-react.jsx
  hello-react.es6
Code
Let’s change the files some more so we can use Content Studio to input some data into the react rendering.
Page definition
We start with some standard XP procedure: defining the data in the page definition XML file. This file is the same as in example 1, but we’re adding a few input fields under <form>: greeting, greetee, counted and startCount are the basis for the initial props of the react component:
<page>
    <display-name>Hello React</display-name>
    <description>Editorial example</description>
    <form>
        <input type="TextLine" name="greeting">
            <label>What's the greeting?</label>
            <default>Hello</default>
            <occurrences minimum="1" maximum="1"/>
        </input>

        <input type="TextLine" name="greetee">
            <label>Who shall we greet?</label>
            <default>world</default>
            <occurrences minimum="1" maximum="1"/>
        </input>

        <input type="TextLine" name="things">
            <label>What are the things on the wall?</label>
            <default>bottles of beer</default>
            <occurrences minimum="1" maximum="1"/>
        </input>

        <input type="Long" name="startCount">
            <label>How many of them are there?</label>
            <default>99</default>
            <occurrences minimum="1" maximum="1"/>
        </input>
    </form>
</page>
React component
Next, we’ll modify the react component so that it displays data from a props object, instead of hardcoding everything.
import React from 'react';


function makeThingDropper(droppableProp, initialCountProp) {
    let currentCount = initialCountProp;
    return () => {
        currentCount--;
        console.log(currentCount.toString(), droppableProp, 'on the wall.');
        document.getElementById('counter').innerText = currentCount;
    };
}

export default (props) => {
    const dropThing = makeThingDropper(props.droppableThing, props.initialCount);
    return (
        <div onClick={dropThing}>
            <h1>
                {props.message} {props.messageTarget}!
            </h1>
            <p>
                Click me: <span id="counter">{props.initialCount}</span> {props.droppableThing} on the wall.
            </p>
        </div>
    );
}|
Although, if you think that the makeObjectDropper closure thing is a strange way to do something react itself could do better… sure. Just trying to stay focused on one thing at a time. |
Page controller
And lastly, we’ll hook them together: modify the controller to fetch the data we defined in XML, then use a props object to inject the data into the react component:
const portal = require('/lib/xp/portal');
const React4xp = require('/lib/enonic/react4xp');


exports.get = function(request) {
    const entry = portal.getComponent();

    const content = portal.getContent();                    (1)
    const pageConfig = (content.page || {}).config || {};

    const props = {                                         (2)
        message: pageConfig.greeting,                       (3)
        messageTarget: pageConfig.greetee,
        droppableThing: pageConfig.things,
        initialCount: pageConfig.startCount
    };

    return React4xp.render(
        entry,
        props,                                              (4)
        request,
        {
            id: "react4xpApp",
            body: `
                <html>
                    <head></head>
                    <body class="xp-page">
                        <div id="react4xpApp"></div>
                    </body>
                </html>
            `
        }                                                   (5)
    )
};| 1 | Fetching the content data defined in the XML (and in the next line, we’re unpacking it into pageConfig while choosing that missing data should just display emptiness, not throw an error). |
| 2 | The props object is just any standard JS object. So the data can of course come from anywhere you want and take any shape - with one exception: props needs to be serializable, so functions can’t be passed here! |
| 3 | Connecting the field names in pageConfig from hello-react.xml to the prop names that hello-react.jsx needs. |
| 4 | See how this makes the first two arguments of React4xp.render analogous to XP’s thymeleaf.render template engine? The first argument, entry, is just a reference to what should be rendered (react component ~ template), and the second one is a collection of data injected into it (props ~ model). |
| 5 | To keep things simpler and clearer, just remove the clientRender flag from the previous example. |
There it is, now let’s take a look!
Setup and rendering
Compile the project, enter Content Studio (see the first two steps in the previous setup), and edit the content you created (double-click it to open a new tab).
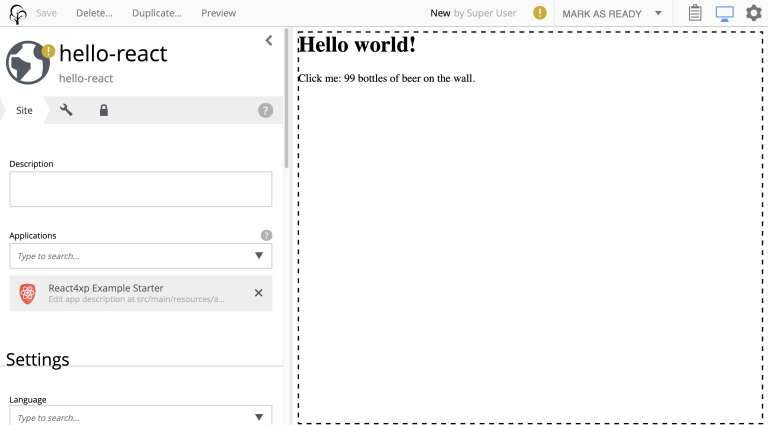
You should still see it in the preview panel on the right (although, since you probably created the content without any data created along with it, it might not display much of the text. We’ll fix that):

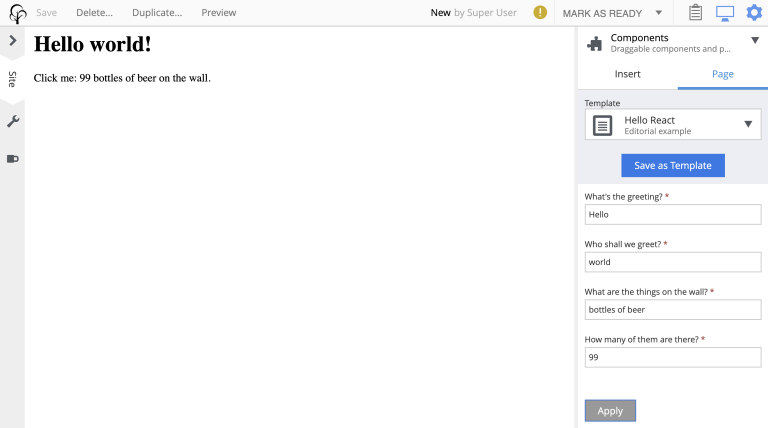
Now, when you click the preview panel, the page-config editing panel should open on the right, with the data fields containing the default text we defined. Once you click Apply/save, the preview panel to the left should update.

So now, it looks the same as before, but with editorial data instead of hardcoded text. Boring, and too similar to the previous example; just repeating "Hello World" might cause a little confusion. Try adding your own data in the fields, for example changing "world" into "Bruce" etc, to keep it clear.
Apply/save your new props, and the output should change again. But since we’re still in Content Studio, it’s just a static serverside-rendered update. To see the final rendering with your new data, all active, click Preview on the top to open the page in a fresh tab:

Output
So did anything change in the rendered response, compared to the first serverside-rendered example? Not all that much, actually. Depending on what data you inserted and the resulting props, your page source should look something like this:
<html>
<head></head>
<body class="xp-page">

    (1)
    <div id="react4xpApp">
        <div data-reactroot="">
            <h1>G'day<!-- --> <!-- -->Bruce<!-- --> !</h1>
            <p>Click me: <span id="counter">42</span> <!-- -->tubes<!-- --> on the wall.</p>
        </div>
    </div>

    (2)
    <script src="(...your.app.service) /react4xp/externals.489d97cdf.js"></script>
    <script src="(...your.app.service) /react4xp/client.5678abcd.js"></script>
    <script src="(...your.app.service) /react4xp/site/pages/hello-react/hello-react.12345678.js"></script>

    <script src="(...your.app.service) /react4xp/dynamic.87654321.js"></script>                            (3)

</body>
</html>| 1 | Since we removed the clientRender flag again, the target container react4xpApp comes filled from the server. But now with a rendering with your texts from props already inserted. |
| 2 | There’s still no change in the asset URLs, but since we changed hello-react.jsx, the content of hello-react.js has of course been recompiled. |
| 3 | The script that actually runs hydrate with the props on the clientside. |
Further reading
Now might be a good time to take a closer look at the API overview of the .render call from the ES6 controller in the example above.
Either way, you should be ready for the last of the three basic lesson chapters.