Page templates
Contents
Thus far, page rendering has been based on mappings, or editorially composing one page at a time. In this chapter you’ll learn how to make page templates - and reuse them across multiple content items.
Task: Movie details part
To complete this section, we’ll need one final part for listing movie details. The content type and content for movies already exists in Enonic, so lets get to work.
-
Verify Enonic app hs the
movie-detailspart descriptor at - same procedure as before…src/main/resources/cms/parts/movie-details/movie-details.yamlkind: "Part" title: "Movie Details" description: "Show details of a movie" form: [ ] -
Redeploy the Enonic app if you made any changes (happens automatically if you started
enonic project dev). -
Add the Movie query and view in Next.
src/components/parts/MovieDetails.tsximport React from 'react' import {APP_NAME_UNDERSCORED, getUrl, I18n, MetaData, PartProps} from '@enonic/nextjs-adapter'; import Link from 'next/link'; export const getMovie = ` query($path:ID!){ guillotine { get(key:$path) { type displayName parent { _path(type: siteRelative) } ... on ${APP_NAME_UNDERSCORED}_Movie { data { subtitle abstract trailer release photos { ... on media_Image { imageUrl: imageUrl(type: absolute, scale: "width(500)") attachments { name } } } cast { character actor { ... on ${APP_NAME_UNDERSCORED}_Person { _path(type: siteRelative) displayName data { photos { ... on media_Image { imageUrl: imageUrl(type: absolute, scale: "block(200,200)") attachments { name } } } } } } } } } } } }`; // Root component const MovieView = (props: PartProps) => { const data = props.data?.get.data as MovieInfoProps; const meta = props.meta; const {displayName, parent = {}} = props.data.get; return ( <> <div> <h2>{displayName}</h2> {data && <MovieInfo {...data} meta={meta}/>} {data?.cast && <Cast cast={data.cast} meta={meta}/>} </div> <p> <Link href={getUrl(`/${parent._path}`, meta)}>{I18n.localize('back')}</Link> </p> </> ); }; export default MovieView; interface MovieInfoProps { meta: MetaData; release: string; subtitle: string; abstract: string; cast: CastMemberProps[], photos: { imageUrl: string; }[]; } // Main movie info: release year, poster image and abstract text. const MovieInfo = (props: MovieInfoProps) => { const posterPhoto = (props.photos || [])[0] || {}; return ( <> {props.release && ( <p>({new Date(props.release).getFullYear()})</p> )} {posterPhoto.imageUrl && ( <img src={getUrl(posterPhoto.imageUrl, props.meta)} title={props.subtitle} alt={props.subtitle} /> )} <p>{props.abstract}</p> </> ) } interface CastProps { cast: CastMemberProps[]; meta: MetaData; } interface CastMemberProps { character: string; actor: { _path: string; displayName: string; data: { photos: { imageUrl: string; attachments: { name: string }[] }[] } } } // List persons starring in the movie. const Cast = (props: CastProps) => ( <div> <h4>Cast</h4> <ul style={{listStyle: "none", display: "flex", flexFlow: "row wrap"}}> {props.cast.map( (person: CastMemberProps, i: number) => person && ( <CastMember key={i} {...person} meta={props.meta}/> ) )} </ul> </div> ); const CastMember = (props: CastMemberProps & { meta: MetaData }) => { const {character, actor, meta} = props; const {displayName, _path, data} = actor; const personPhoto = (data.photos || [])[0] || {}; return ( <li style={{marginRight: "15px"}}> { personPhoto.imageUrl && <img src={getUrl(personPhoto.imageUrl, meta)} title={`${displayName} as ${character}`} alt={`${displayName} as ${character}`}/> } <div> <p>{character}</p> <p> <Link href={getUrl(_path, meta)}> {displayName} </Link> </p> </div> </li> ); } -
Update the component mappings:
src/components/_mappings.tsimport MovieDetails, {getMovie} from './parts/MovieDetails'; // Part mappings ComponentRegistry.addPart(`${APP_NAME}:movie-details`, { query: getMovie, view: MovieDetails });
Task: Create template
With the new component registered, let’s put it to use.
-
In Content Studio, select and edit your favorite movie (or choose "No time to deflate" if you have no favorites).
-
Activate the context panel by pressing its icon in the top right screen corner, select the
Pageextension, then "Main page" descriptor in dropdown and add the "Movie details" part to the page.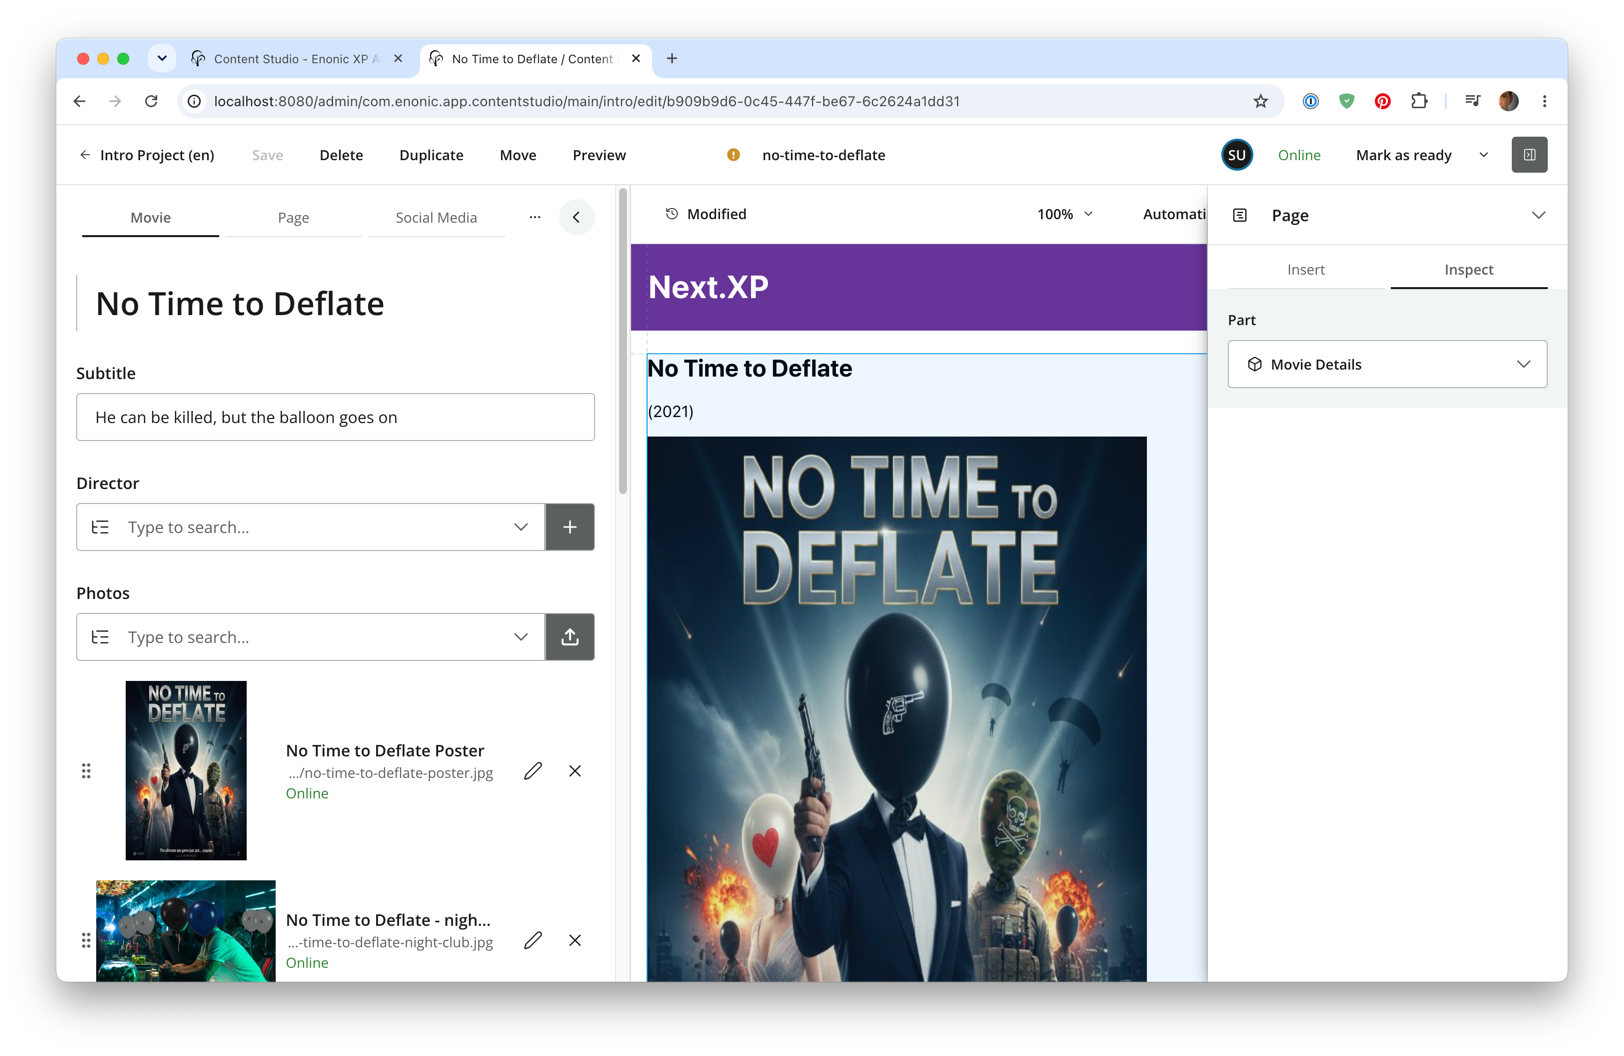
We now have a single movie nicely presented, but it would be cumbersome to manually configure each movie like this - page templates to the rescue.
-
In the page tab in the form on the left, select the page (root) component.
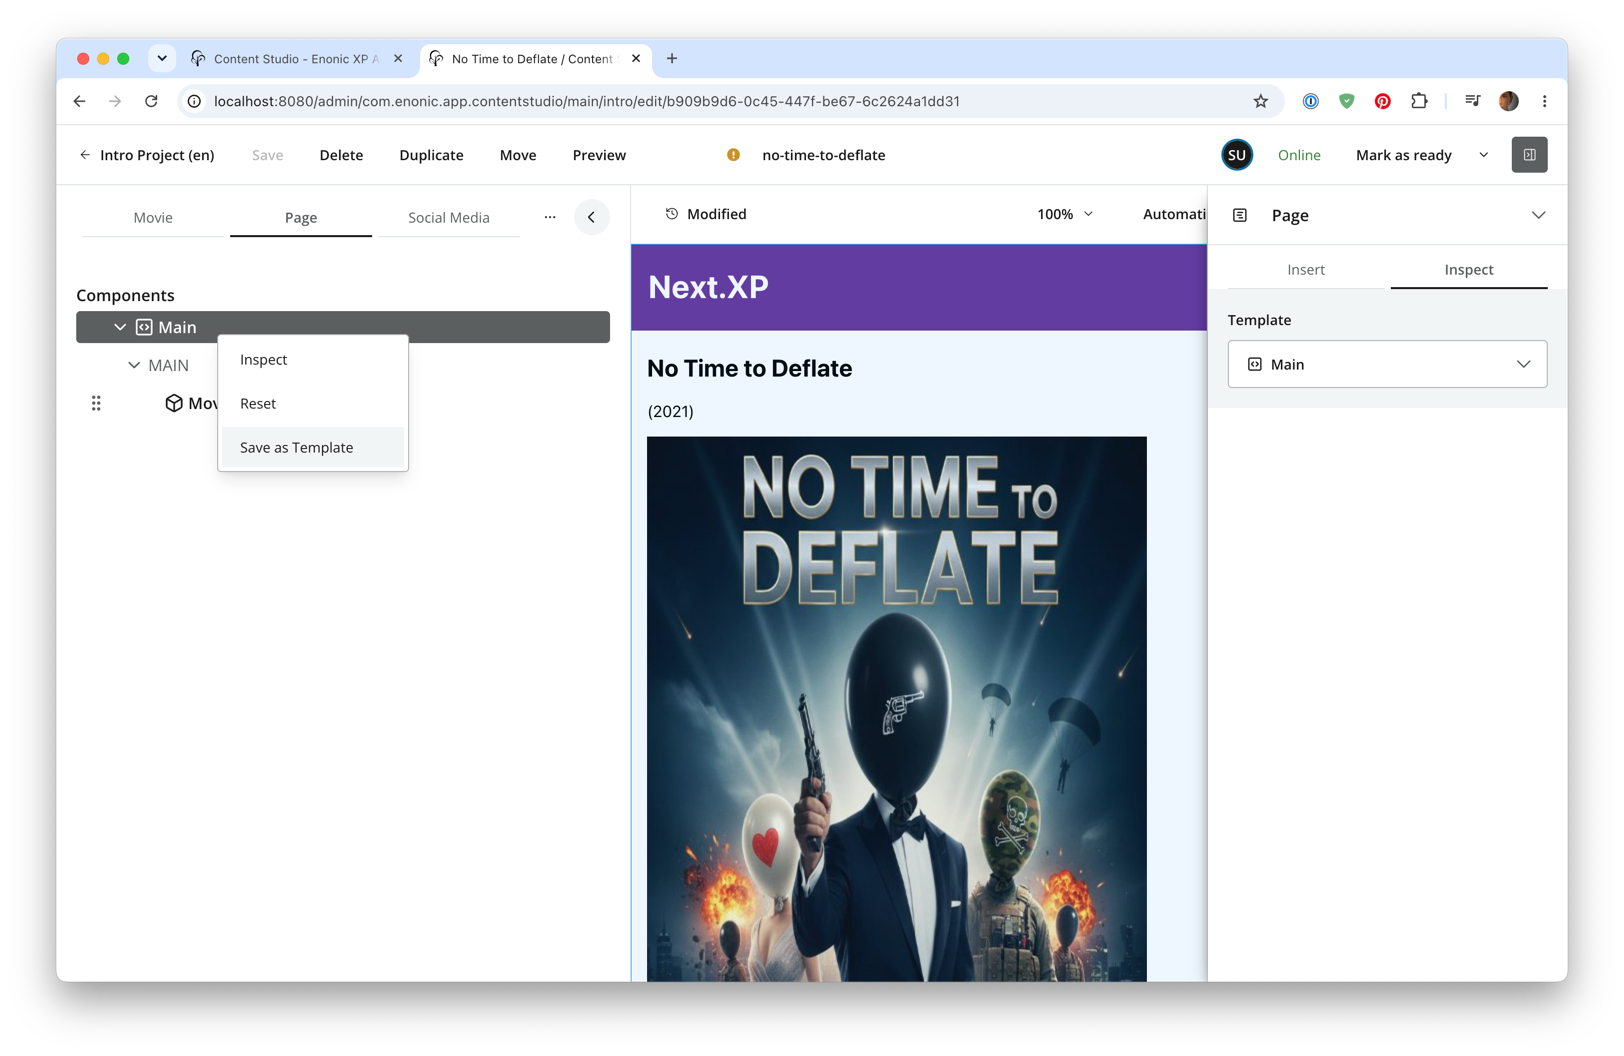
-
Right click it and select Save as template from the context menu.
This will create a new page template content item, and open it in a new tab for editing.
-
Give your template a better name, such as "Movie details" and save the changes.
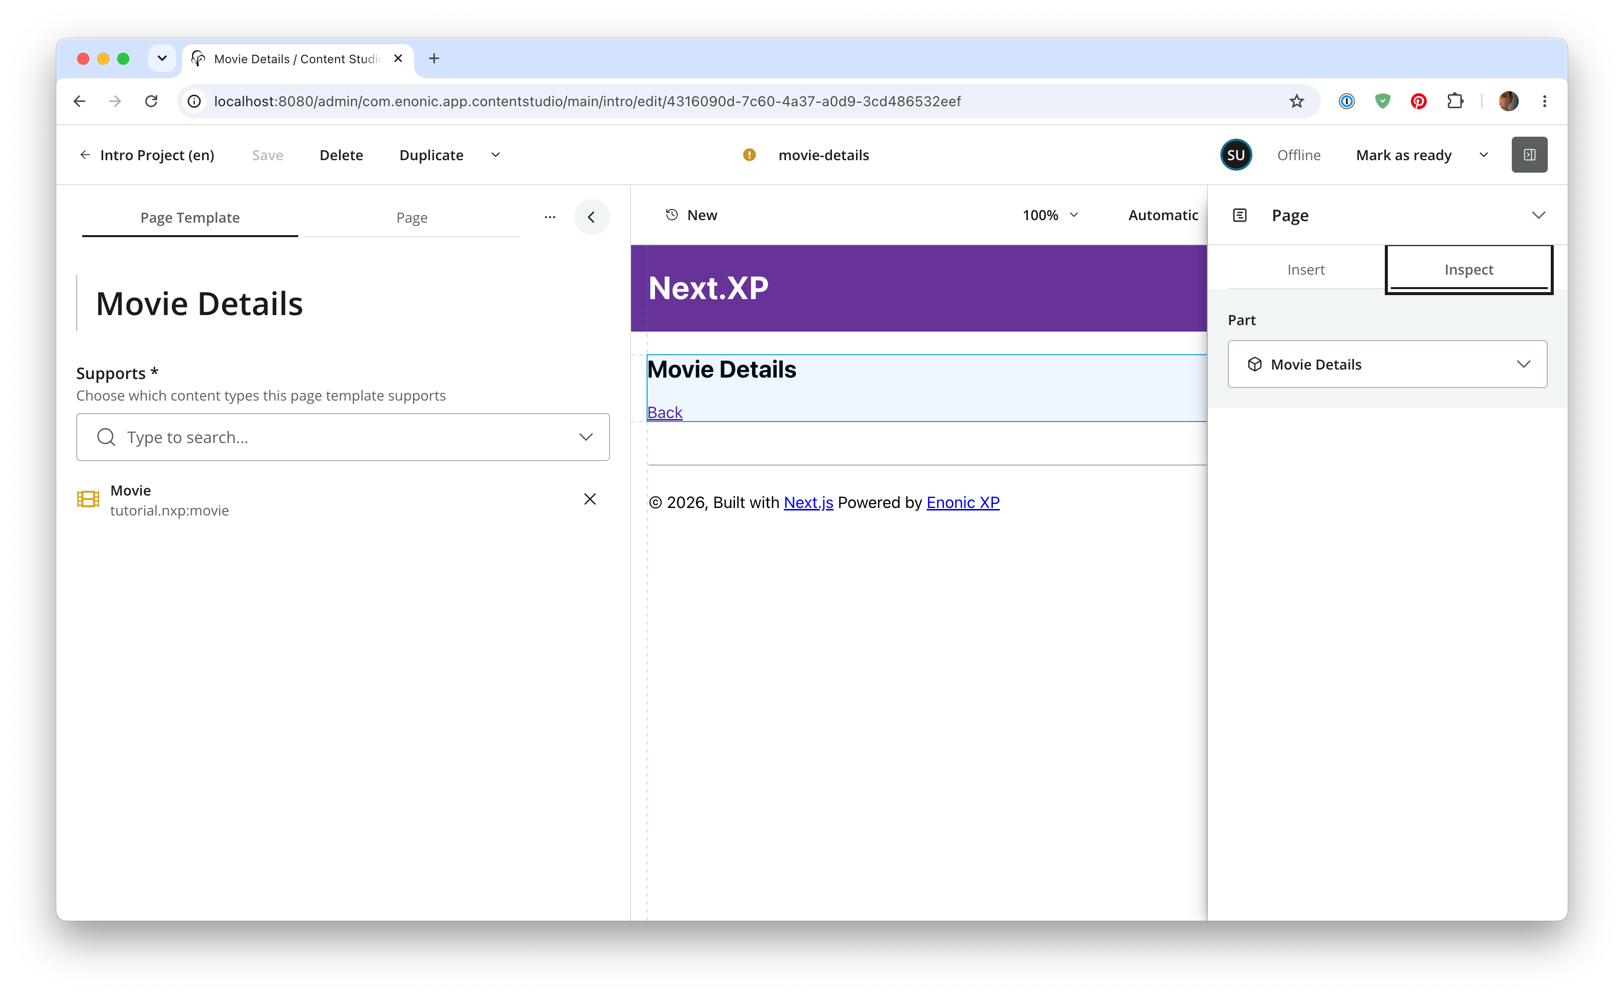
-
Try visiting other movie items to verify they now automatically render.
PS! Don’t forget to publish the changes and the new page template.
With templates sorted out, let’s dive into production mode and page revalidation.