Person details component
Contents
In this chapter you’ll create a component to display details of a single person.
Query
Similar to the PersonList component, create a query which will fetch details of a person:
src/queries/Person.ts
const query = `query PersonQuery($personId: ID!) {
    guillotine {
        get(key: $personId) {
            _path
            _name
            displayName
            ... on com_enonic_app_intro_Person {
                data {
                    dateofbirth
                    photos {
                        ... on media_Image {
                            imageUrl(scale: "width(1000)", type: absolute)
                            attachments {
                                name
                            }
                        }
                    }
                    bio(processHtml: { type: absolute }) {
                        processedHtml
                        links {
                            ref
                            media {
                                content {
                                    _id
                                }
                            }
                            content {
                                _id
                                _name
                                type
                            }
                        }
                        images {
                            ref
                            image {
                                _id
                            }
                        }
                        macros {
                            ref
                            name
                            descriptor
                            config {
                                factbox {
                                    header
                                }
                            }
                        }
                    }
                }
            }
        }
    }
}`;

export default query;
bio contains Rich Text content |
Styling
This time, we will use css modules to style this component.
Add the following file to your project:
src/components/Person.module.css
.person,
.person .bio {
    font-family: sans-serif;
}

.person {
    display: flex;
    flex-direction: column;
    padding: 30px
}

.bio {
    line-height: 24px;
}

.bio figcaption {
    font-size: 12px;
}

.photos {
    padding: 0 20px 20px;
    display: grid;
    grid-template-columns: repeat(auto-fit, minmax(200px, 1fr));
    grid-gap: 50px;
    gap: 50px;
}

.photos img {
    width: 100%;
    height: auto; /* Ensures images scale properly */
}

@media screen and (max-width: 720px) {
    .bio figure {
        width: auto !important;
    }
}
Component
Add the Person component:
src/components/Person.tsx
import type {RichTextData, RichTextMetaData, ContentTypeData} from '@enonic/react-components';
import {RichText} from '@enonic/react-components';
import {useEffect, useState} from 'react';
import {Link as RouterLink, useParams} from 'react-router-dom';
import PERSON_QUERY from '../queries/Person';
import styles from './Person.module.css';


export function Person() {
    const {
        // name,
        personId = ''
    } = useParams();

    const guillotineUrl = import.meta.env.VITE_GUILLOTINE_URL as string;

    const [data, setData] = useState<{
        _name: string
        _path: string
        data: {
            bio: RichTextData
            dateofbirth: string
            photos: {
                imageUrl: string
            }[]
        }
        displayName: string
    }>();

    useEffect(() => {
        fetch(guillotineUrl, {
            body: JSON.stringify({
                query: PERSON_QUERY,
                variables: {
                    personId,
                }
            }),
            headers: {
                'content-type': 'application/json'
            },
            method: 'POST',
        })
            .then(response => response.json())
            .then(json => {
                const value = json.data.guillotine.get;
                setData(value)
            });
    }, []); // useEffect

    if (!data) {
        return null;
    }

    const {
        data: {
            bio,
            photos
        },
        displayName
    } = data;

    // Minimal meta and component data required by RichText
    const meta: RichTextMetaData = {
        type: 'person',
        id: personId,
        path: data._path,
        mode: 'inline'
    };

    const component: ContentTypeData = {
        contentType: 'person',
        type: 'contentType'
    };

    return (
        <>
            <div className={styles.person}>
                <h2>{displayName}</h2>
                <RichText
                    className={styles.bio}
                    data={bio}
                    meta={meta}
                    component={component}
                    tag='article'
                />
                {
                    photos.length && <h4 className={styles.photosheader}>Photos</h4>
                }
                <div className={styles.photos}>
                    {
                        photos.map((photo: any, i: number) => (
                            <img key={i}
                                 src={photo.imageUrl}
                                 title={getTitle(photo, displayName)}
                                 alt={getTitle(photo, displayName)}
                                 width="500"
                            />
                        ))
                    }
                </div>
            </div>
            <RouterLink to='/'>Back to list</RouterLink>
        </>
    );
}

function getTitle(photo: any, displayName: string) {
    return (photo.attachments || [])[0].name || displayName;
}
Here, we use the RichText component from @enonic/react-components npm module to render data from the bio. We will dive into more details in the next chapter. |
Routing
Finally, App.tsx must be updated to handle the Person component, and trigger it on the following route pattern: /p/:name/:personId.
This means the link should look something like this: /p/name-of-person/id-of-person. Since the ID is unique, we can use this to look up the content in Enonic.
src/App.tsx
import './App.sass';
import {Route, BrowserRouter as Router, Routes, } from 'react-router-dom';
import {PersonList} from './components/PersonList';
import {Person} from './components/Person';

export default function App() {
  return (
    <Router>
      <Routes>
        <Route path="/" element={<PersonList />}/>
        <Route path="/p/:name/:personId" element={<Person />}/>
      </Routes>
    </Router>
  );
}
Result
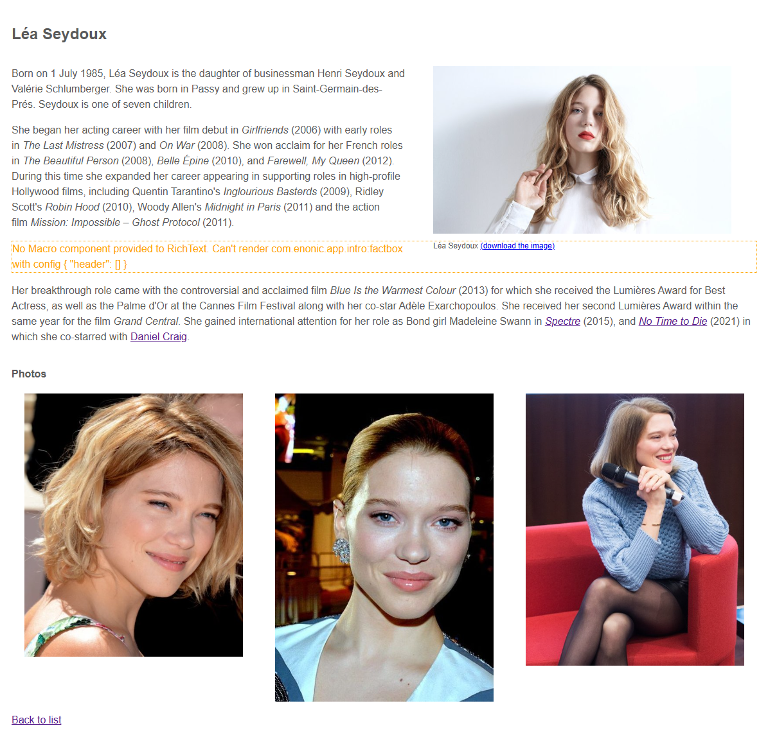
To see the Person component in action, open http://localhost:3000 and click any of the persons in the list.
Alternatively, here’s the direct link to Lea Seydoux: