Tsup Starter
Contents
Feature-rich starter for Enonic XP applications with lightning-fast builder and support for hot reload, designed for development in Typescript.
Features
Build
-
Typescript support
-
Fast build times (
tsupusesesbuildandswc) -
Asynchronous (concurrent build targets)
-
Transpilation (Typescript to JS, SASS to CSS)
-
Bundling
-
Tree-shaking
-
Polyfilling
-
Injection
-
Code splitting (chunks)
-
Hot reload (changes appear without additional build)
Enonic XP APIs
-
Application (creation of virtual applications)
-
Project (creation of content projects)
-
Scheme (dynamic creation of content type schemas)
-
Task (submitting and managing server-side tasks)
-
I/O (reading manifest files)
-
Vhost (checking whether virtual hosts are enabled)
-
i18n (localisation)
UI
-
Admin tool
-
Widgets (three different types)
-
Web app
-
Embedded React app
-
Two template rendering engines (Thymeleaf & Mustache)
CMS
-
Site
-
Sample page template
-
Sample page components (a layout and a part)
-
Sample content type
Misc
-
HTTP service (returns server-side current date/time via Java bean)
-
Response processor (injects a custom header into HTTP response)
-
Customisation of CSP (Content Security Policy)
-
Custom error handlers
-
Coverage tests (in Jest)
Create project
To set up a project locally, you will need Enonic CLI.
| Don’t have the Enonic CLI? Visit the Getting started guide to install it. |
Once you have the CLI, run the following command to create a new Enonic project based on this starter:
enonic create foo -r starter-tsupBuild environment
Gradle
Enonic projects are typically built with Gradle and come with bundled Gradle wrapper which we aim to keep up-to-date with the latest Gradle releases.
Version
You can check which version of Gradle wrapper your project is using by issuing this command:
./gradlew --versionUpgrade
You can upgrade your Gradle wrapper by issuing this command:
./gradlew wrapper --gradle-version latestRead more about Upgrading the Gradle Wrapper.
Node
Version
We suggest to keep your project on the latest LTS version of Node, which can be found here.
Some node modules don’t support the newest versions of Node (yet). In this case you might get build warnings or even errors. This can typically be solved by downgrading Node again or verifying (in package.json) whether version of the problematic module is outdated. |
Gradle node plugin
The Tsup Starter uses the Gradle node plugin, which is defined like this:
plugins {
	id 'com.github.node-gradle.node' version '5.0.0'
}
and configured like this:
node {
	// Whether to download and install a specific Node.js version or not
	// If false, it will use the globally installed Node.js
	// If true, it will download node using above parameters
	// Note that npm is bundled with Node.js
	download = true

	// Version of node to download and install (only used if download is true)
	// It will be unpacked in the workDir
	version = "18.17.1"
}
Any Gradle task that runs scripts in Node should depend on npmInstall:
task.register('myTask', NpmTask) {
    dependsOn npmInstall
}
System Node
Sometimes you want to run node scripts directly (not via Gradle). For example, to run Enonic XP in the [Watch mode].
| Node version manager can be used to have multiple versions of Node at your fingertips. |
In order to use the correct version of Node, use the following command:
nvm useIt will use the version specified in the .nvmrc file:
18.17.1Incremental build
An important part of any build tool is the ability to avoid doing work that has already been done.
Continuous build
Gradle does support incremental build, but using the continuous mode is NOT the most efficient option. Gradle can detect file changes, but it doesn’t know much about the dependency tree of JavaScript files, i.e. which other files need to be recompiled once a single JavaScript file is changed. Gradle will simply rebuild "everything" by calling:
npm run buildTsup/esbuild doesn’t support filesystem caching, like Webpack, but they do support watch mode.
Hot reload
This starter supports hot reload. Changes in your source code - both server-side and client-side - will be automatically rebuilt and displayed in the browser without you having to manually rebuild the app or reload the browser window.
Follow the steps below to enable this mode (we assume you are using Enonic CLI).
-
Create a new project (unless you already have it) based on the Tsup starter as described above.
-
Go to the project’s folder and start the dev mode:
enonic dev
This will start the project’s sandbox in development mode and execute dev command which will watch for changes in the source-code and automatically rebuild the app.
This mode is provided by BrowserSync utility which is running on port 3000 and proxying changes to port 8080 used by Enonic XP. If you are using port 3000 for something else, make sure you change BROWSER_SYNC_PORT in server config properties. |
return {
    // ...
    env: {
        BROWSER_SYNC_PORT: '3000',
    },
    // ...
}
Automatic browser reload will only work in preview and live modes, i.e. outside Content Studio. This means that it will work for the sample Admin tool and the sample Webapp bundled with this starter, but not for the sample widgets, for example. Changes will still be rebuilt, but you’ll have to manually refresh the browser window to see the changes. |
Server-side
The JavaScript ecosystem is advancing rapidly, using more and more modern features, which typically isn’t supported everywhere (yet).
In order to use modern features, transpilers are used to convert modern code into more stable versions of ECMAScript, and polyfills are used to provide APIs which are not present in the runtime environment.
Currently, Enonic XP JavaScript framework only has limited ECAMScript 6/2015 support and supports only the CommonJS module (CJS) format. |
Enonic XP API
In order to use Enonic XP API libraries in your code, the following steps are required:
Include
Add an API library as a dependency to your build.gradle:
dependencies {
    include "com.enonic.xp:lib-portal:${xpVersion}"
}| For your convenience, we have included all existing API libraries but commented out those not explicitly used by the Starter. |
Externals
Jar file of an API library typically contains a CJS wrapper which is required at runtime.
The contents of the jar file are NOT available at compile time, so it cannot be bundled. Instead, we configure the transpiler to treat the library import path as an external (expecting it to exist at runtime).
external: [
    /^\/lib\/xp\//,
]
Import
import { getContent } from '/lib/xp/portal';

export function get() {
    const {
        displayName,
        page: {
            regions
        }
    } = getContent();
}
Node modules
You can use node modules in your code, but there are come steps/caveats to consider:
Installing
You can use the following command to install a node module you want to use (for example, sha.js):
npm install --save sha.jsThis will add sha.js under dependencies in the package.json file, and download and extract the package into node_modules folder of your project.
Bundling
By default, Tsup starter bundles all imported modules EXCEPT dependencies and peerDependencies. Since sha.js (in the example above) is added as a dependency, it will NOT be bundled!
To fix that we have to list it under noExternal in the Tsup build config:
For server-side dependencies this is done in tsup/server.ts:
noExternal: [
    'sha.js',
],
For client-side dependencies this is done either in tsup/client-static.ts (static client-side assets) or tsup/client-asset.ts ("standard" client-side assets):
noExternal: [
    'dayjs',
],
Polyfill Node
| Node modules are typically run in Node, and thus expect Node APIs to be present, which is not always the case. |
For example, sha.js module expects buffer to exist in the global scope, but it does NOT exist in the Enonic XP JavaScript framework runtime environment.
We can use esbuild-plugin-polyfill-node to selectively polyfill only the parts of Node that is used by the node module:
import { polyfillNode } from 'esbuild-plugin-polyfill-node';

esbuildPlugins: [
    polyfillNode: {
        globals: {
            buffer: true
        },
        polyfills: {
            buffer: true
        }
    }
]
The Global object
Different JavaScript runtime environments have different properties on their Global object.
In addition, they even have different ways of accessing the Global object.
globalThis, introduced in ES2020 aims to consolidate the increasingly fragmented ways of accessing the Global object.
Some node modules support multiple runtime environments, and use the properties of the Global object to determine what runtime environment the code is running in.
| One might be tempted to polyfill all the ways of accessing the Global object, but that will typically break node modules that are trying to detect the runtime environment. |
To make matters worse, some of the polyfills themselves expect things to be a certain way.
For example, polyfilling of buffer only works if it can apply itself on the Global object. In the Enonic XP JavaScript framework, each controller runs in its own "sandbox" environment, so there really isn’t a Global object, there is rather a controller scope "local" object. In order for the buffer polyfill to work we can simply make globalThis point to the controller scope:
esbuildOptions(options, context) {
    options.banner = {
        js: `const globalThis = (1, eval)('this');`
    };
}
Injection
Sometimes all you need to polyfill is a single function rather than a whole API.
github.com/zloirock/core-js provides a bunch of such minimal "single function" polyfills.
| If you only use a function in a single place, you can simply import the polyfill in that single file. But if you are using a function all over the place, you can use injection to make it work everywhere: |
inject: [
    'node_modules/core-js/stable/array/includes.js'
]
Environment variable replacement
Sometimes you need to replace environment variables in your code, for example, when you want to use different values in development and production environments, or when you want to use secrets or configuration which are not checked into source control.
In the starter there is an example of how to do this.
At compiletime we’re setting the BROWSER_SYNC_PORT environment variable to 3000:
return {
    // ...
    env: {
        BROWSER_SYNC_PORT: '3000',
    },
    // ...
}
Then in the code we’re using the BROWSER_SYNC_PORT environment variable via process.env:
return `${scheme}://${host}:${
    // @ts-expect-error Is replaced at build time by tsup:
    process.env.BROWSER_SYNC_PORT
}/browser-sync/browser-sync-client.js`;
The process object is only available in the Node runtime environment, so it will not work in Enonic XP server-side environment. But since TSUP replaces process.env.BROWSER_SYNC_PORT with the string 3000 at compile-time, there is no problem. The transpiled code will look something like this: |
return "".concat(scheme, "://").concat(host, ":", "3000", "/browser-sync/browser-sync-client.js");Code splitting
| Everything you add via imports, polyfills, banners, injections etc. increases the size of the resources which need to be loaded into memory at runtime. The more you add, the longer the warmup time becomes. |
In order to avoid loading the same code multiple times, shared code is split into chunk files, which are only loaded once, but can be used many times via require in the JavaScript controllers.
It’s sort of like all the shared code exists in the global scope and don’t need to be loaded.
| An Enonic XP application jar file only has a single "root folder" which all libs are "merged" into, which can potentially cause file name collisions. |
Libraries typically avoid file name collisions by using their own "namespace" inside the /lib folder. |
When it comes to files autogenerated by a build system, for example chunk files, they also need their own "namespace".
In Tsup Starter we can "name space" its chunks like this:
esbuildOptions(options, context) {
    options.chunkNames = 'myAppChunks/[name]-[hash]';
}
Tree-shaking
Tree shaking refers to the process of eliminating or "shaking off" dead code or unused code from the final bundled output. Tools that support tree-shaking typically only work with the ECMAScript module (ESM) format.
Tsup Starter uses esbuild to transpile sources into ESM so that tree-shaking can be applied.
Then it uses swc to transpile the code back to CJS (the format supported by Enonic XP JavaScript framework).
Client-side
"Client-side" and "Server-side" are web development terms that describe where application code runs.
When people talk about "the client-side", they typically just mean their web browser, not considering other User-Agents like bots/robots/web-crawlers, headless browsers, legacy browsers or even other modern browser alternatives :)
In the context of build systems, the source code is processed in different ways, depending upon which "target platform" the code is supposed to run on.
There are many ways of developing client-side code in Enonic XP:
-
The most common way is to use the assets folder.
-
It can be improved upon by using lib-static.
-
It can be provided by Services, Site Mappings, Webapp, or Admin.
-
Client-side code can be inlined in controllers.
-
Web frameworks like React can be used.
-
Content Security Policy is enabled by default and can be configured for improved security.
Content Security Policy
Content Security Policy (CSP) makes it possible to configure what is allowed to run on the client-side. You can limit scripts, images, media and stylesheets. You can even configure if and how violations are reported.
Enonic XP has some configurable Content Security Policy defaults, but you can override these by using the content-security-policy response header (or a <meta http-equiv="Content-Security-Policy"/> tag in html head).
Tools
Code completion
When programming, it’s very useful to get code completion and Type checking directly in the code editor. To enable this, IDE will typically look for tsconfig.json files.
Type checking
In addition to type checking directly in the IDE, it’s a good idea to make type checking part of the build process. In Tsup Starter this is set up via check statements in the scripts section of the package.json file. Type checking is currently skipped for development builds.
The check:types:* scripts uses the same tsconfig.json files as IDE’s.
tsconfig.json
Tsup Starter comes with four tsconfig.json files:
-
${PROJECT_DIR}/tsconfig.json
-
${PROJECT_DIR}/test/tsconfig.json
-
${PROJECT_DIR}/src/main/resources/assets/tsconfig.json
-
${PROJECT_DIR}/src/main/resources/static/tsconfig.json
The tsconfig.json file at the root of the project is used for all code processing (except the assets and static folders which are handled by their own), and is configured to match the Enonic XP server-side runtime environment.
The two tsconfig.json files in assets and static are identical and configured for client-side runtime environment.
Do NOT set target in the ${PROJECT_DIR}/tsconfig.json, it will probably break the build. Target should always be set to 'es5' in the ${PROJECT_DIR}/tsup/server.ts file. |
Sometimes a folder may contain both code for the server-side and the client-side. Using different include and exclude lists in multiple tsconfig.*.json files makes it possible to configure strict type-checking for all code in those folders, to be run as part of the build process. |
It seems IDEs are only able to read a single tsconfig.json file per folder, so it’s currently only possible to set up relaxed/permissive type checking when server and client side code is "mixed". Let us know if you discover a way to set up strict type-checking. 🙏
Code Hierarchy
Admin
Extensions of Admin UI are located in src/main/resources/admin.
Tool
There is an admin tool called "Sample Tool" included in the Starter, located in src/main/resources/admin/tools/tool. When a project based on this starter is deployed, you will see it inside the XP menu.
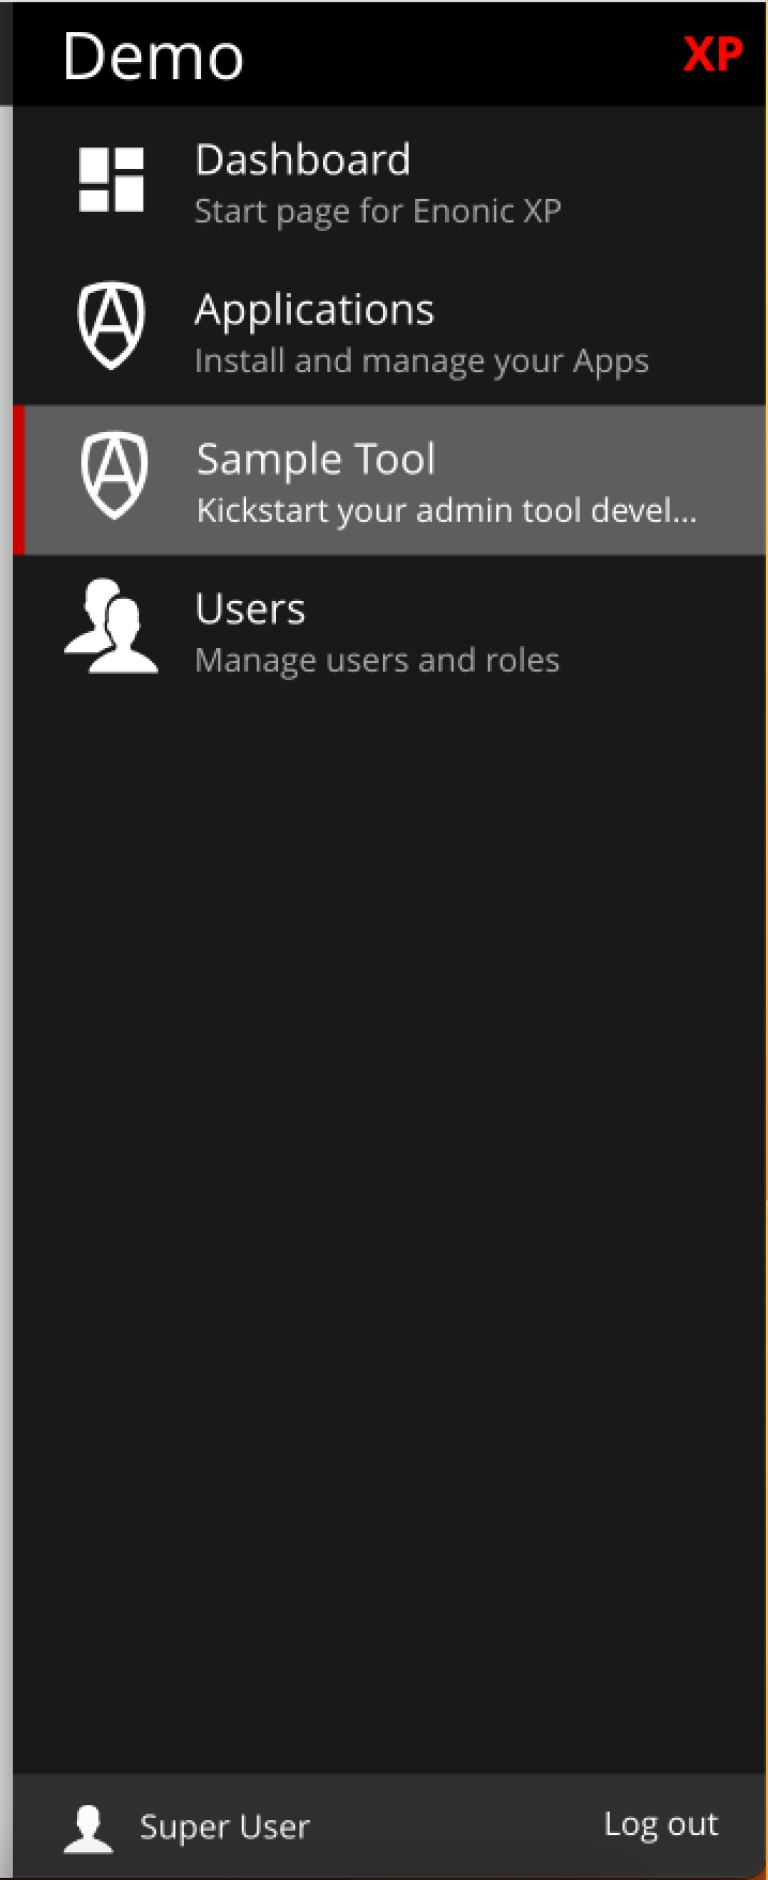
Click "Sample Tool" in the menu to open the tool.
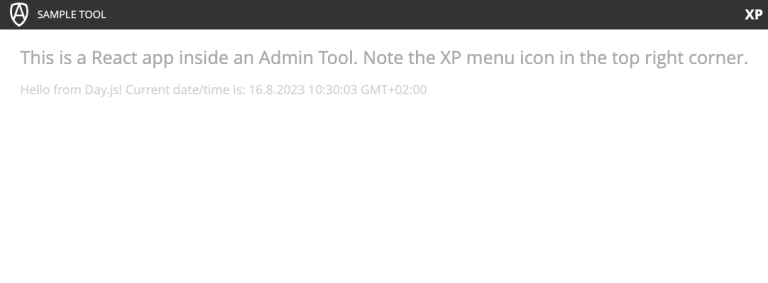
What you see here is essentially a React app inside the Admin Tool. If you open browser console, you will see a log message there saying something like
react-dom.development-1B959UOCEC1QW.js:29850 Download the React DevTools for a better development experience: https://reactjs.org/link/react-devtools
App.tsx:11 Hello from React inside an Admin Tool. React app id: {
 "id": ":r0:"
}
We have also added an example of importing an external Node module called Day.js which allows you to easily handle date/time operations.
Both of these integrations (React and Day.js) can be found in src/main/resources/static/admin/App.tsx.
Widgets
The starter includes examples for the following widget interfaces:
-
Dashboard (src/main/resources/widgets/dashboard/)
-
Context panel (src/main/resources/widgets/contextPanel/)
-
Menu-item (src/main/resources/widgets/menuItem/)
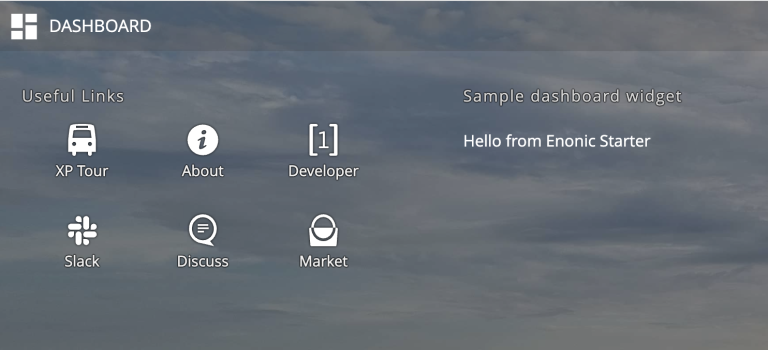
Dashboard
The Dashboard widget (titled "Sample dashboard widget") will be shown on the XP Dashboard page when you log in into Admin console.
| The next two widgets are extensions of Content Studio, so you’ll need to install it first. |
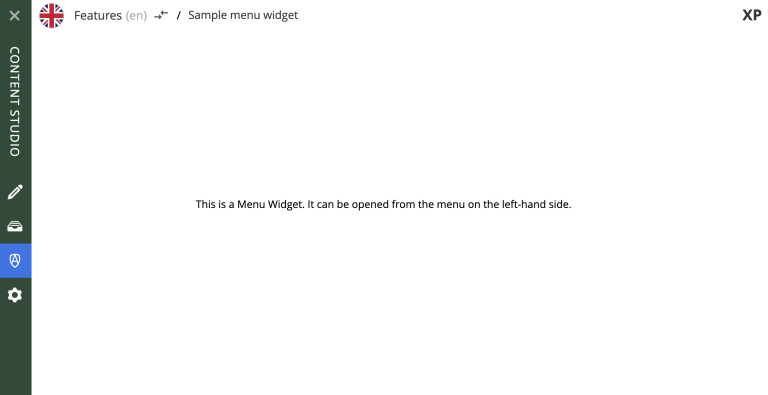
Menu item
Content Studio has a menu on the left-hand side and this widget’s icon will appear in this menu.
Context panel
You’ll find this widget inside the Context Panel on the right hand side of Content Studio’s. This panel can be opened by clicking the burger icon under the XP menu icon.
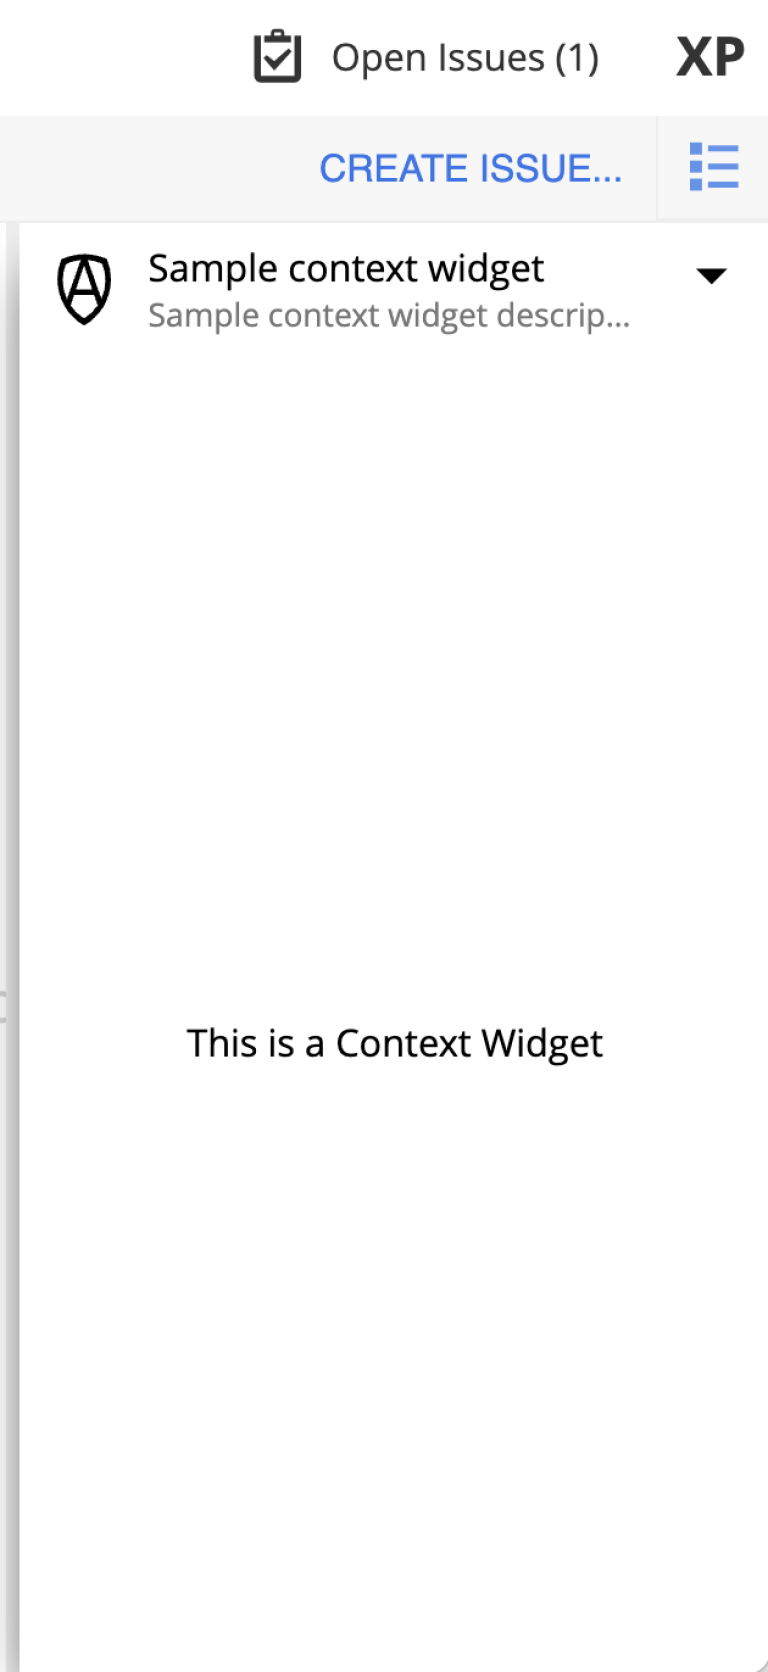
| The last two widgets are using inline styling, but you can define CSS styles in a stylesheet and plug it in the same way as it’s done in the Dashboard widget (or have one stylesheet shared by all the widgets, depending on your architecture). |
Assets
Tsup Starter provides examples for two main ways of serving client-side assets:
-
Either from the
assetsfolder (src/main/resources/assets) via the Assets service -
Or from the Static folder (
src/main/resources/static) via Site Mappings or Webapp (even Admin)
| We recommend using the Static folder, since it enables immutable urls - urls that can be cached "forever". |
Assets service
Any files in the assets folder are PUBLICLY available to EVERYONE via the Assets service. If you need some security, do NOT put files in the assets folder. Rather put them somewhere else, write your own controllers and implement some level of security. |
| Any assetUrl includes a built-in hash number. Which means, everytime you deploy a new build the url changes. So even though the asset files are probably NOT changed, they are still re-downloaded by the browser. Which is why we recommend using the Static folder instead. |
| Read more about Asset service. |
Static
Files in the static folder are not available via the Assets service. Instead, they are made available via the Static Assets Library.
In order to enable immutable urls, a content hash is added to the files names at compile time. The content hash is generated from the file content (and location) and only changes, if the content (or location) of the file changes. This means that the browser can cache the asset "forever", and every time it encounters the url, it can simply load the asset from the cache.
Whenever you change a file, it will have a new content hash and thus a new url. In order for the browser to load the new url, the html response from the server needs to provide the new url. This is made possible with a manifest file, which contains mapping of original assets with their current content hash.
There are many ways of serving the files from the static folder to the browser. The Starter contains helper functions for doing this (inside the /lib/urlHelper).
For assets inside a Site, we recommend using the getSiteUrl function.
For assets inside an Admin extension (a tool or a widget), we recommend using the getAdminUrl function.
For assets inside a Webapp, we recommend using the getWebappUrl function.
| Read more about Static assets library |
Error
The Starter includes a sample error handler at src/main/resources/error/error.ts.
| Read more about HTTP Error handler. |
I18n
The starter includes a couple of phrase resource bundles at src/main/resources/i18n/. Localisation itself is used by the sample page template controller at src/main/resources/site/pages/sample-page.ts
Lib
The starter includes several lib examples (which are essentially simple helpers that can be imported by other modules) at `src/main/resources/lib/'.
Services
The starter includes a sample HTTP service (that communicates with JVM) at `src/main/resources/services/'.
| Read more about HTTP Services. |
Content Type
The starter includes a sample content type with a few basic input types at `src/main/resources/site/content-types/sample-type.xml'.
| Read more about Content Types. |
Site
The starter includes necessary setup to build a site using a page controller and sample page components. The site has a simple config declared in `src/main/resources/site/site.xml'. All site components can be found at `src/main/resources/site/'.
| Use our tutorial to build your first site with Enonic XP. |
Page component
The starter includes a sample page component at `src/main/resources/site/pages/sample-page/'.
Layout component
The starter includes a sample layout component at `src/main/resources/site/layouts/sample-layout/'.
Part component
The starter includes a sample part component at `src/main/resources/site/parts/sample-part/'.
Response processors
The starter includes a sample response processors (that injects a header into response) at `src/main/resources/site/processors/sample-processor.ts'.
| Note that response processors must be declared inside `src/main/resources/site/site.xml'. |
| Read more about Response Processors. |
Site Mappings
The starter includes a sample site mapping (declared in src/main/resources/site/site.xml) which maps assets inside src/main/resources/static/ folder with a controller at `src/main/resources/site/static.ts' which generates correct hash-based static path for each asset.
| Read more about Site Mappings. |
Tasks
The starter includes a sample task controller (located in `src/main/resources/tasks/task/) which makes use of Application, Schema and Task APIs. It also shows how to avoid simultaneous execution of more than one instance of the same task by submitting the same task twice then rejecting one of them.
| Read more about Tasks. |
Webapp
The starter includes a sample webapp controller (located in src/main/resources/webapp/).
| Read more about Webapp engine. |
Constants
There are two files called constants.ts: in tsup/constants.ts (used by Tsup for building server- and client-side bundles) and in src/main/resources/constants.ts (used by XP resources inside src/main/resources). If you, for example, decide to rename src/main/resources/static folder to something else, you’d have to do it in both files constants.ts.
Also, the latter file contains a property called DEBUG_MODE (set to true by default). This property is used to output helpful log messages in different places of the Starter. Set it to false to skip the log messages.