Macros
Contents
Rich Text also supports custom components - aka Macros.
Background
In order to support more complex structure within Enonic’s Rich Text editor, you can define macros.
| Details on defining macros can be found in the XP documentation. |
Default macro handling
The sample content contains an example macro called Factbox, which has been added to the Lea Seydough bio.
For Guillotine 9 to resolve this macro, configure the Intro provider app (com.enonic.app.intro) in the intro project’s applications in Content Studio. Our queries use the project-root scope scopeKey: "/"; having the app installed, or configured only on a site, is not sufficient.
By default, the RichText component will simply render a fallback placeholder:
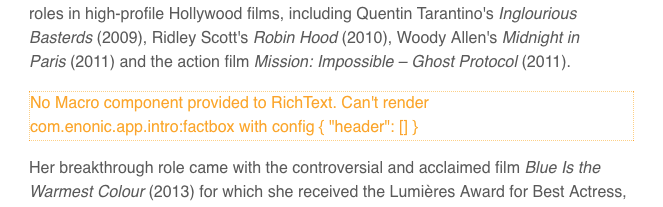
| The screenshots may show names from an older Intro dataset. |
To improve the situation, start by implementing a FactBox component.
The FactBox component
Add the following files to your project:
import styles from './FactBox.module.css';
import type {ReactNode} from 'react';

declare type FactBoxProps = {
    header?: string[];
    children: ReactNode
};

export const FactBox = ({header, children}: FactBoxProps) => (<>
    <ins className={styles.factbox}>
        <strong className={styles.header}>{header?.length ? header.join(' ') : 'Fact Box'}</strong>
        <br/>
        {children}
    </ins>
</>)
The optional body of a macro is available as a React component called children. |
.icon {
    speak: none;
    font-style: normal;
    font-weight: normal;
    font-variant: normal;
    text-transform: none;
    line-height: 1;

    /* Better Font Rendering =========== */
    -webkit-font-smoothing: antialiased;
    -moz-osx-font-smoothing: grayscale;
}

.factbox {
    background-color: rgb(235, 249, 249);
    display: block;
    text-decoration: none;
    -webkit-border-radius: 2px;
    -moz-border-radius: 2px;
    border-radius: 2px;
    clear: both;

    -webkit-box-shadow: 0 2px 3px rgba(0, 0, 0, .3);
    -moz-box-shadow: 0 2px 3px rgba(0, 0, 0, .3);
    box-shadow: 0 2px 3px rgba(0, 0, 0, .3);

    min-height: 24px;
    line-height: 24px;

    font-family: sans-serif;
    font-size: 14px;
    color: #333;

    padding: 10px 20px 10px 44px;
    width: 75%;
    margin: 20px auto;
    position: relative;
}

.factbox .header {
    font-size: 14px;
    font-weight: bold;
    line-height: 24px;
    margin: 0;
    color: #1f71a1;
}

.factbox .body ul {
    padding-left: 0;
}

.factbox .body ul li {
    margin: 5px 0;
}

@media screen and (max-width: 720px) {
    .factbox {
        width: 90%;
    }
}
Like other components, you may also declare a query for your Macro - but in this case we already have everything we need in the data returned from the original bio query.
The Macro component
We now have a FactBox component, but we still need to map it to the Enonic macro definition. This can be solved by implementing a generic Macro component where you map specific macro descriptors to corresponding macro components.
import type {MacroComponent} from '@enonic/react-components';


import {FactBox} from './FactBox';


export const Macro: MacroComponent = ({
                                          component,
                                          data,
                                          children
                                      }) => {
    if (component.descriptor === 'com.enonic.app.intro:factbox') {
        return <FactBox header={data?.header as string[] | undefined}>{children}</FactBox>;
    }
    throw new Error(`Macro not found: ${component.descriptor}`);
}
This component takes care of mapping each macro to its corresponding React component. In our case, FactBox component implements the macro called com.enonic.app.intro:factbox in Enonic.
It will throw an error otherwise, which will cause the RichText component’s ErrorBoundary to render an Error placeholder.
Use in RichText
Just like with Link and Image components, import Macro component and pass it to the RichText component:
import type {RichTextData, RichTextMetaData, ContentTypeData, UrlParts} from '@enonic/react-components';
import {RichText} from '@enonic/react-components';
import {useEffect, useState} from 'react';
import {Link as RouterLink, useParams} from 'react-router-dom';

import {Image} from './Image';
import {Link} from './Link';
import {Macro} from './Macro';
import {mediaUrl} from '../api';
import PERSON_QUERY from '../queries/Person';

import styles from './Person.module.css';


export function Person() {

    const {
        personId = ''
    } = useParams();

    const [data, setData] = useState<{
        _name: string
        _path: string
        data: {
            bio: RichTextData
            dateofbirth: string
            photos: {
                imageUrl: UrlParts | null
            }[]
        }
        displayName: string
    }>();

    useEffect(() => {
        fetch(import.meta.env.VITE_GUILLOTINE_URL as string, {
            body: JSON.stringify({
                query: PERSON_QUERY,
                variables: {
                    personId,
                }
            }),
            headers: {
                'content-type': 'application/json'
            },
            method: 'POST',
        })
            .then(response => response.json())
            .then(json => {
                const value = json.data.guillotine.get;
                setData(value)
            });
    }, [personId]); // useEffect

    if (!data) {
        return null;
    }

    const {
        data: {
            bio,
            photos
        },
        displayName
    } = data;

    // Minimal meta and component data required by RichText
    const meta: RichTextMetaData = {
        type: 'person',
        id: personId,
        path: data._path,
        mode: 'inline'
    };

    const component: ContentTypeData = {
        contentType: 'person',
        type: 'contentType'
    };

    return (
        <>
            <div className={styles.person}>
                <h2>{displayName}</h2>
                <RichText
                    className={styles.bio}
                    data={bio}
                    meta={meta}
                    component={component}
                    Image={Image}
                    Link={Link}
                    Macro={Macro}
                    tag='article'
                />
                {
                    photos.length && <h4 className={styles.photosheader}>Photos</h4>
                }
                <div className={styles.photos}>
                    {
                        photos.map((photo: any, i: number) => (
                            <img key={i}
                                 src={mediaUrl(photo.imageUrl)}
                                 title={getTitle(photo, displayName)}
                                 alt={getTitle(photo, displayName)}
                                 width="500"
                            />
                        ))
                    }
                </div>
                <RouterLink to="/">Back to list</RouterLink>
            </div>
        </>
    );
}

function getTitle(photo: any, displayName: string) {
    return (photo.attachments || [])[0].name || displayName;
}
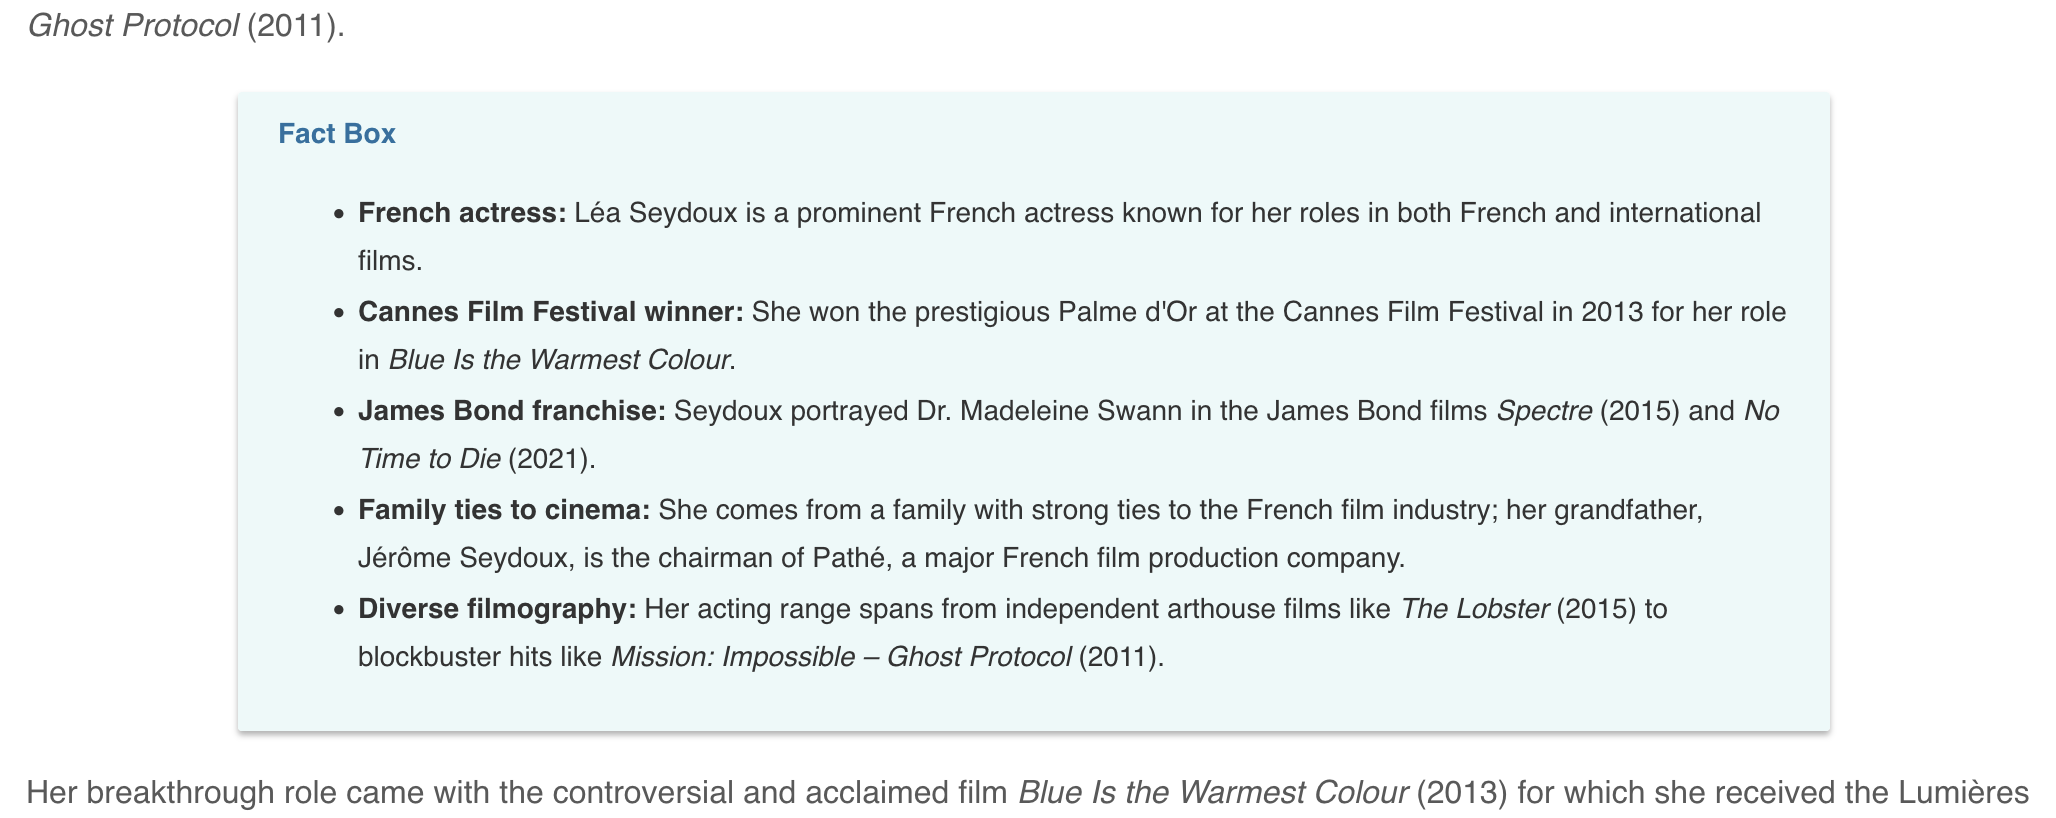
If you did everything correctly, you should now see the FactBox macro rendered inside the biography on the Lea Seydough page:
A final tip
Make an interface for RestProps so you can use it in other components as needed:
export interface RestProps {
    personID: string;
}
You may pass additional parameters, such as personID to the RichText component by supplying a generic interface which declares them. Import the interface and supply it to the Link, Image and Macro component types to make them aware of the new field.
For example, this optional wrapper forwards personID to typed renderers while keeping the existing Link.tsx, Image.tsx and Macro.tsx implementations:
import {RichText} from '@enonic/react-components';
import type {
    ImageComponent,
    LinkComponent,
    MacroComponent,
    RichTextParams
} from '@enonic/react-components';
import type {RestProps} from './RestProps';
import {Link} from './Link';
import {Image} from './Image';
import {Macro} from './Macro';

const PersonLink: LinkComponent<RestProps> = (props) => <Link {...props}/>;
const PersonImage: ImageComponent<RestProps> = (props) => <Image {...props}/>;
const PersonMacro: MacroComponent<RestProps> = (props) => <Macro {...props}/>;

export function RichTextWithPerson(props: RichTextParams<RestProps>) {
    return <RichText<RestProps>
        {...props}
        Link={PersonLink}
        Image={PersonImage}
        Macro={PersonMacro}
    />;
}
Use RichTextWithPerson in place of RichText in Person.tsx, importing it from ./RichTextWithPerson and adding personID={personId} alongside the existing data, meta, and component props. Each typed renderer can then read props.personID when needed.
Next steps
Congratulations on completing this tutorial!
For more details on our React Components library, visit the NPM documentation.
To learn more about Enonic’s CMS capabilities, we recommend the Developer 101 tutorial.
To dive deeper into React and building sites with Enonic, have a look at our Next.js integration.