Actions
Contents
Content can be created, edited, deleted, duplicated, moved, sorted and published. Depending on permissions, users may perform those actions on selected content items.
New
The New action will launch the New Content dialog.
There are three ways to open the New Content dialog in the Content Studio:
-
The first method is with the shortcut —
alt + n; -
By clicking the
Newbutton in the toolbar; -
By clicking
Newin the context menu, which is accessible by right-clicking an item.
| The content dialog will use the context of the selected content to create the new item. If no context is set, the item will be created on the root level. |
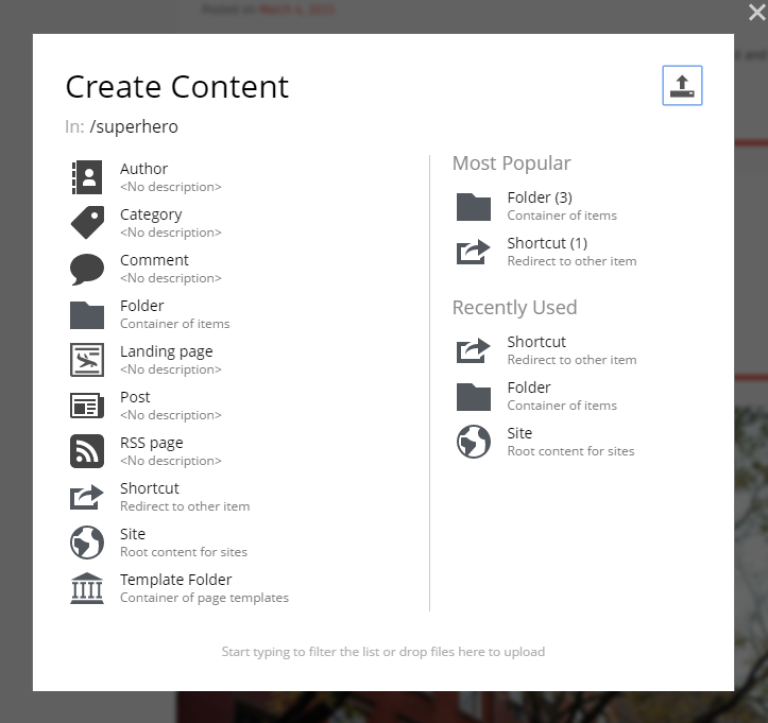
New by Type
The dialog lets you choose from available content types, based on the context of the selected item.
-
Select from the list of all content types;
-
Select from the "Most Popular" list (most used content types in your current context);
-
Select from the "Recently Used" list (based on users recent actions).
| To filter the list of items — simply start typing on your keyboard to filter the list of available content types. |
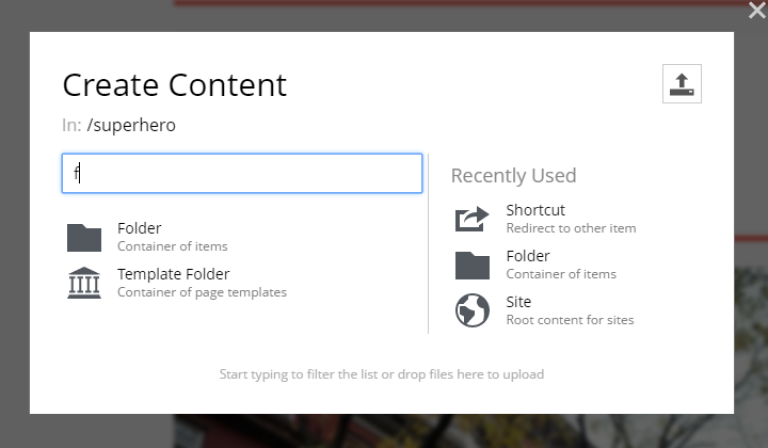
Once a content type is selected, a new item is created, and the content editor is launched in a new tab.
New by Uploading
Create file-based content aka "media" from the new content dialog by uploading. There are two ways to upload files:
-
Click the upload icon placed in the top right of the dialog;
-
Drag’n drop — also supports bulk uploading.
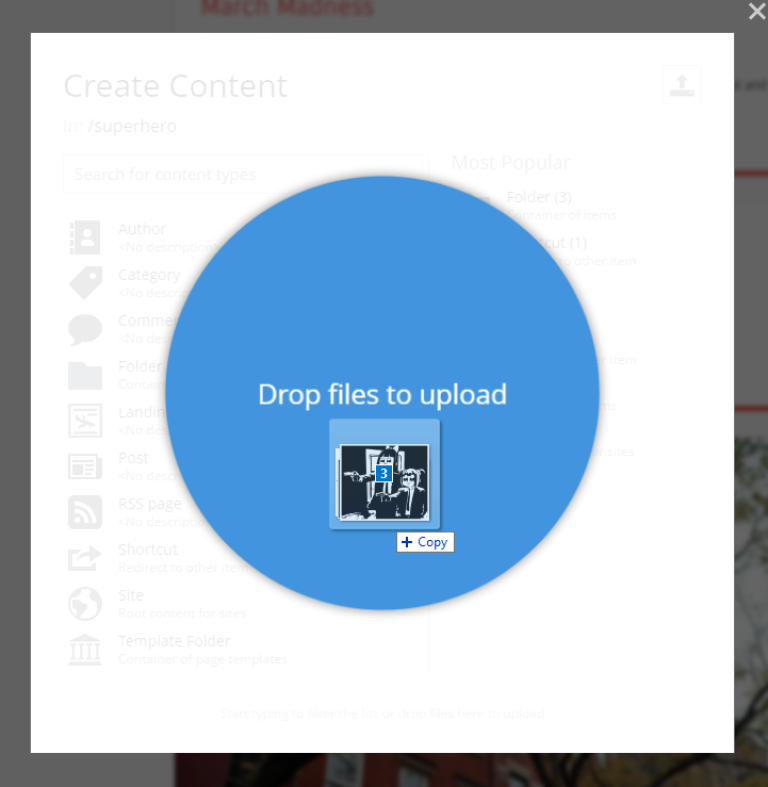
| When uploading files, the underlying content type is automatically detected from the file type file uploaded. |
Edit
The Edit action will open the Wizard of the selected contents for edit in the new tab. If multiple items are selected, then the action will open a tab for each one.
There are four ways to open content for edit in the Content Studio:
-
The first method is with the shortcut —
⌘ + e(ctrl + efor Windows); -
By clicking the
Editbutton in the toolbar; -
By double-clicking the item in the grid;
-
By clicking
Editin the context menu, which is accessible by right-clicking an item.
Delete
The Delete action will open the Delete item(s) dialog for the selected content.
There are three ways to open the Delete item(s) dialog in the Content Studio:
-
The first method is with the shortcut —
⌘ + del(ctrl + delfor Windows); -
By clicking the
Deletebutton in the toolbar; -
By clicking
Deletein the context menu, which is accessible by right-clicking an item.
Deleting offline items
If selected content is offline (status "New" or "Unpublished"), it will be deleted instantly right after you confirm your action.
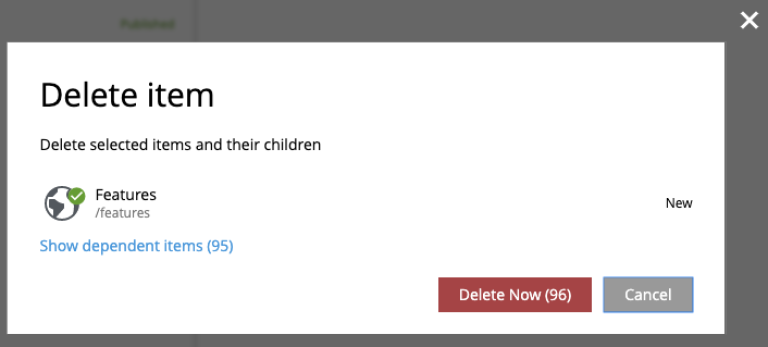
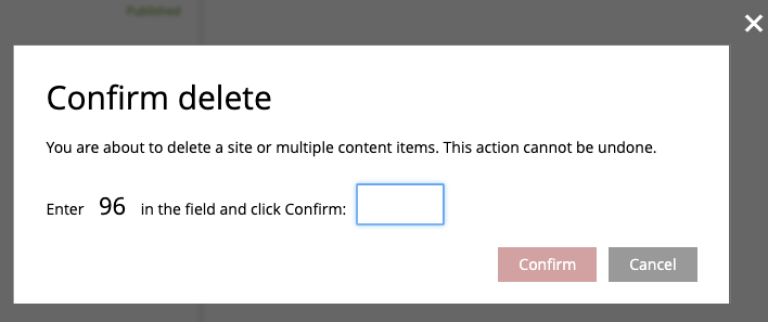
If you are about to delete a site or more than one item, the "Delete Now" button will show the total number of items to be deleted, including children. After pressing the button you will be asked to confirm your action.
Deleting online items
If you try to delete content that is currently online (status "Published" or "Modified"), "Delete Now" button will turn into a menu button with "Mark as Deleted" action in the dropdown.
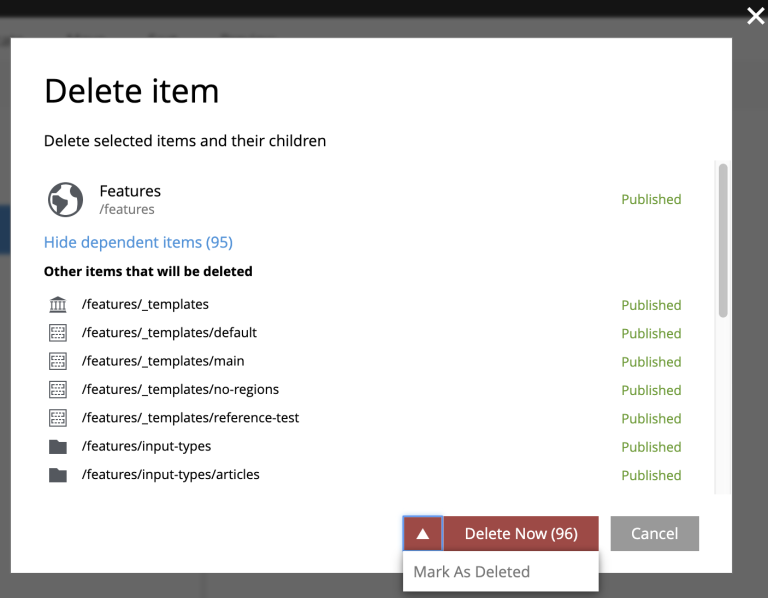
when "Mark as Deleted" is clicked, all offline content will be instantly deleted, but online content will change the status to "Deleted". To remove such items completely, they must be published.
To restore items marked as deleted to their previous status, select them and click the Undo delete button in the toolbar.
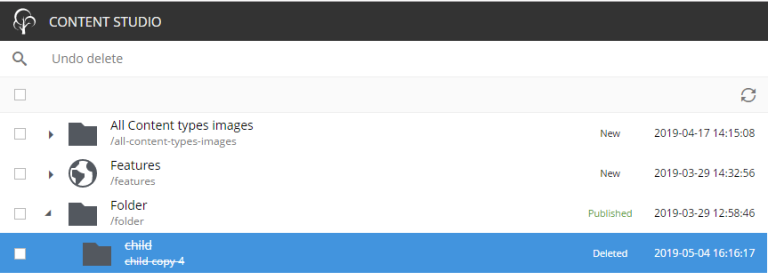
Standard content management actions (like editing, moving, duplicating etc.) are not available for items marked as deleted, you have to undelete them first.
Deleting from the wizard
When the Delete button is clicked from inside the Content Wizard, only the current item will be selected in the dialog.
Duplicate
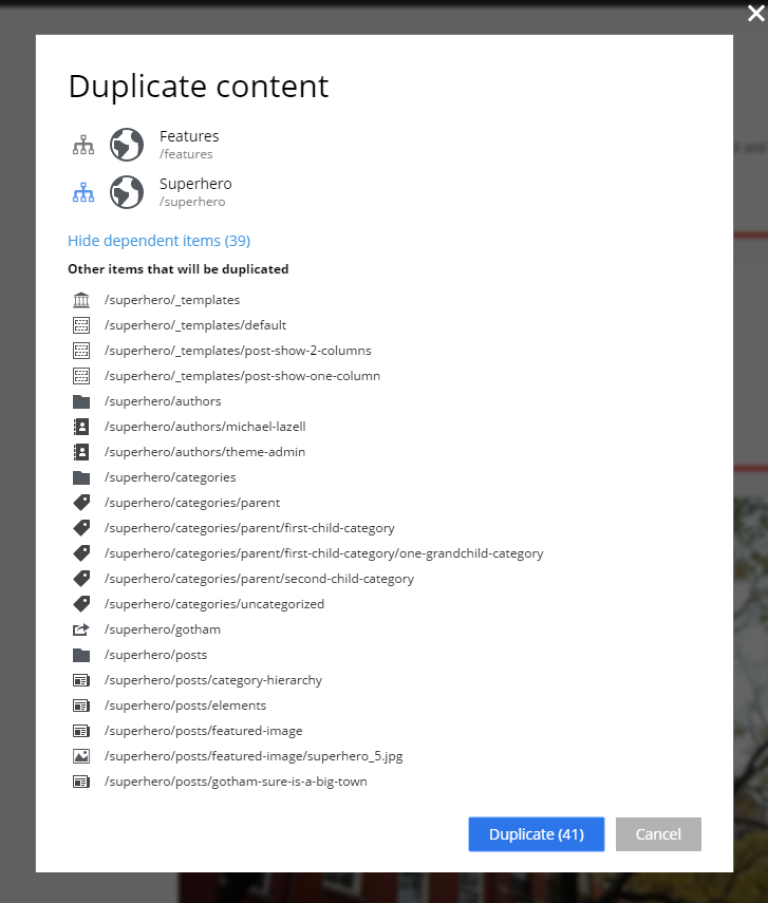
The Duplicate action will launch the Duplicate content dialog for the selected content.
There are two ways to open the Delete item(s) dialog in the Content Studio:
-
By clicking the
Duplicatebutton in the toolbar; -
By clicking
Duplicatein the context menu, which is accessible by right-clicking an item.
In the dialog, you can choose whether child items of selected content(s) should also be duplicated or not by pressing the tree icon to the left of the content. Pressing the "Duplicate" button in the dialog will trigger the duplicate operation which will be visualized by a progress bar if the process is taking more than a few seconds. Duplicates will get a new id and path names will be postfixed with -copy or -copy-* with a number instead of an asterisk starting with 2 if it is not the first copy.
Duplicating from the wizard
When the Duplicate button is clicked from inside the Content Wizard, only the current item will be selected in the dialog.
Move
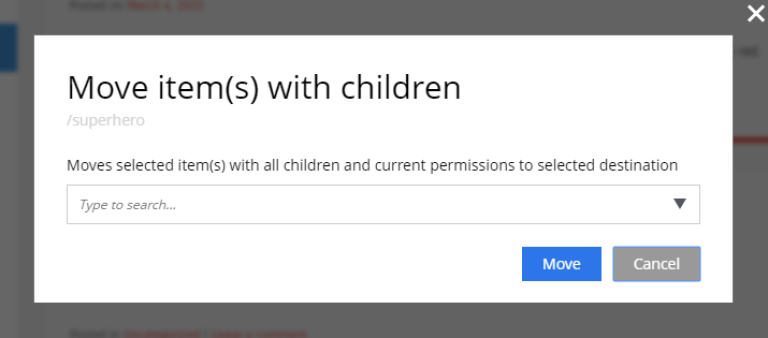
The Move action will launch the Move item(s) with children dialog for the selected content.
There are two ways to open this dialog in the Content Studio:
-
By clicking the
Movebutton in the toolbar; -
By clicking
Movein the context menu, which is accessible by right-clicking an item.
This feature moves selected items with all children and current permissions to another place in the tree grid. Type to search, or use the dropdown arrow, to find the new parent content where the selected items will be moved to. If the Move button in the dialog is clicked without choosing a parent content then the items will be moved to the root of the content tree.
Content cannot be moved to a location where another content already exists with the same path name.
Sort
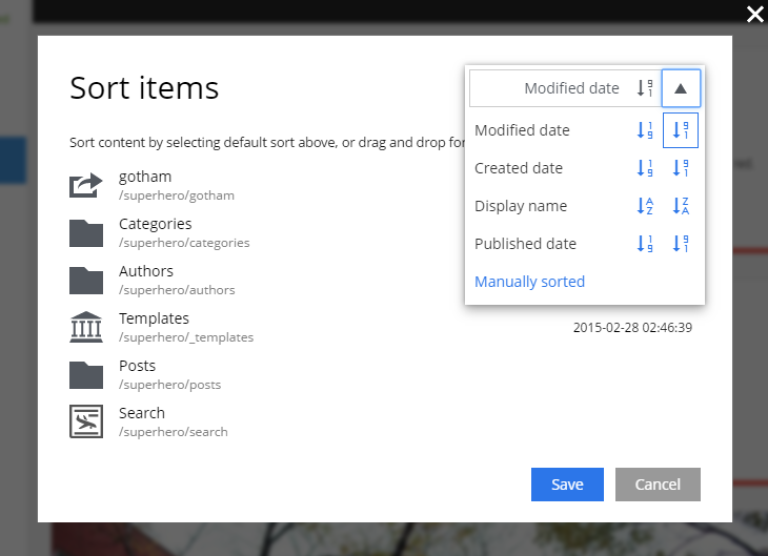
The Sort action will launch the Sort items dialog for the selected content.
There are two ways to open this dialog in the Content Studio:
-
By clicking the
Sortbutton in the toolbar; -
By clicking
Sortin the context menu, which is accessible by right-clicking an item.
Child items of any content can be sorted in a number of ways through the Sort items dialog.
The default sorting is by the Modified date in descending order.
You can sort items in ascending or descending order by Modified date, Created date, Display name or Publish date. Children can also be manually sorted by simply dragging them in the Sort items dialog.
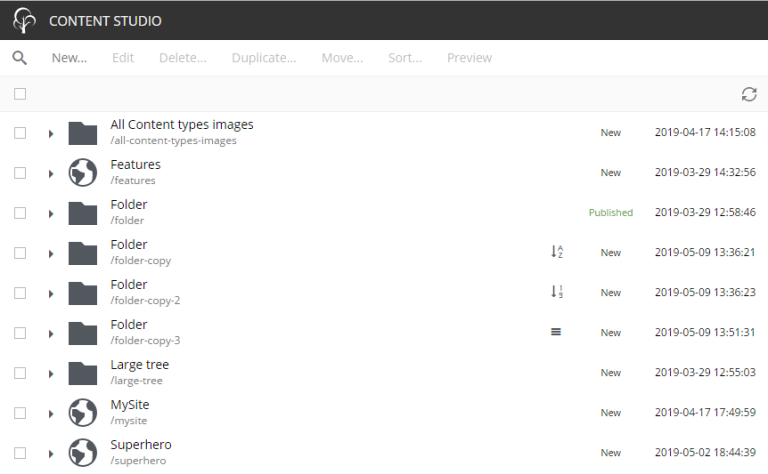
Once items are sorted, the parent content will have an arrow in the browse view tree grid pointed up or down to denote ascending or descending. If the content is manually sorted, an icon with three horizontal bars will appear.
Clicking the bars or arrow icon will open the Sort items dialog.
In the image below, the /folder-copy is sorted by Display name in ascending order, /folder-copy-2 is sorted by Published date in ascending order, and the /folder-copy-3 has manual sorting.
Preview
The Preview action will open and render a selected Site or Page in the new tab.
There are two ways to open this dialog in the Content Studio:
-
By clicking the
Previewbutton in the toolbar; -
By clicking
Previewin the context menu, which is accessible by right-clicking an item.
Publish
Publishing is a simple but important concept for working with content in Enonic XP. The basic concept of publishing is that it makes content viewable to others outside of the Content Studio.
The Publish action will launch the Publishing Wizard dialog for the selected content.
There are three ways to open the Publishing Wizard dialog in the Content Studio:
-
The first method is with the shortcut —
⌘ + alt + p(ctrl + alt + pfor Windows); -
By clicking the
Publishbutton in the toolbar; -
By clicking
Publishin the context menu, which is accessible by right-clicking an item.
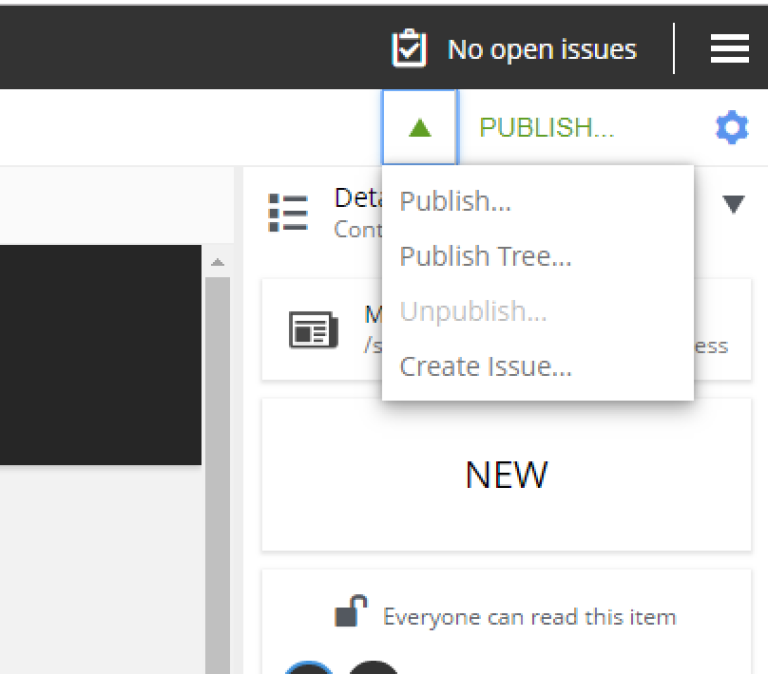
There are also several options in the publish menu. Publish will simply opens the dialog, just like the main button. Publish Tree will open the same dialog, but with active tree icons. Unpublish will open the Unpublish item dialog. Create Issue will open the New Issue dialog.
If the "Publish" action is not available, the main button may change the action and title to Publish Tree… or Create Issue…. |
Draft and master branches
All content created with the Content Studio exists in the draft branch with the status offline. Content in the draft branch can be edited, changed, and previewed until it is ready to go online. Every time a content is saved with changes, a new version is created.
When a content is published, the active version is copied from the draft branch to the master branch. Only content in the master branch can be accessed by others outside of the Content Studio, subject to the contents security settings.
Content status
Published content will have the status online while content that has not yet been published will be offline. When changes to a published content are saved, the new version becomes the active version but the version that is online is not changed. The status of the new active version will be modified and this content will need to be published again before the changes will be visible outside of the Content Studio.
When a published content is deleted, the Delete item(s) dialog offers a checkbox to "Instantly delete published items". If this box is not checked then the content’s status will be Deleted and it will still be visible outside of the Content Studio. Content that is Deleted must be published, unpublished, or "instantly deleted" before it is actually removed from the master branch.
Publishing wizard
Content is published through the Publishing Wizard dialog. When a content is selected for publishing, its parents and all the related content will be published with it. For example, in the image below, a Post content named "March madness" was selected for publishing. This post has two related Category contents and a related Author content. Therefore, the categories and author will be published with the March "Madness post" and the parent folders of the categories and author will also be published. All items that will be published with the selected content are listed in the publishing wizard.
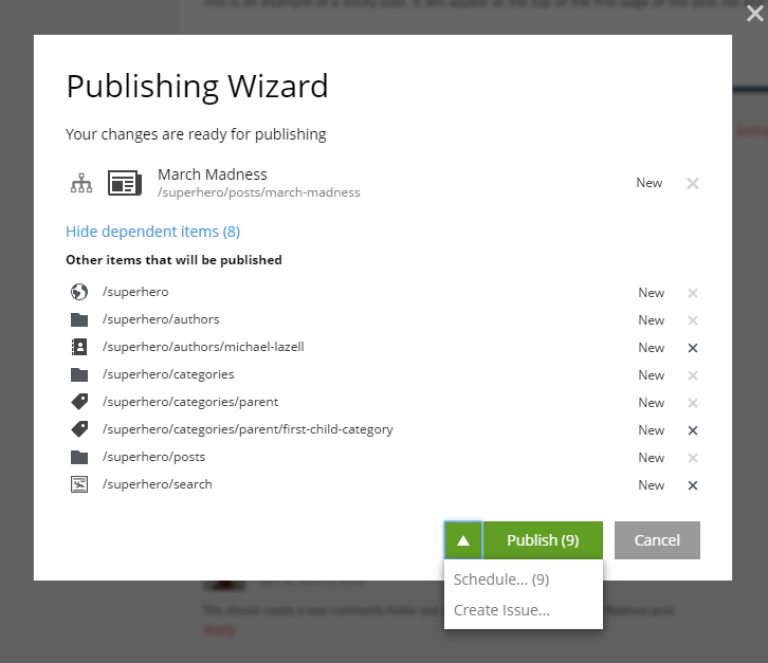
The green Publish button has a menu option for Schedule… and Create Issue… options.
Publish Tree
If the selected content has children then these items can be included by clicking the tree icon to the left of the content. As you can see from the picture below, clicking the icon will add all descendants of the content to the publishing list.
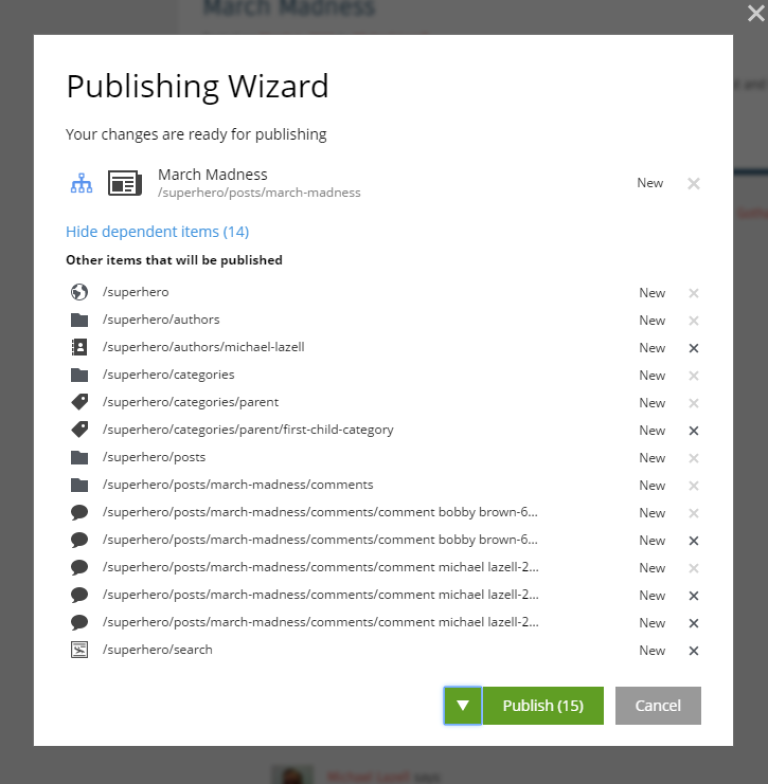
The total number of items that will be published is displayed on the Publish button.
Scheduled publishing
Clicking on the menu item Schedule… in the Publish Wizard dialog will open a new dialog, called Scheduled Publishing. There you can schedule the period of time, that the content will be online or even defer the publishing.
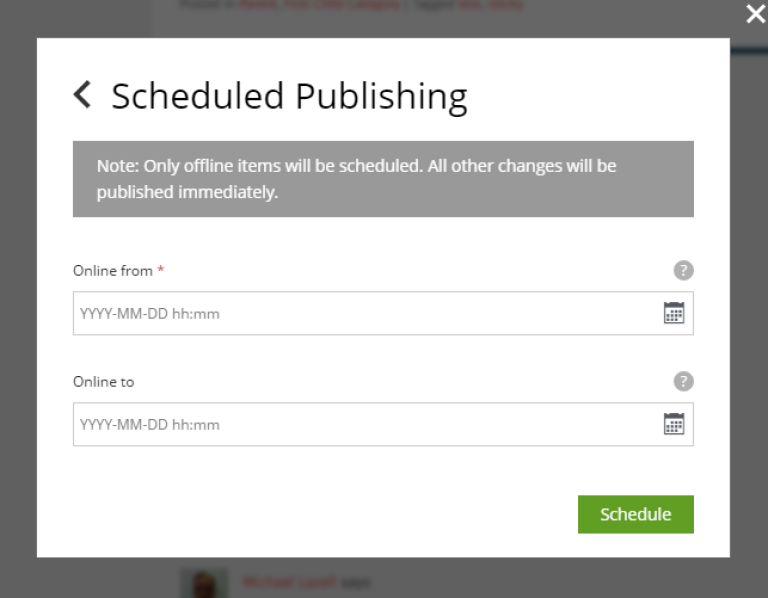
| Only offline items will be scheduled. All other changes will be published immediately. |
Publishing from the wizard
When the Publish button is clicked from inside the Content Wizard, only the current item will be selected in the dialog.
Unpublish
There are two ways to open this dialog in the Content Studio:
-
By clicking the
Unpublishoption button in the toolbar (it will replace thePublishbutton for the published content, otherwise it can be found in the publish menu dropdown, next to thePublishbutton); -
By clicking
Unpublishin the context menu, which is accessible by right-clicking an item, where it will replacePublishoption for the published content.
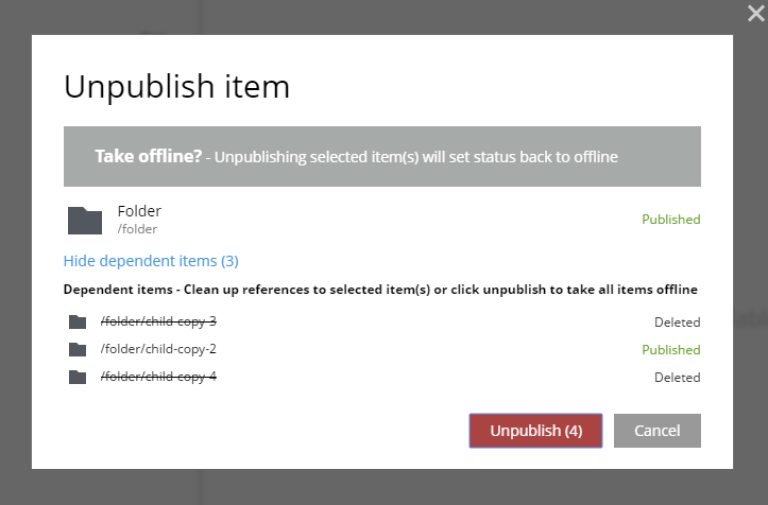
Previously published content can be taken offline with the "Unpublish" feature. All of the content’s children will be listed and unpublished along with the selected content. The total number of content items that will be taken offline will appear in parenthesis in the red Unpublish button at the bottom of the dialog.
Content that has the status Deleted will be taken offline, changing the status to Unpublished.
Create Issue
| In-depth reference on the issues can be accessed in the separate chapter. |
There are three ways to open this dialog in the Content Studio:
-
By clicking the
Create Issue…option button in the toolbar (it will replace thePublishbutton for the fully published content, otherwise it can be found in the publish menu dropdown, next to thePublishbutton); -
By clicking the
Create Issue…button in the Publish Wizard dialog; -
By clicking
My Issuesbutton above the toolbar and then clicking theNew Issue…button in the opened dialog.
Creating issue
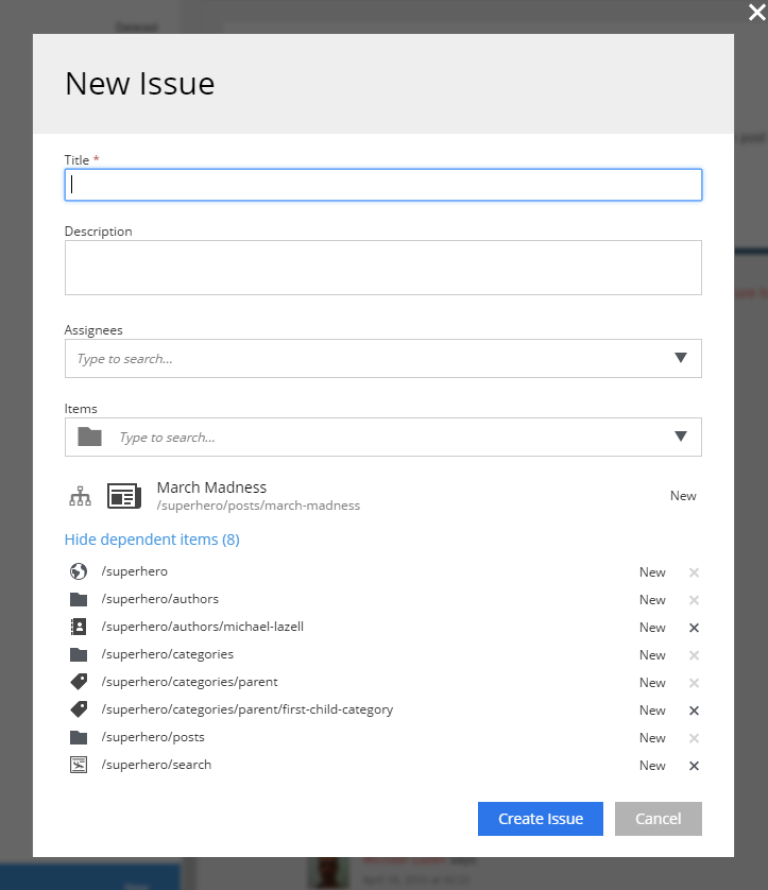
To create a new issue, only the Title must be specified. All other fields are optional.
You can assign multiple users to work on an issue, using the Assignees selector, but you can’t assign yourself.
If you click Create Issue… button in the Publishing Wizard dialog, like in the example, when publishing "March Madness" post, all content from the previous dialog will be automatically added to the items list. You can also add or remove from that list the descendants of specific content by clicking on the tree icon next to that content.