Issues
Contents
Creating an issue may be useful when you want to create a task, describe it, add related content and then assigning it to a certain user. Issues can also be used as tasks to track activities, needed to perform on the content before the publish.
New Issue
There are three ways to open this dialog in the Content Studio:
-
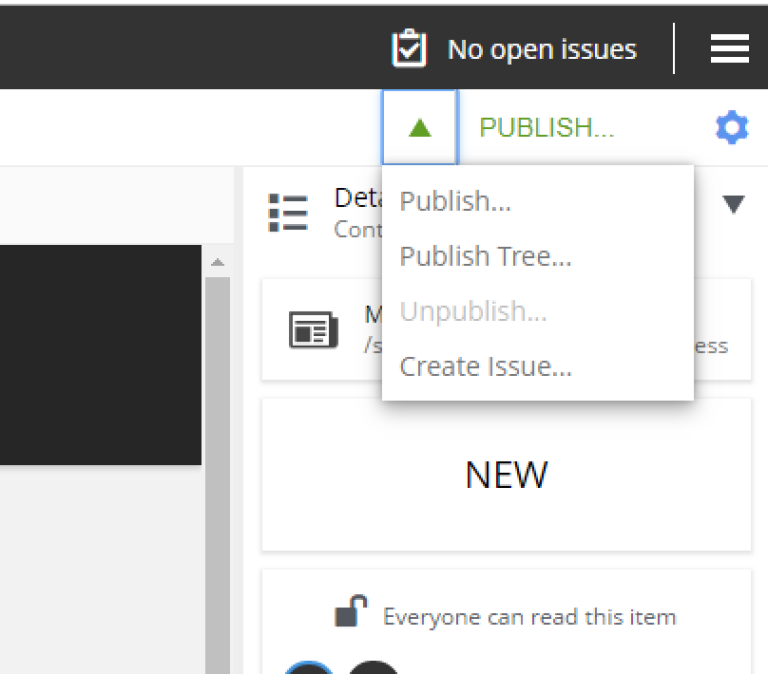
By clicking the
Create Issue…option button in the toolbar (it will replace thePublishbutton for the fully published content, otherwise it can be found in the publish menu dropdown, next to thePublishbutton); -
By clicking the
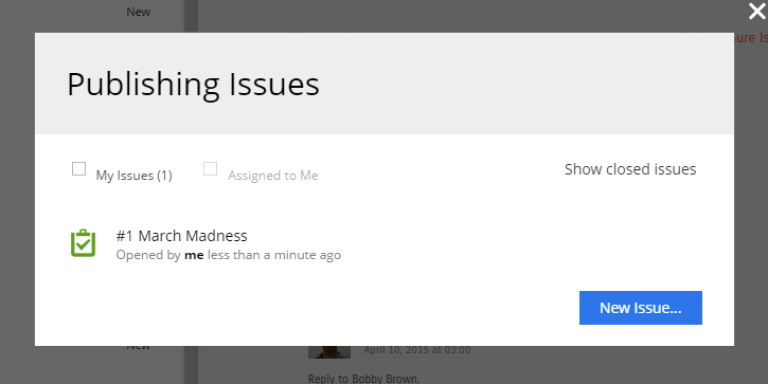
Create Issue…button in the Publish Wizard dialog; -
By clicking
My Issuesbutton above the toolbar and then clicking theNew Issue…button in the opened dialog.
My issues
My Issues dialog can be accessed by clicking the My Issues in the top right corner, just button above the Publish button.
The dialog will list all opened issues. You can switch to the closed ones by clicking the Show closed issues button. You can also filter the list, showing only the issues that were assigned to you (Assigned to Me checkbox), or created by you (My Issues checkbox).
To create a new issue, click the New Issue… button.
Clicking on the issue from the list will open the dialog to an edit issue.
Creating issue
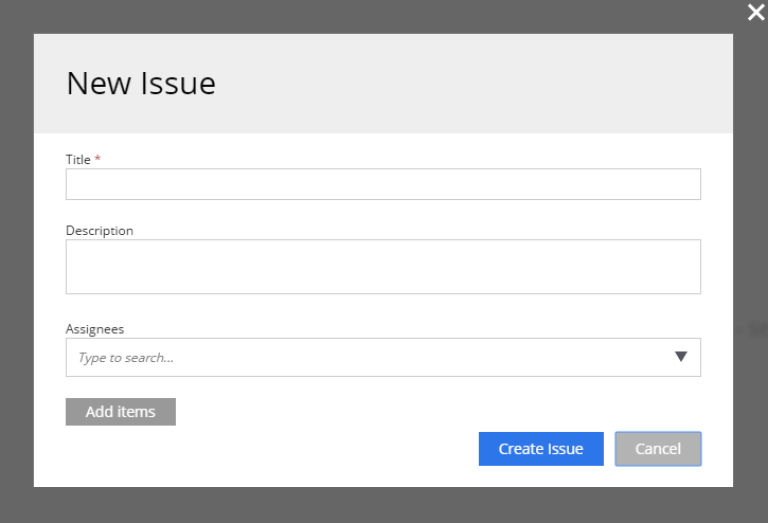
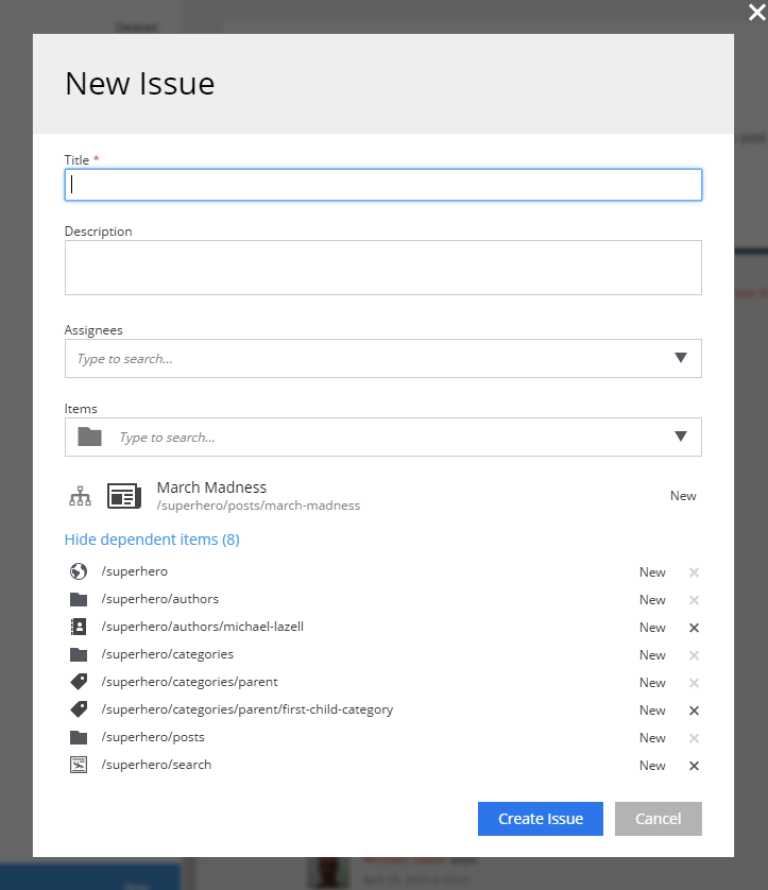
To create a new issue, only the Title must be specified. All other fields are optional.
You can assign multiple users to work on an issue, using the Assignees selector, but you can’t assign yourself.
To add specific content to an issue, click on the Add items button. The Items selector will appear.
If you click Create Issue… button in the Publishing Wizard dialog, like in the example, when publishing “March Madness” post, all content from the previous dialog will be automatically added to the items list. You can also add or remove from that list the descendants of specific content by clicking on the tree icon next to that content.
Updating issue
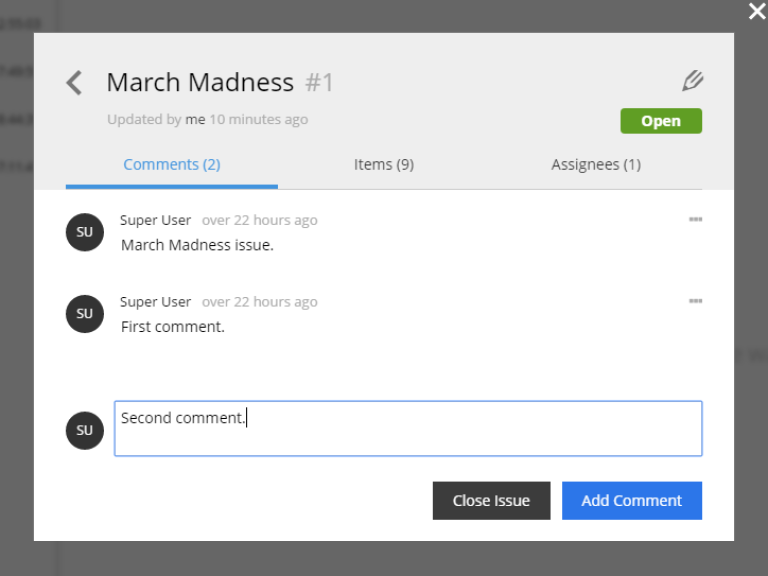
To edit the issue, click on it in the My issues dialog. It will open the dialog with three tabs.
In the top right corner, you will see the status of the current issue. It can be Open or Close.
Just above the status is the pencil icon, clicking on which will allow you to edit the title of the issue.
Comments
The first tabs show comments on the current issue. Comments can be added by clicking the Add Comment button. To edit or delete a comment, click on the kebab icon to the right of the comment, that will show the menu with those two options. The number next to the tab title shows the total number of comments.
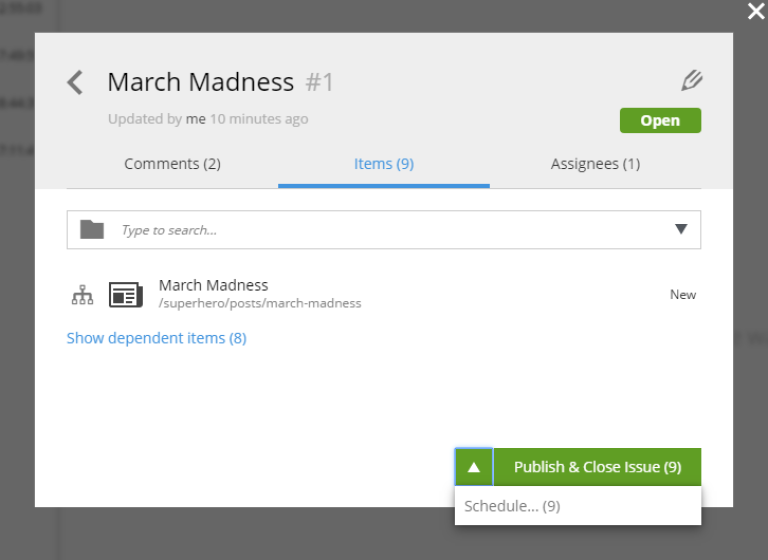
Items
On the second tab, you can update the list of content, that is associated with this issue. There can be multiple contents or no content at all. The descendants of the content can be added or removed from the list by clicking on the tree icon next to the content.
There is a Publish & Close Issue button at the footer of the dialog in this tab, which allows you to close the issue, or schedule the time, that the issue will be closed, if you click the Schedule… option in the menu.
The number next to the tab title shows the total number of content, associated with the issue.
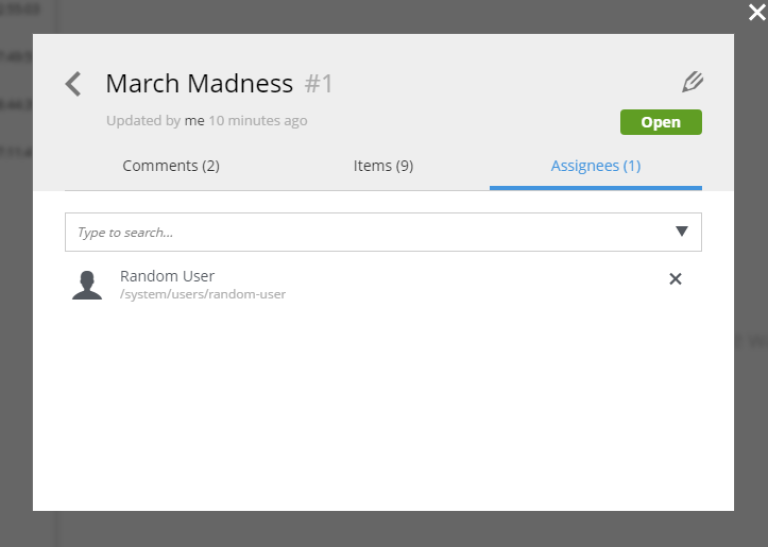
Assignees
On the third tab, assignees can be added and removed from this issue. The number next to the tab title shows the total number of assignees.