Getting Started
Contents
Hands-on introduction to get familiar with Enonic Explorer
Introduction
During this tutorial you will:
-
Sign up for a free Enonic account
-
Set up a new solution with Explorer pre-installed
-
Create a new collection and fill it with sample content
-
Learn about Documents and Document types
-
Create an interface to search your content
-
Access and query the API directly
Sign up
| Developers may also run Explorer locally by setting up the Enonic SDK, and then installing Explorer from Enonic Market. |
-
Start by signing up for a free account on https://console.enonic.com
-
Create a new Solution.
Solutions → Create.Choose the
Explorertemplate. Give your solution a name, go with the default values.The template ensures that Explorer and all relevant dependencies are pre-installed.
Explorer admin
Once the environment has booted, click Admin → Launch from the new solution page.
This will take you to the environment dashboard.
Launch the Explorer admin from the top right XP menu → Explorer.
Only users with the role system.admin, or com.enonic.explorer (created when Explorer was installed) can see and access the Explorer admin. |
The initial view should look something like this:
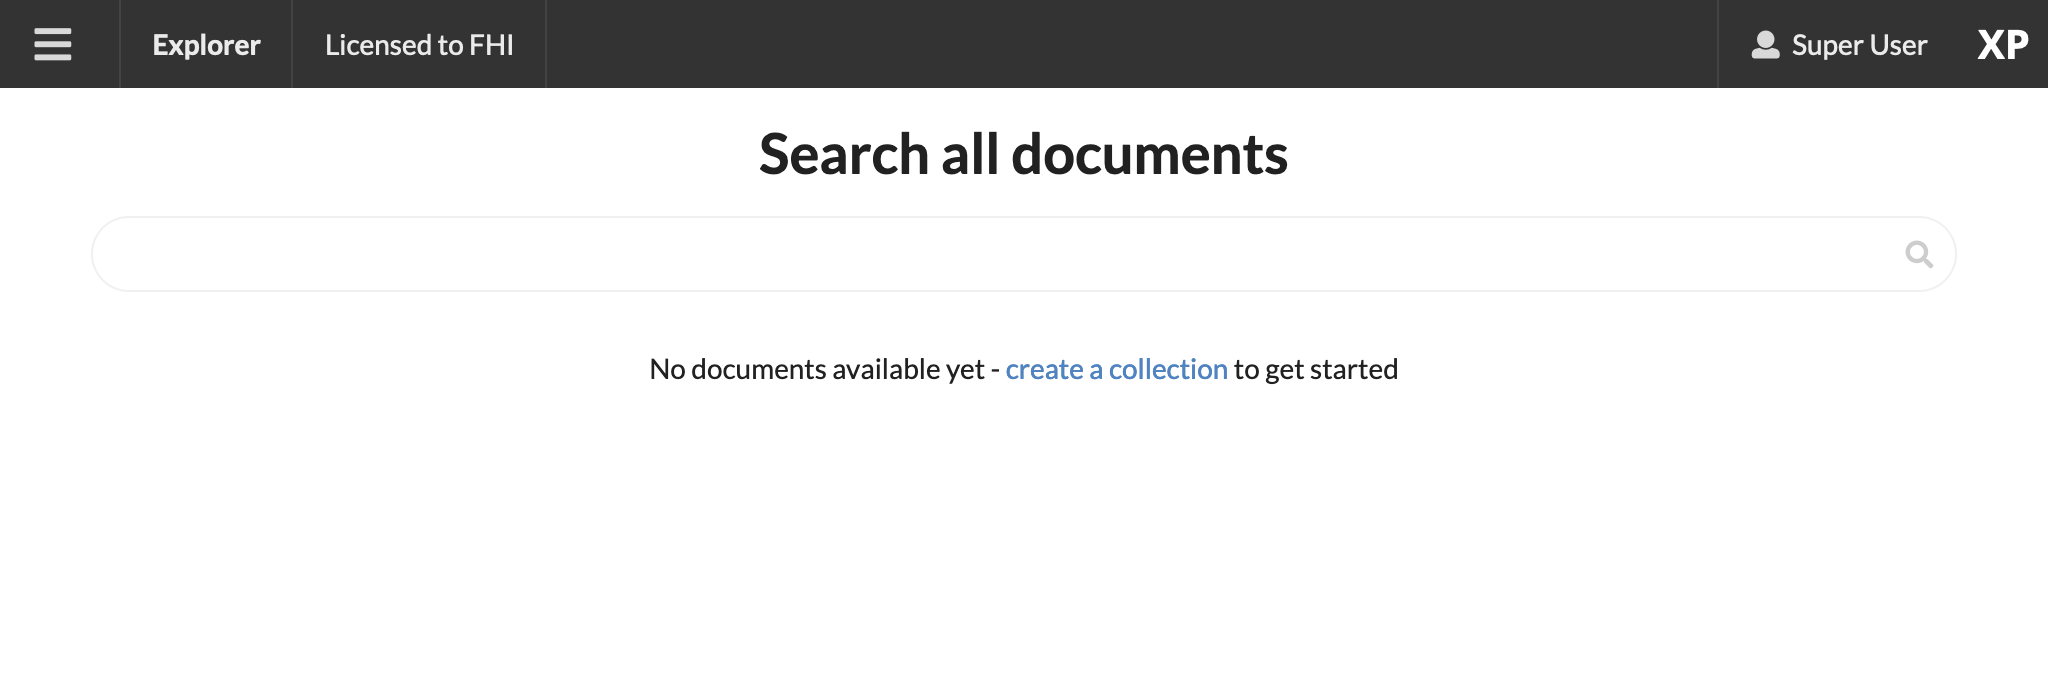
The Explorer menu is available from the top left.
From the main panel you can search the indexed documents - but sadly there is nothing to search yet. 🤷
Collecting data
To get some data to play with, let’s use the simple built-in Web crawler collector to fetch content from Enonic Market.
-
Create a new Collection: `Collections → ]`. The Create button (green btn:[) can be found at the bottom right hand of the page.
-
Give your new collection a name, i.e.
market. -
Choose
Web crawlerfrom the collector dropdown menu -
Provide the collector with a starting URL:
https://market.enonic.com -
Skip all other options, and click Save at the bottom of the form
-
The
marketcollection should now be visible on the Collections page.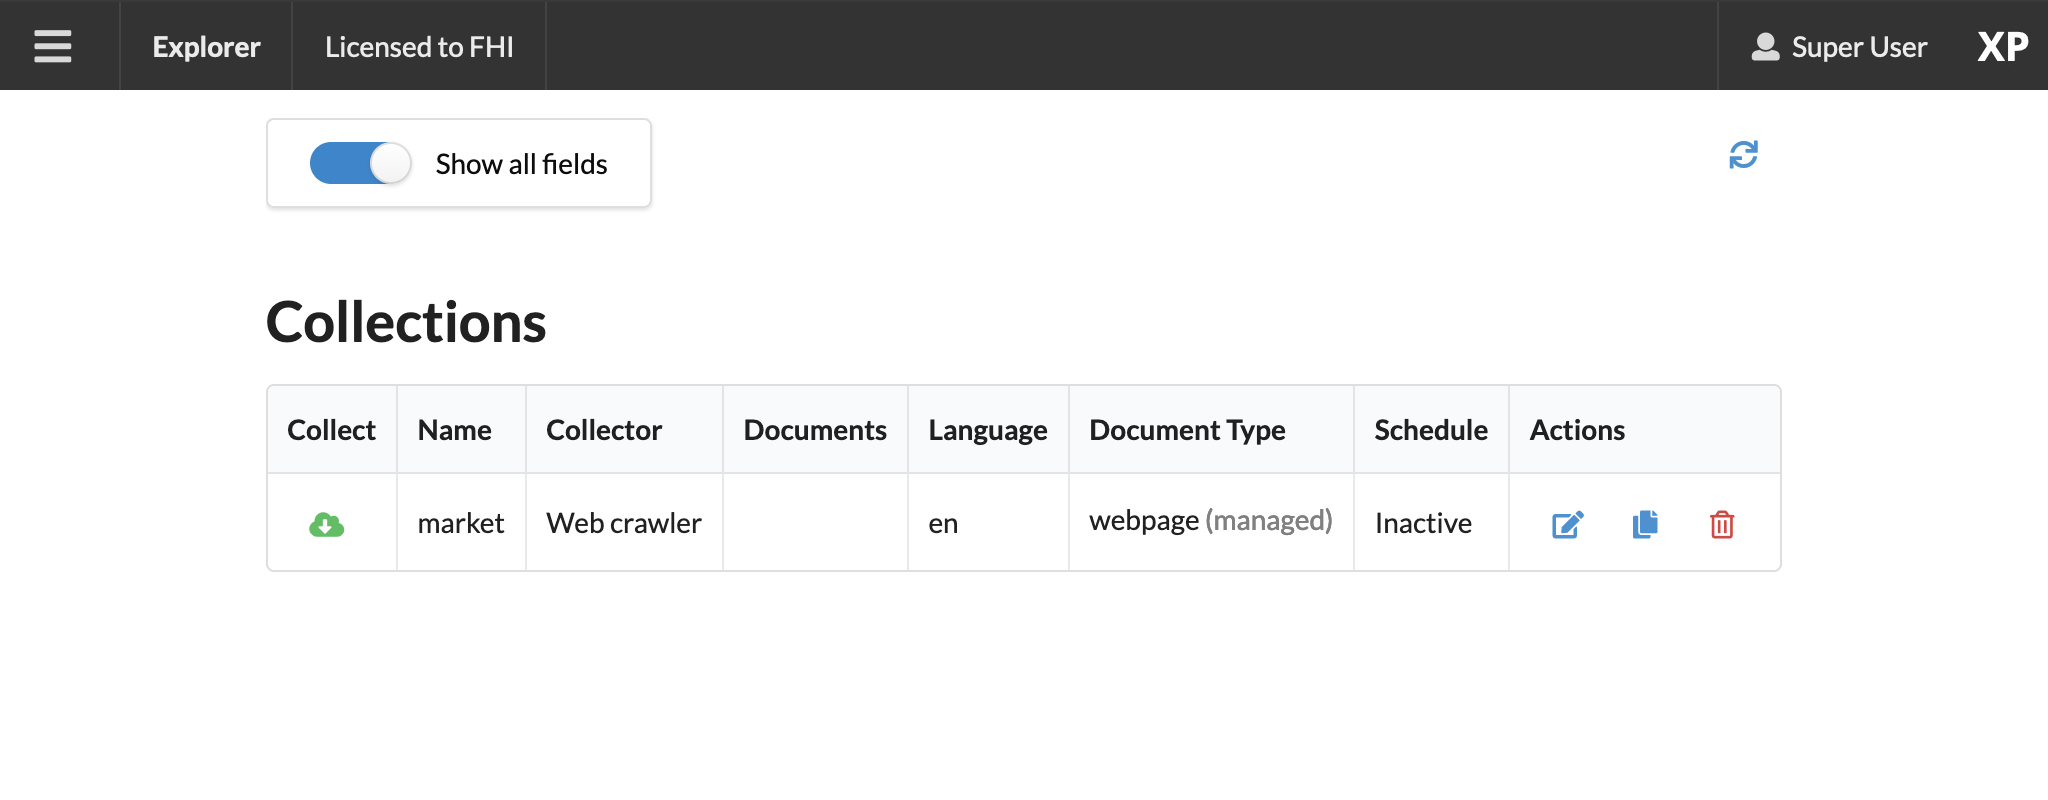
-
-
Collect content
Click the Download icon to the left to start the collector. This will trigger a background job that crawls the website and adds each page as a document in Explorer.
To view the status of the job, visit the
Collections → Statuspage from the Explorer menu.
| In addition to using collectors (jobs that run within Enonic), you may also inject data externally through the Ingest API. |
Documents
Document is a term used for a single item within a collection.
Once the collector job has completed, clicking the document count will take you to the Documents page.
The Documents page is available from the Explorer menu as well. |
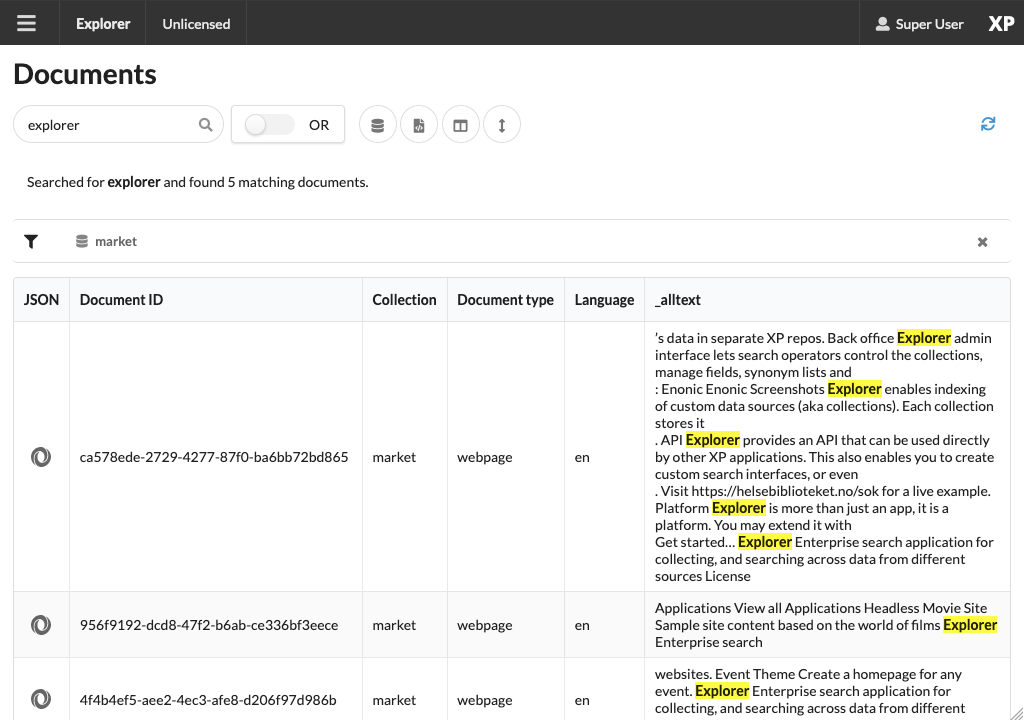
From the Documents page, you may browse and filter all available documents. You can also configure which fields to show. Clicking the leftmost JSON icon will reveal the raw data that was indexed for this document.
Perform your first search by typing explorer in the search box:
Document types
In order to optimize your search, you may need to tune how the different fields are indexed. Indexing is managed via Document types.
From the Document types page, you should see a single entry - Web page.
This specific document type, which was automatically created by the Web crawler collector, is called a managed document type. This means that the collector is responsible for the life cycle of the document type - as opposed to a manually created document type.
If you try editing the document type (using the edit icon on the right hand side), you will be warned that it is managed. Ignore this and go on to see the full document type details:

A document type may be used across multiple collections, and you may also use multiple document types within a single collection.
| Every document also has a set of common meta-fields like id, collection, createdTime and documentType. These cannot be removed or changed. |
Interfaces
Interfaces are used to manually tune your search results. Tuning includes boosting, stemming, synonyms and stopwords, as well as selecting which collections to search.
Like collections and document types, Interfaces are created and managed directly from the Explorer admin.
| An interface in this context is not the actual user interface, but refers to the API. Explorer provide a GraphQL API which is optimized for searching your documents. The actual end-user UX must be built on top of this. |
-
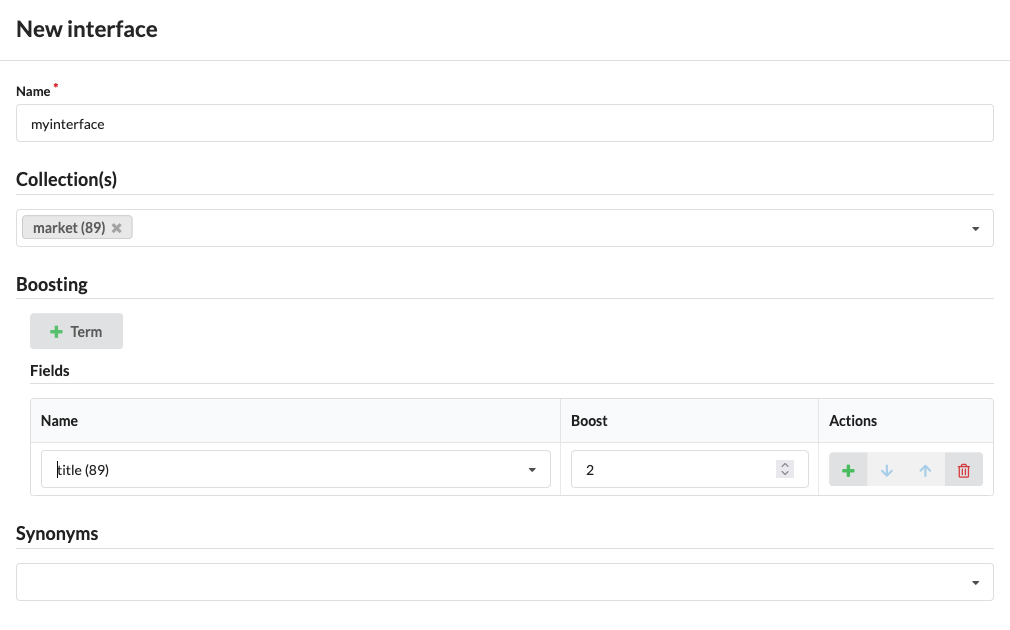
Create a new interface by clicking
Interfaces → +:-
give your interface a name, for instance
myinterface -
add the
marketcollection -
set a field boosting for the
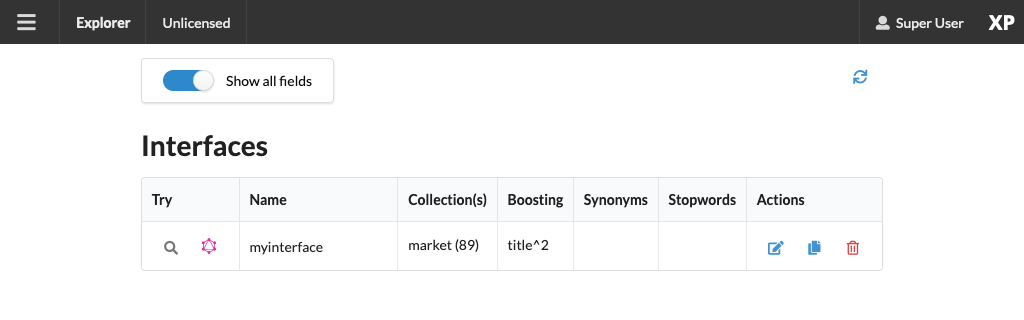
titlefield.It should look something like this:
-
-
Save the changes to create the interface.
With the interface created, you are now ready to give it a spin!
GraphQL API
To try out the API, click the pink graphQL icon on the left.
This will take you to an API browser, where you can easily test various queries against the API:
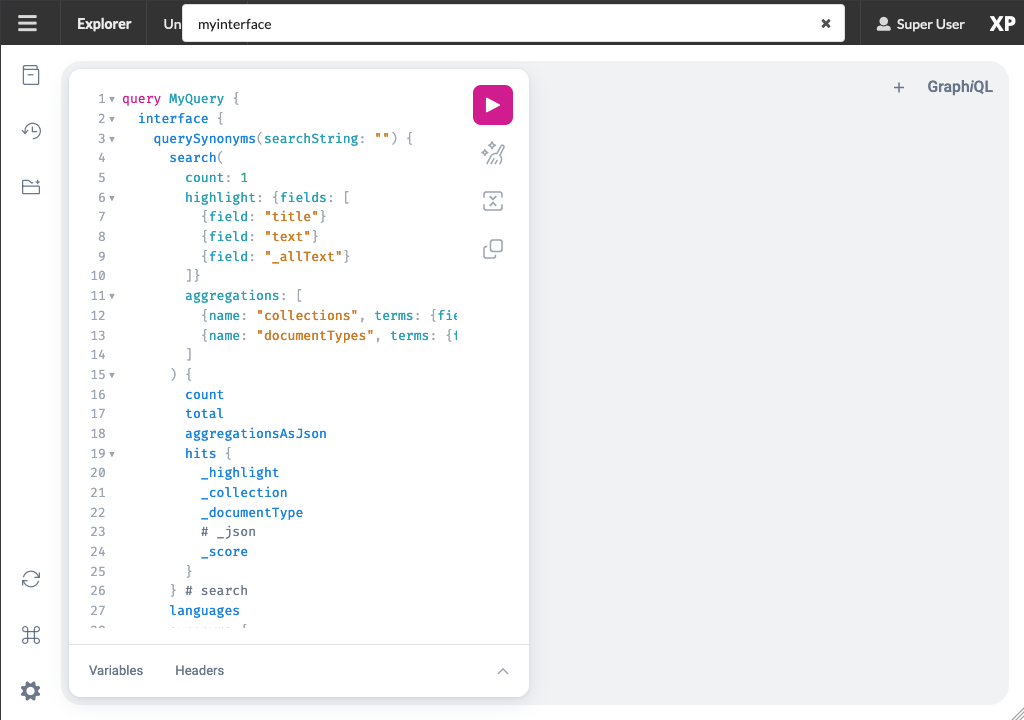
It essentially consists of:
-
context selector (on top)
-
query panel (to the left)
-
result panel (to the right)
Follow these steps to run your first API-powered query:
-
Make sure the context (Dropdown at the top of the page) is set to
myinterface -
Paste the following into the query panel:
Searchstring "explorer"query{ interface { search(searchString: "explorer"){ hits{ _documentType ... on DocumentType_Webpage { title url } } } } } -
Click the pink
playbutton.You should now get a result looking something like this:
Searchstring "explorer"{ "data": { "interface": { "search": { "hits": [ { "_documentType": "webpage", "title": "Explorer - Enonic Market", "url": "https://market.enonic.com/vendors/enonic/explorer" }, { "_documentType": "webpage", "title": "Extensions and plugins for Enonic XP and Content Studio (CMS)", "url": "https://market.enonic.com/" }, { "_documentType": "webpage", "title": "Enonic - Enonic Market", "url": "https://market.enonic.com/vendors/enonic" }, { "_documentType": "webpage", "title": "Applications - Enonic Market", "url": "https://market.enonic.com/applications" }, { "_documentType": "webpage", "title": "React4xp Lib - Enonic Market", "url": "https://market.enonic.com/vendors/enonic/react4xp-lib" } ] } } } }
Explorer is also capable of various aggregations as well. Below we perform a term aggregation search over the title and _documentType fields.
Try it out yourself!
query {
  interface {
    search(
      searchString: "explorer"
      aggregations: [
        {name: "title", terms: {field: "title"}},
        {name: "documentTypes", terms: {field: "_documentType"}}
    ]){
      aggregationsAsJson
      }
   }
}
Live API
Back in the Enonic Console, the API enpoint has already been exposed publicly via an Ingress. Visit the Solution → Ingresses section and find the link on the Ingress called Explorer API.
Visit the Graphql API or Ingest API pages to learn more.
Next up
With the fundamentals covered, we recommend looking into the following areas to learn more:
-
Get an overview of the Explorer admin
-
Learn more about collectors.