Internationalization
Contents
In this chapter you will learn what it takes to support multi-language for your site.
Introduction
Next.js has native multi-language support, allowing your projects to switch language on the fly.
To back this, Content Studio has a feature called content layering.
Task: Create a layered project
To demonstrate multi-language, you first need to activate support for translating your content in Content Studio. In our case, let’s try Norwegian.
-
Create a new project in Content Studio by clicking on the
Settingscog icon, on the left-hand side of the grid. You will be presented with the currently available projects: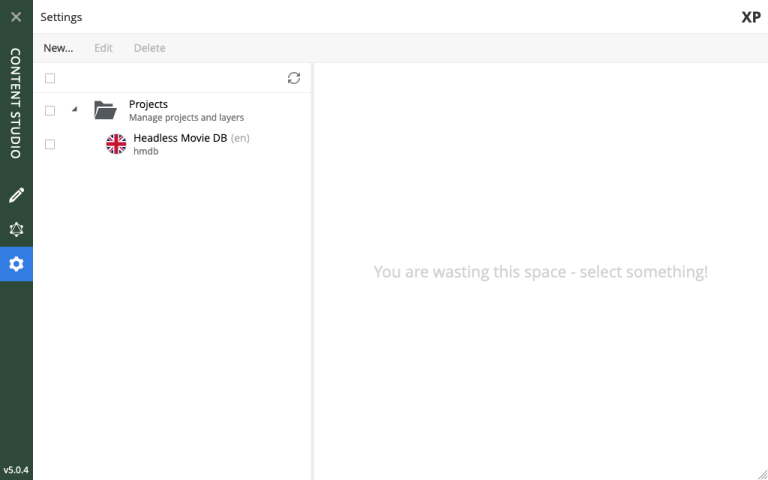
Click
New…button, and select typeLayer. Then choose theMovie DBproject as the parent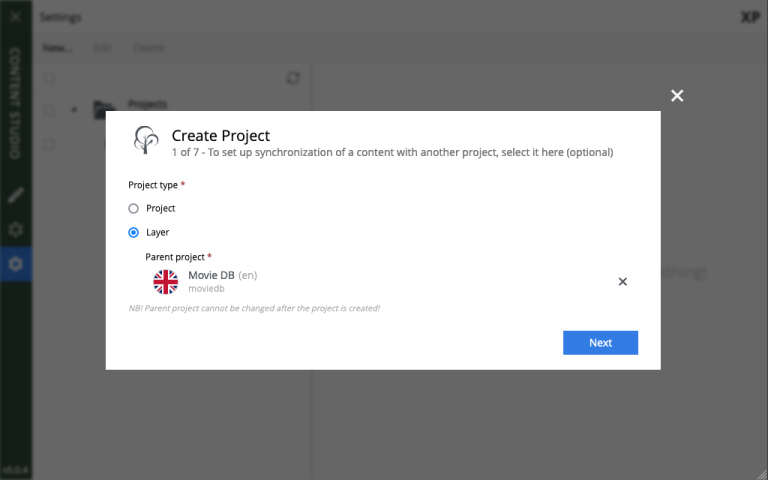
Fill in the rest of the form, using the following values:
-
Name:
Film DB -
Identifier:
moviedb-no -
Language:
norsk (no) -
Access mode:
Public -
Other fields may be skipped
After saving and closing the wizard, the new project should appear in the list.
-
-
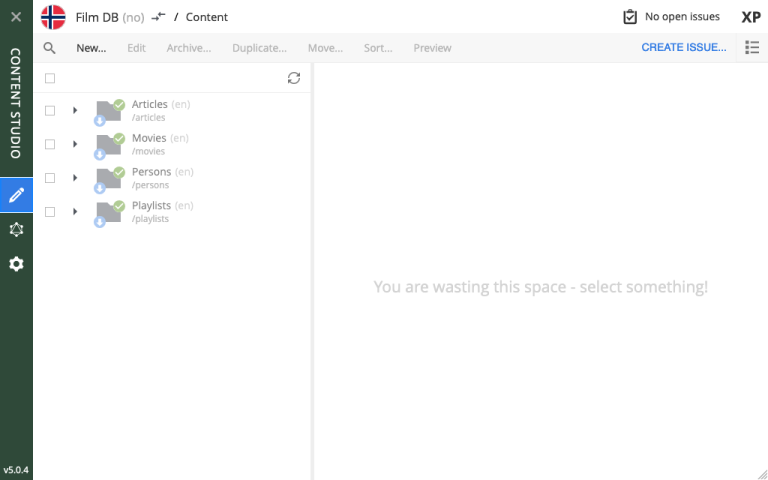
Verify the new layer by going back to the content list (via the pencil icon), and then switching context using the context selector in the top bar.
After switching context, you should see the following:
Task: Set up i18n in Next.js
Next, let’s turn on multi-language support in Next.js.
-
Start by activating Next.js' multilanguage support by adding a few lines to the
next.config.jsfile:next.config.jsmodule.exports = { // ... i18n: { locales: ['en', 'no'], defaultLocale: 'en' } // ... }The defaultLocale is the one that will be used to serve content on your domain root /, others will be available on /no etc. -
Configure the Enonic adapter, by specifying which content project to use for each specific locale:
.env// ... ENONIC_PROJECTS=moviedb/hmdb,no:moviedb-no/hmdb // ...Let’s break down the syntax.
For each comma separated entry, you will find the following pattern:
<locale>:<repository>/<sitekey>. From the example aboveno:moviedb-no/hmdb.The first entry in the list may skip the locale, as it will map to the
defaultLocalespecified innext.config.jsearlier (in our case,en).The reason for repeating paths, is that the path may be different in each project/translation. -
Finally restart your Next.js server to pick up the changes to environment variables.
Task: Translate and publish
As long as your preview configuration was working before you started, Content Studio should automatically be able to detect the right locale for each project.
| You may need to restart/rebuild your Next.js server for the changes to be picked up. |
-
In Content Studio, Switch editing context to the
Film DBproject by toggling in the top left corner of Content Studio.Content Studio should automatically be able to detect the correct Next.js locale for the project. Select an item, and you should get a preview.
-
Translate the site content by selecting the site content, then click
localize(rather than edit..). This effectively takes you to the edit form. You may now show off your skills while translating the page to Norwegian.Once finished, click
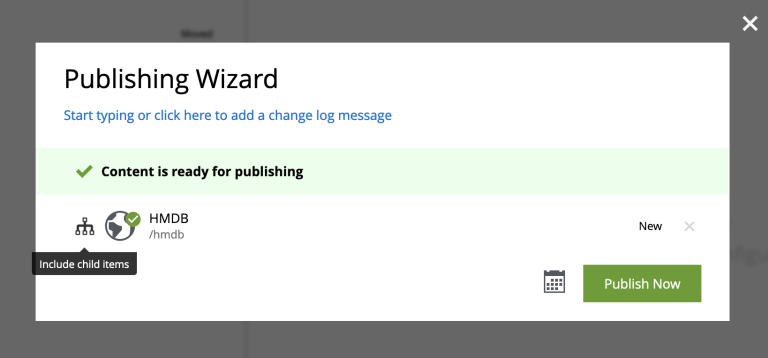
Mark as Readyand proceed to publish the entire site structure.Publish the entire tree by selecting the tree icon in the publishing wizard.
-
Verify that your front-end is working
Finally, by adding
/no(i.e.localhost:4242/no) to the URL of your Next.js server you should now see the published content from the Norwegian project.
Multi front-end setup
In some cases, you may prefer a setup where each language/market is served by a separate Next.js front-end, or you may simply have different sites accessing the same Enonic instance.
Setting up Next.js to do this is just like handling a single language. To enable Content Studio preview to know which Next.js server to use, some additional configuration will be required.
-
Update the Next.xp configuration file for your Enonic installation by adding multiple entries:
The sandbox configuration files are located in the sandbox' home directory inside your user’s root directory at .enonic/sandboxes/<your-sandbox-name>/home/config.com.enonic.app.nextxp.cfg# uncomment to override default values # nextjs.default.secret=yourSecret # nextjs.default.url=http://127.0.0.1:4242 # # config 'someName' nextjs.someName.secret=yourSecret nextjs.someName.url=https://your.next-site.com # # config 'anotherName' nextjs.anotherName.secret=yourOtherSecret nextjs.anotherName.url=https://your.other-next-site.com # ... -
Assign the configuration to your site by clicking the pencil icon next to the
Next.XPapp name in the site form, and selecting it from the list of named configurations: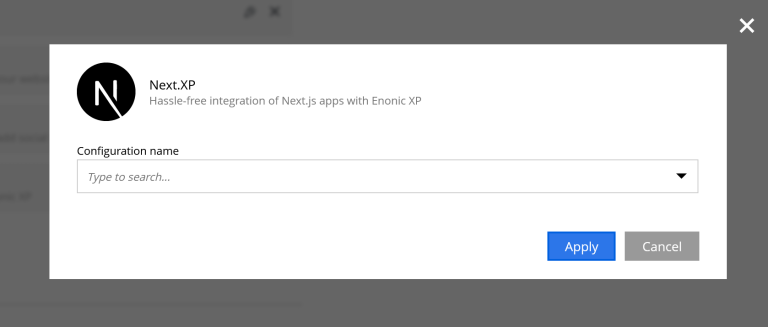
Accessing locale in views
Here are some insight on how to make further use of locales in your Next.js project.
When using getStaticProps or getServerSideProps, locale is accessible through the Context:
import {Context,FetchContentResult} from '@enonic/nextjs-adapter';
import {GetStaticPropsResult} from 'next';

export async function getStaticProps(context: Context): Promise<GetStaticPropsResult<FetchContentResult>> {
    const locale = context.locale;
    const defaultLocale = context.defaultLocale;
}
Additionally, MetaData object (available in every view) contains locale and defaultLocale along with other runtime data:
import {PageComponent, RENDER_MODE, XP_REQUEST_TYPE} from '@enonic/nextjs-adapter';

export interface MetaData {
    type: string;
    path: string;
    requestType: XP_REQUEST_TYPE;
    renderMode: RENDER_MODE;
    requestedComponent?: PageComponent;
    canRender: boolean;
    catchAll: boolean;
    apiUrl: string;
    baseUrl: string;
    locale: string;
    defaultLocale: string;
}
Now that we have everything working, it’s about time you deploy to live servers.