Setting up Enonic
Contents
In this chapter you will create create a local Enonic developer environment, create and deploy an Enonic app.
Task: Install the Enonic CLI
Install the Enonic CLI (follow link for instructions).
Task: Create and start a sandbox
-
Create a sandbox called
nxptutorialby running this command in your terminal:enonic sandbox create nxptutorial -t essentials -f
-fforces the use of default values for remaining options
Task: Create and deploy your app
| Leave the sandbox running in the first terminal window, and open a new terminal window for the following commands. |
-
Create a new project using the
Introductionapp as a starter, by running the following command in your terminal:enonic create tutorial.nxp -r tutorial-intro --s nxptutorial -f
This command will:
-
use the GitHub repo
github.com/enonic/tutorial-introas a starter -
to create an app called
tutorial.nxp -
and link it to the
nxptutorial
-
-
Deploy the application
To build and run your application, execute these commands:
cd nxp
enonic dev
The last command will build and deploy the app to the sandbox, and then start watching for changes in the code to automatically rebuild as you work on it.
|
In [server] CLI Watching for changes in "."
[server] CLI Ignoring changes in "**/{.git,node_modules}/**" | "build/resources/main"
[browserSync] [Browsersync] Reloading Browsers... (buffered 9 events)
<============-> 94% EXECUTING [17m 31s]
> :dev
|
Task: Open Admin dashboard
Let’s have a look at the sandbox' web interface. Open http://localhost:8080 in your browser (or just click the link).
You should now see the Welcome page:
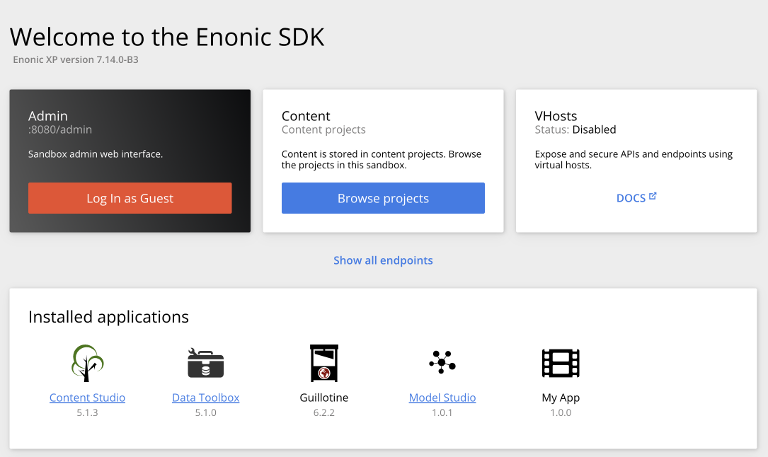
The Welcome page provides an overview of the sandbox, including installed application and standard configuration files.
My App should be in the list, together with other applications that were automatically installed when you created the sandbox. |
Click Log In as Guest to open the XP admin dashboard. You should now see the following:
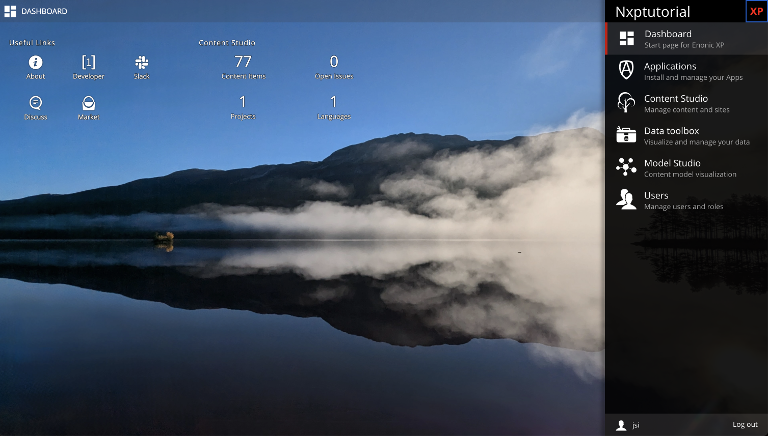
You are now on the admin dashboard. The right hand menu (aka XP menu) enables navigation between admin tools. Admin tools may be injected as extensions via applications.
| If things don’t look exactly the same, don’t worry. In every new version of XP the background picture gets updated. Also, admin dashboard is automatically localized - based on your browsers preferred language. |
Task: Open Content Studio
Content Studio is the editorial interface used to create and manage content. It was pre-installed from Enonic Market as a part of the Essentials template when you started the sandbox, and can now be accessed from the XP menu.
Click Content Studio in the XP menu to launch it.
The first time your application was deployed to the sandbox, it automatically created a content project called Intro Project and populated it with content. Since this is the only available project at the moment, Content Studio will automatically open it, revealing the list of sample content items.
| The current project is shown at the top of Content Studio. |

| Some of the content items will have a default preview. That’s okay for now - you’ll customize the preview later. |
Congrats on setting up the Enonic development environment
With the Enonic environment up and running, lets have a look at the GraphQL API.