Visualize your content with pages
Contents
For every page, there is always a page component.
Page component
At the moment, we have some content, but no preview or visual rendering. Pages to the rescue. Page are composed from one or more components, always with a page component as its root.
Your app includes a pre-defined page component named hello. It is defined by a descriptor file, placed in a particular location within your app: src/main/resources/site/pages/
<?xml version="1.0" encoding="UTF-8" standalone="yes"?>
<page>
  <display-name>Hello Page Controller</display-name>
  <form/>
</page>| Like content types, you can also define a form for the component using the schema system. We’ll get back to this later. |
Component controller
Enonic XP supports rendering with 3rd party front-ends, but is also capable of rendering by itself thanks to the JS framework. We will be using this throughout the rest of this tutorial.
Each component may have its very own controller, responsible for its rendering. Here is what it looks like in our case:
| The controller file must be placed in and use the same name as the component directory. |
import type { Response } from '/index.d';

// @ts-expect-error no-types
import {render} from '/lib/thymeleaf';
import {getContent} from '/lib/xp/portal';

// Specify the view file to use
const VIEW = resolve('./hello.html');

// Handle the GET request
export function get(): Response {

    // Get the content that is using the page
	const content = getContent();

	// Prepare the model that will be passed to the view
	const model = {
		displayName: content.displayName
	}

	// Prepare the response object
	const response: Response = {
		body: render(VIEW, model)
	};

	return response;
}| Here we’re using TypeScript. Each .ts file will automatically be compiled by the build system, and the generated .js file placed in the same location. XP picks up and invokes the resulting .js file. |
Templating
For clean coding, we have also supplied a simple HTML template - a.k.a the View of the Model View Controller (MVC) pattern. It looks like this:
<!DOCTYPE html>
<html>
    <head>
        <title data-th-text="${displayName}">Sample title</title>
    </head>
    <body>
        <h1 data-th-text="${displayName} + ' - we made it!'">Sample header</h1>
    </body>
</html>| This view is plain HTML, but also uses a specific syntax known as the Thymeleaf templating language. The Enonic runtime also supports many other options, such as React, Mustache and Freemarker |
Your first page
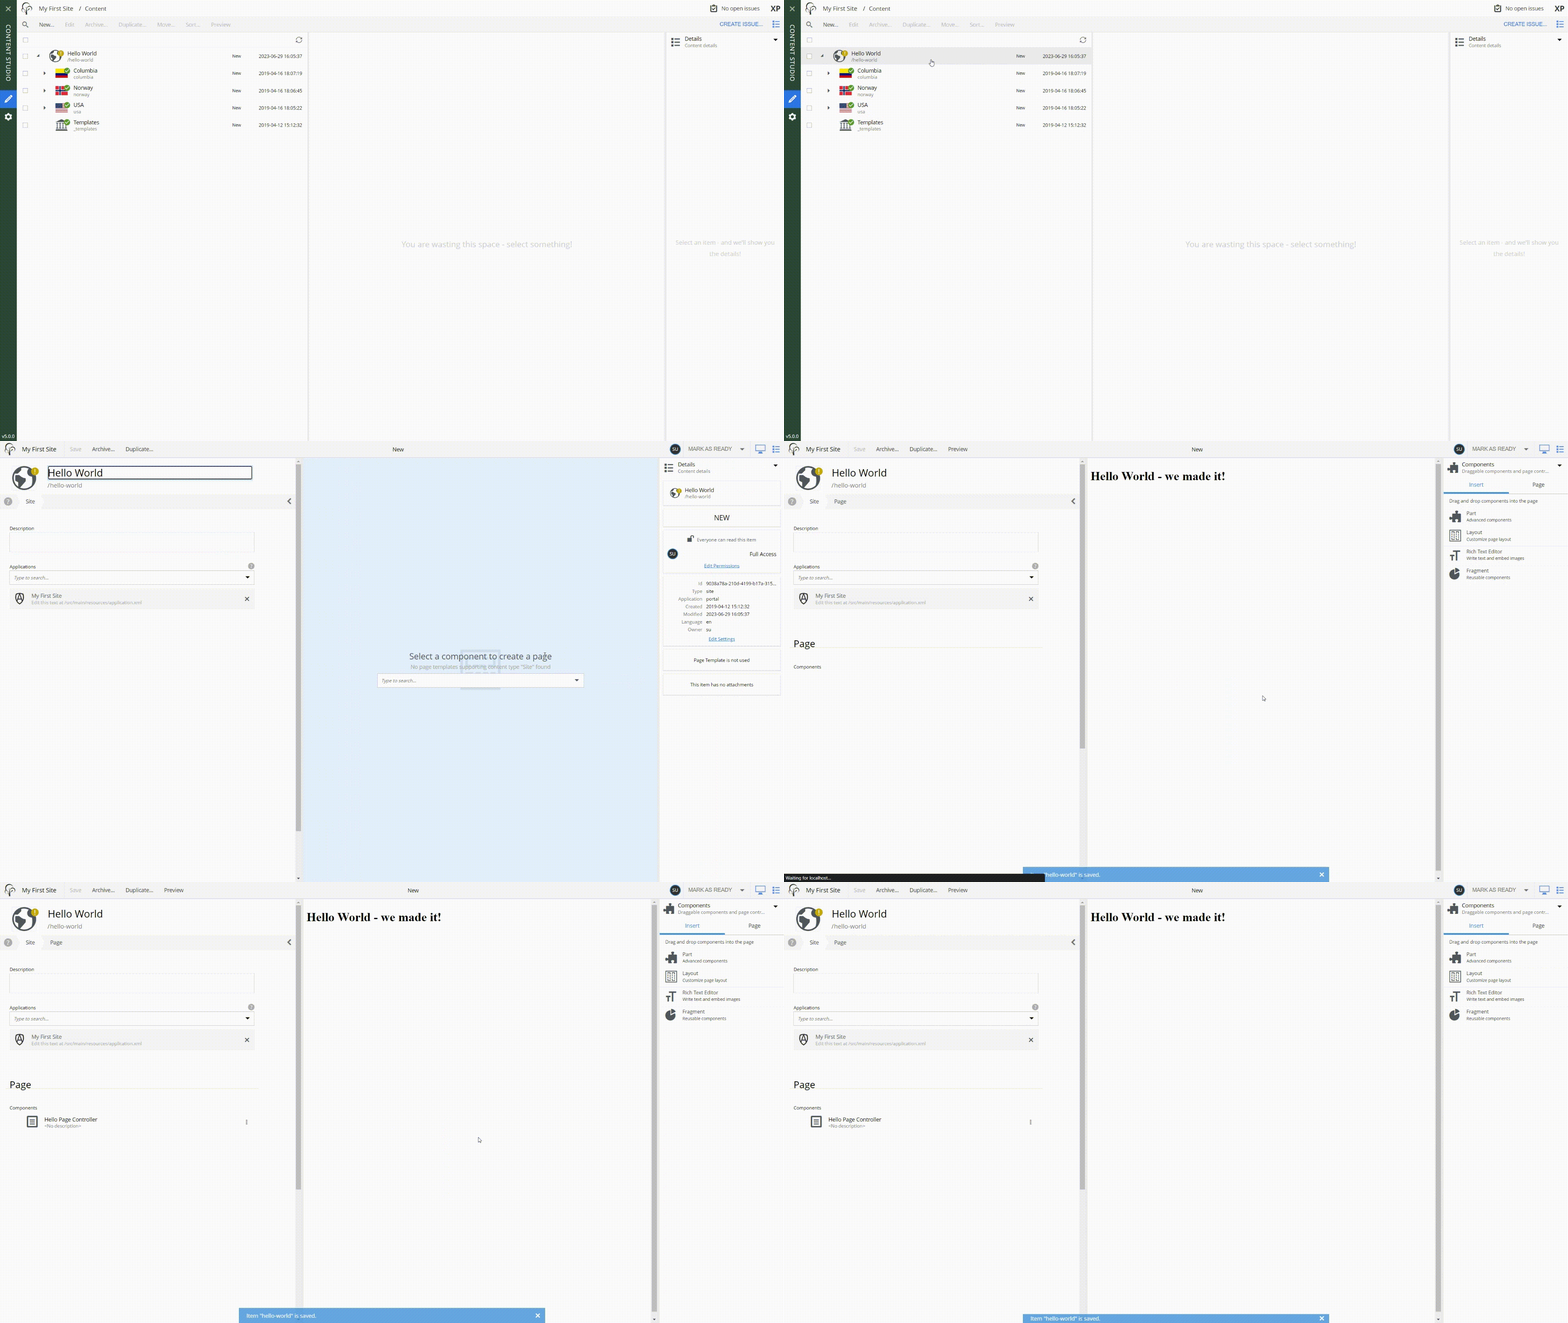
For the hello page component to actually render something, it must be used by a content item:
-
Select the Site content item -
Hello Worldand click edit -
From the preview panel on the right, select the
Hellopage component in the list. Your changes will automatically save, and the page preview will render the result.

Summary
At this point we were able to attach a hello page component to the hello-world site content, which is great! A good observer will notice that the page is not entirely static, it will ouput the content displayName followed by a hardcoded text - we made it!.
| To learn more about pages, visit the pages documentation. |
Next you’ll be introduced to the concept of regions, that will enable you to add more components to your pages.