Rich text editor
Contents
Rich Text Editor is used by HTMLArea input type and for editing text component inside the Page Editor. It’s capable of formatting the text in many ways, pasting from Word and Google Docs, using macros to insert code snippets and iFrames, inserting tables, images and content links etc.
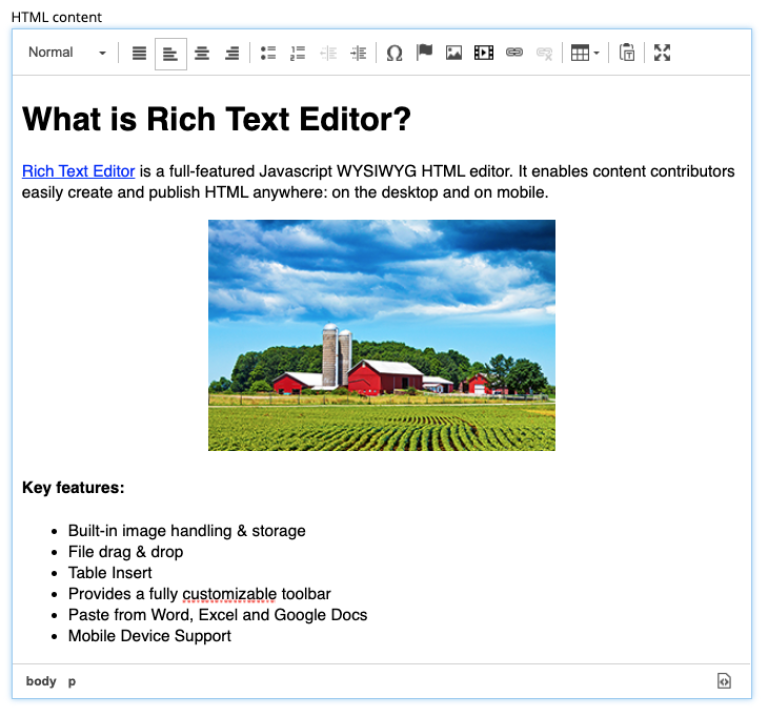
Toolbar
The toolbar contains buttons for various formatting options as well as inserting elements like pictures, links, special characters and more.
Style menu
Style menu contains options for styles that can be applied to the entire paragraph, for example to create heading elements or snippets of code.
Inline formatting
The next group of icons represent inline styles which can be combined in the same paragraph, for example bold, italic, strikethrough etc.
Alignment
The next four icons can be used to change alignment of selected element: left-align, center, right-align or justify.
Lists
The next two icons will turn text into a bullet list or a numbered list. Pressing Enter / Return will make a new list item and pressing it a second time will end the list. Use Shift + Enter / Shift + Return to make a new line within the list item. A sub-list can be created with the indent button.
Indent
The next buttons will decrease and increase indent for the selected text. These buttons will also increase or decrease the level of a list item.
Special character
This button opens a menu with special characters. Selecting one will insert it at the cursor’s location.
Anchor
Anchors enable pointing to a specfic position on a page via context link. If a link references an anchor on the same page then the page will scroll up or down to the location of the anchor. The anchor button in the toolbar opens the Insert Anchor dialog where the name of the anchor is entered. The anchor name will be used as the value of the “id” attribute, so it should be lower case without spaces.
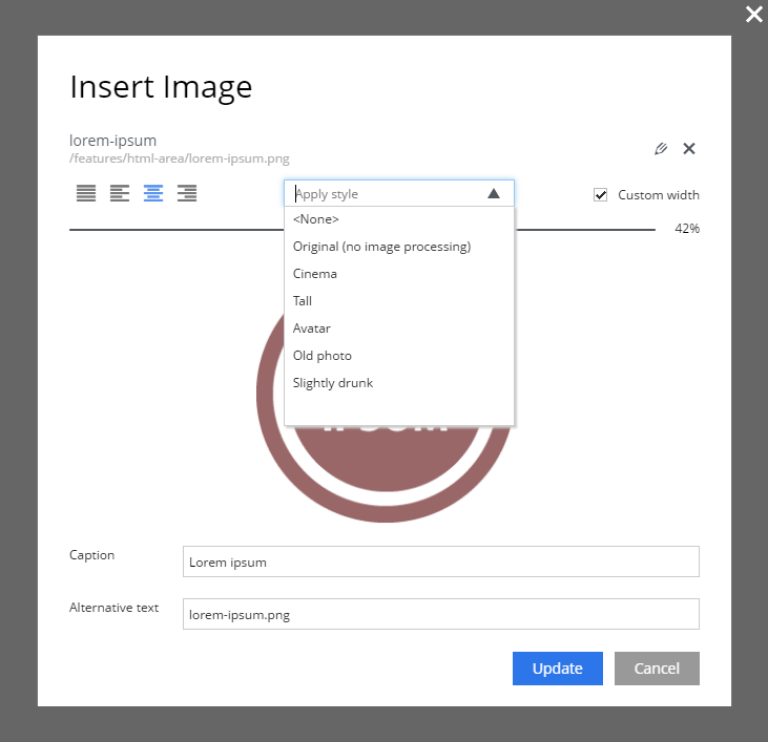
Insert/Edit image
This button opens the Insert Image dialog. An existing image content can be selected from the “Image” selector, or a new image can be uploaded by clicking the upload button. Once an image is selected, additional formatting options appear. The image can be floated to the left or right so that text wraps around it. The image can also be centered or set to full width. By checking off “Custom width” you will have an option to set relative width of the image. Additionally, there’s an option to apply defined image styles to the image. Read how to define custom Image Styles below A caption and alt text can be entered at the bottom of the modal dialog.
Insert macro
This button opens the Insert Macro dialog, which contains a selector for choosing a macro. Macros allow all sorts of things to be inserted into the input, such as iframes, YouTube videos, Twitter Tweets, etc. There two built-in macros and others can be added with applications. Once a macro is selected, a form appears with inputs for the macro’s configuration settings.
Insert/Edit Link
This button opens the Insert Link dialog. You can select existing text in the HTML Area before opening the dialog or write it directly inside the dialog. You can link to a content item, external URL, trigger download or a new email.
Unlink
Pressing this button will remove a link from an element.
Table
This button expands a dropdown menu enabling you to insert a new table, manage table properties or add/delete columns/rows in existing table.
Paste text mode
This button allows toggling between "formatted text" (default setting) and "plain text" modes when pasting text into the editor.
Source
This button will open a modal dialog allowing you to manually edit HTML source content of the text editor. For HTML Area input type this button will be placed in the footer of the editor, while for a Text component inside the Page Editor it’s part of the toolbar.
Full screen
This button will open the editor in the full screen mode for more convenient user experience. Not available inside the text component editor.
Custom Image Styles
By default, XP comes with one built-in image style called “Original (no image processing)”. By applying this style to the image, you’ll make sure that the image won’t undergo any processing on the server and will be rendered “as is”.
Custom Image Styles can be defined in your application as described in the CMS section of XP docs.
Custom styles from all the applications added to the site (plus the "Original" style) will be combined into one list inside the dropdown of the Image modal dialog.