Content Localisation
Contents
| Content Localisation has been introduced in Content Studio 3.2 and require XP 7.6.0 or higher |
Localisation in Content Studio is done by utilising advanced concept of Content Layers. A layer is a special type of content project that always has a parent project (or another layer) where it inherits its content from. This inherited content can then be localised to the language of the layer, restructured, renamed or differently sorted. Content in a layer can be created, modified and published as usual.
You can have as many layers as you need: project A in the root can have a child layer B which has a child layer C (and so on). Content changes will be propagated top-down from the project/layer the content was originally changed in, through all the layers down to the bottommost descendant. Synchronisation job will stop propagating changes for a content once it finds a layer where this content has been localised.
With our example above, any content created in A will be automatically created in the child B and the grand-child C. If the content is then modified in B it will stop being synchronised with A, but the new modifications will still be synchronised from B down to C.
The moment an inherited content is modified (localised), it will be "unlinked" from its parent and will no longer be synchronised. If you modify a content in the layer C, it will stop inheriting content changes from the layer B. However, the same content in B still inherits content changes from its parent project A, until it’s localised in B as well.
There are 4 different types of inheritance that are supported independently: content data, sorting, parent and name. This means, for example, that if a child layer B has inherited an entire website from its parent A, you can change sorting order of content items inside this site in B which will stop inheritance only of sorting from A, however inheritance of content data will still continue. Another example, is that you can move a content item from one parent content to another in the layer B, but this content will still be inheriting data changes from A.
Content Layers are using the Content Projects' engine under the hood, which means that each layer has its own content repository, language, read permissions and roles.
Just like projects, layers can be created and managed in the Settings section.
Settings
To create a new layer, click New button in the Settings section and select "Layer" from the modal dialog.
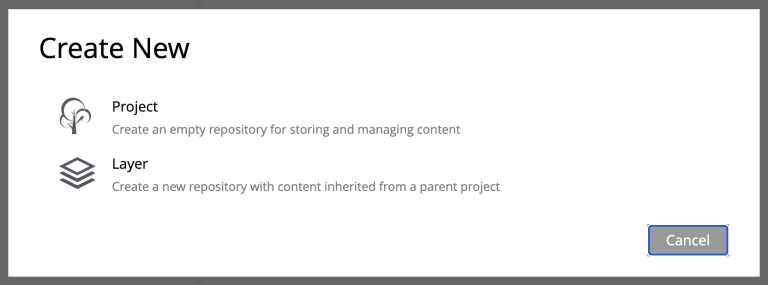
If you have selected a project (or another layer) in the grid before clicking New, you will only have one option (Layer) in the dialog. The dialog will also display that the new layer will be created under the project/layer you’ve selected.

Upon selection, you will be redirected to the New Layer wizard which is very similar to the New Project wizard, although there’s a few key differences.
The New Layer wizard will have a dropdown called "Parent project" for selecting a project/layer where the new layer will be inheriting its content from.
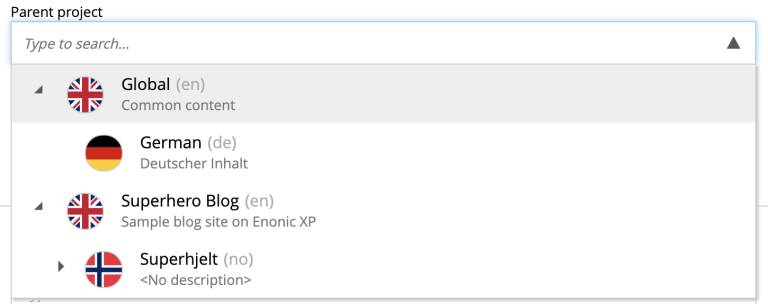
If you have already selected a project/layer in the Settings grid before clicking the New button, the selected project/layer will be preset in the "Parent project" dropdown.

| You will not be able to select or change the parent project/layer once the new layer is created. |
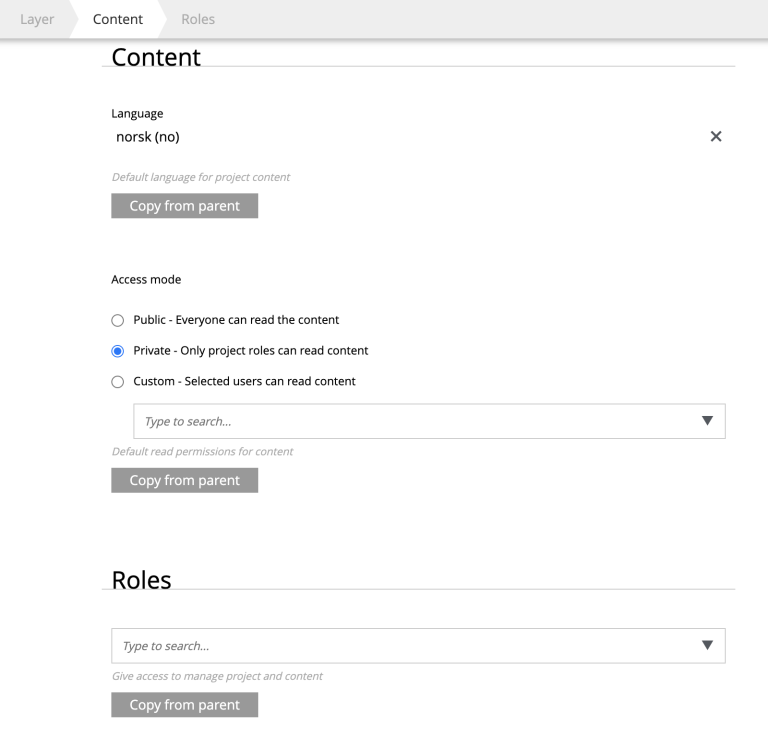
| In the Layer wizard you can copy settings like Language, Access Mode and Roles from the parent project/layer by using the Copy from parent button. If the parent doesn’t have those properties set, or they are the same as in this layer, the button will be disabled. |
Icon of the layer will be automatically set to a flag of the layer’s language. It can be changed by clicking the icon thumbnail and selecting an icon file from your local file system.
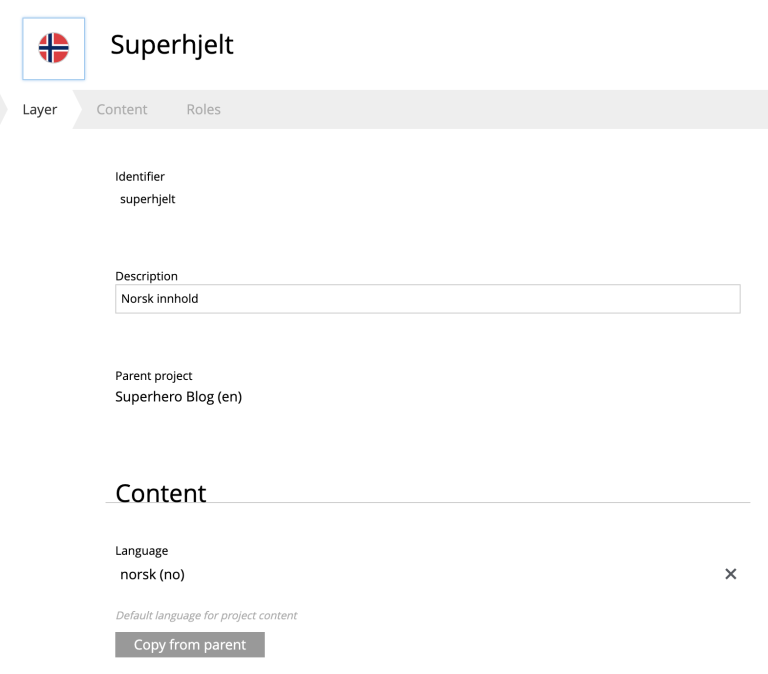
Once the new layer is created, the synchronisation job will kick in and inherit content from the parent project/layer.
Localising inherited content
To navigate between the layers use the same context switch in the header that was implemented for switching between project contexts in XP 7.3.
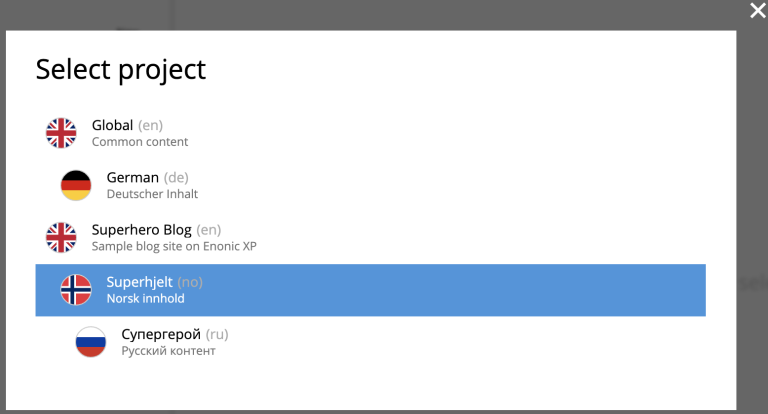
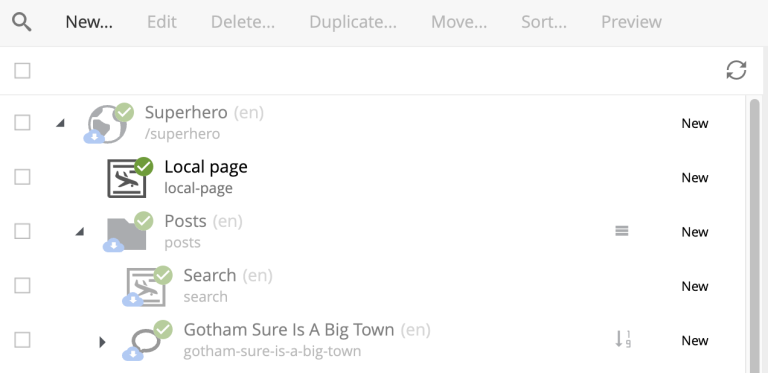
In the Content grid localised content will be greyed out, providing visual difference from a local content manually created directly in this layer.
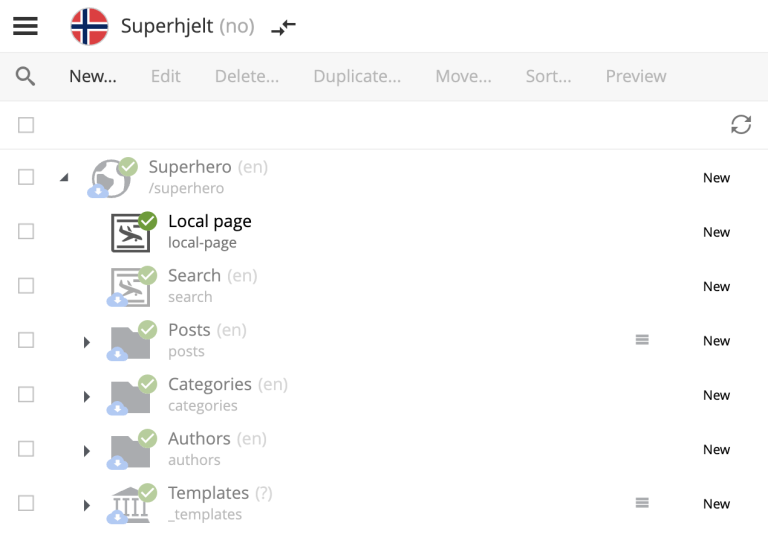
To localise (translate) an inherited content item, select it in the content tree and click Localise button in the Content grid toolbar
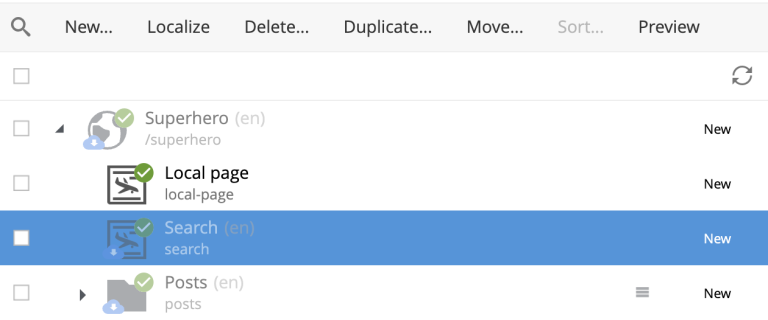
| Edit button is replaced with Localise for inherited content. |
| Language shown in brackets after content’s display name means shows that language of this content is different from language of the current layer. |
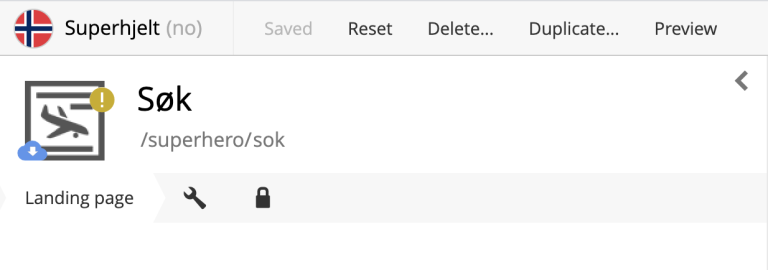
The Localise button will open the Content Wizard for the selected content item and set language of the current layer for the item. You can now translate the content to language of the layer or make any other changes. When you save the changes, the content item will no longer be considered inherited and changes made for this item in the parent project/layer will no longer be synchronised down to this layer.
In the example below, "Search" page from the parent project with English language was localised in the Norwegian layer and translated to "Søk".
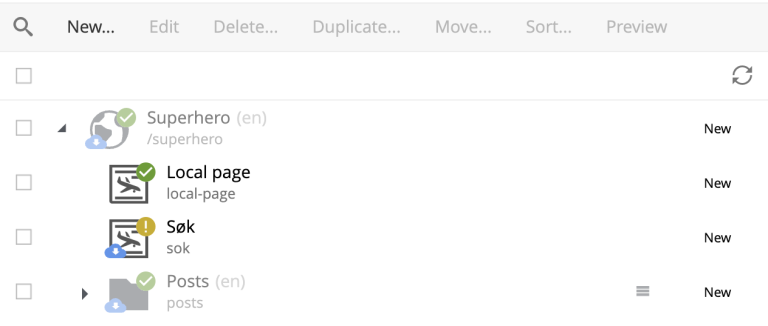
| The purpose of the blue "cloud" icon over the content item icon is to distinguish localised inherited content from local content created directly in this layer (like "Local page" in the example above). |
As mentioned above, it’s possible to rearrange inherited content without localising it. The same goes for sorting. In the example below the "Search" page was moved under "Posts" folder but is still inheriting content changes from the parent project.
You can reset changes made for an inherited item and restore inheritance from the parent level by clicking Reset button in the Content Wizard.
| All changes made to the content item in the current layer will be lost. |
Layers Widget
| The Layers widget is bundled with Content Studio+ application available only for users with Enonic license. |
The Layers widget enables user to see status of a specific content item in all existing layers in the system.
Box of the current layer is highlighted with blue border, and you can see how many layers there are above (Ascendants) and below (Descendants) the current one. Each box has an action button (Localise or Edit for the current layer and Open for other layers) which can be displayed if you expand the box with a left-click.
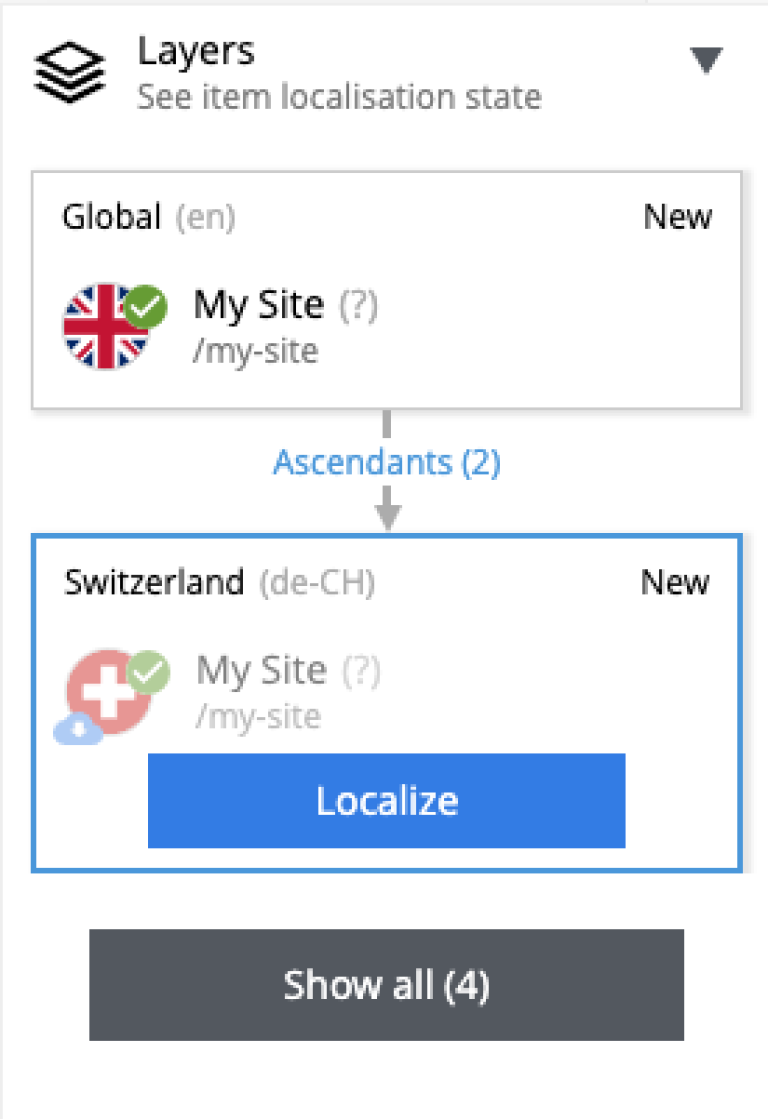
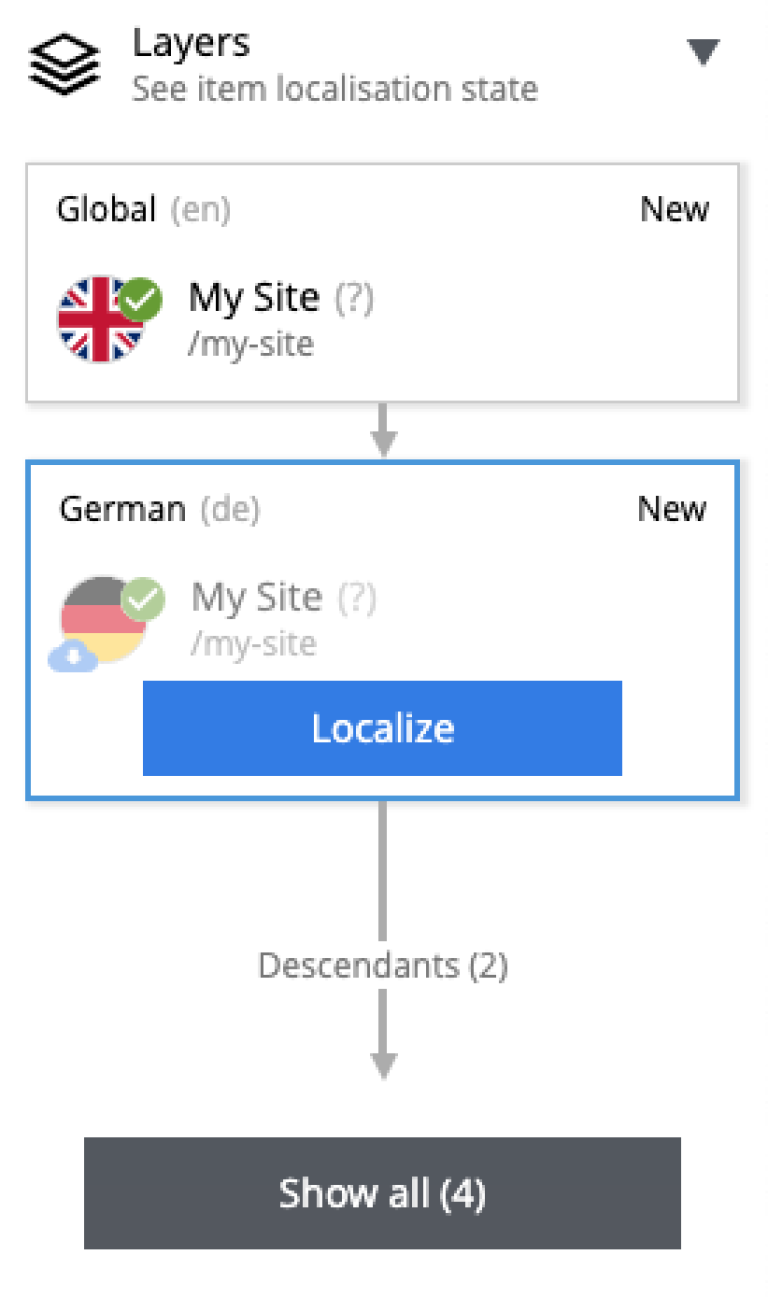
Boxes of parent layers where the content item is not localised are hidden by default and can be displayed by clicking on the Ascendants link.
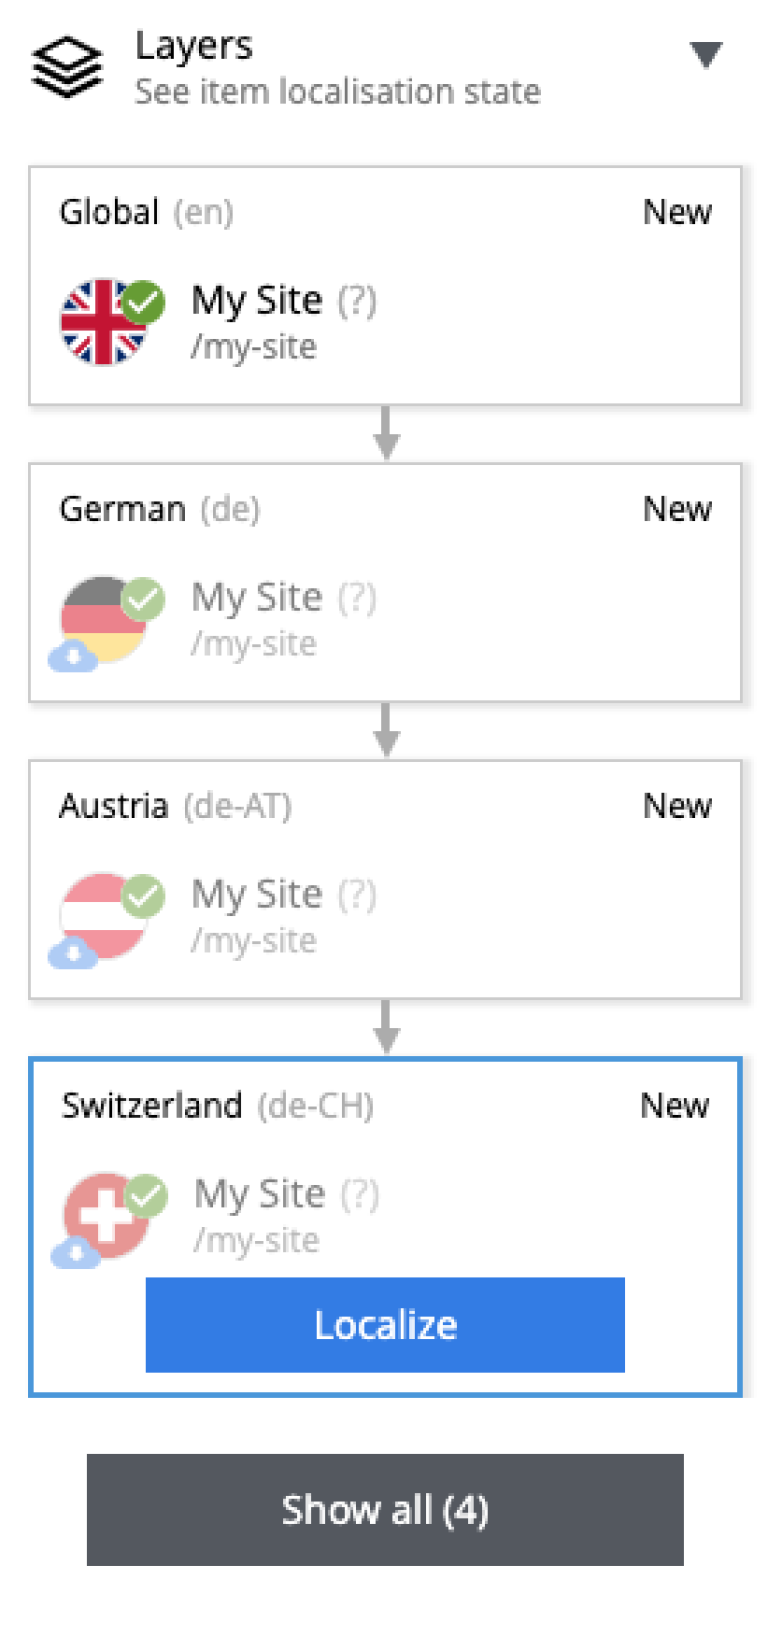
| You can localise content in the current layer directly from the widget. |
Show all button at the bottom of the widget displays the total number of layers where this item exists. This number can be different from tbe number of boxes displayed in the widget, since the widget only displays the branch of the current layer. To see status of the content item in the entire tree of layers click the button to open the modal dialog.
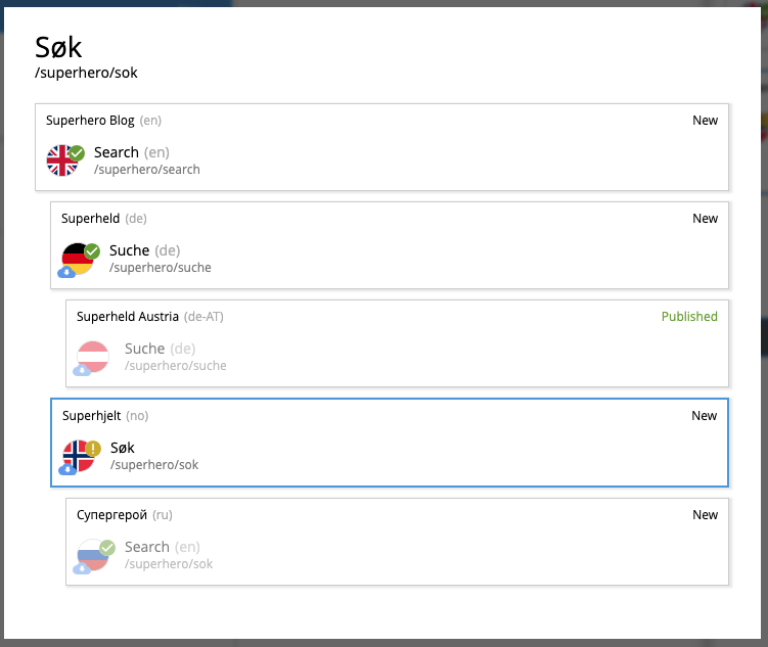
Just like with the Layers widget, you can expand layer boxes in this dialog to either localise or edit the content in the current layer, or open it in other layers (given your user has sufficient permissions to access the layer).
| Read about the high-level concept of Content Layers here. |