Content studio and content creation
Contents
In this chapter, we’ll give a short introduction to Content Studio, an app that serves as the main content management interface for XP, providing editors an efficient way of creating, and curating content without technical skills.
For a more comprehensive overview, watch this short video on Content Studio basics or head to the Content Studio reference documentation.
| The tasks and examples in this chapter are based on work done in previous chapters (starting with the sandboxes chapter). If you want to follow along with the examples, make sure you’re all caught up. |
Content Studio
Content Studio should already have been installed, and can be launched from XP Admin: XP menu → Content Studio.
If you wish to install or update an application, this can be done from XP menu → Applications. |
Task: your first project
When visiting Content Studio for the first time, you’ll be welcomed with the following dialog:
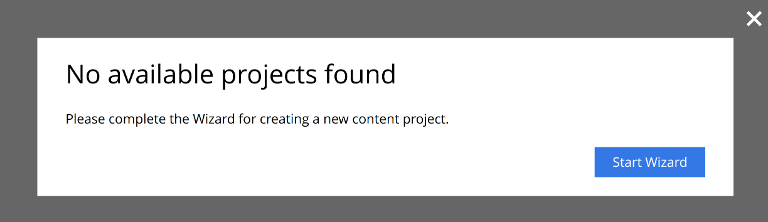
Content Studio manages content, and content is organized in independent repositories, which are called content projects, or simply as projects.
A project offer individual access control and permissions, as well as other settings to toggle features and language(s).
| Privileged users can manage projects via Content Studio settings. |
Now, head back to the project wizard dialog to create your first project:
Assiging an app to a project
Content Studio is a powerful app with a lot of features, and one of its main goal is to provide an awesome user experience for creating and curating content.
Content is defined through content types (a concept we’ll introduce in the next section), which are defined and installed via applications.
Therefore, if we want to enable Content Studio to manage a specific type of content, we need to access content studio in a project which has an app assigned to it, and in this app, this specific content should defined via a content type.
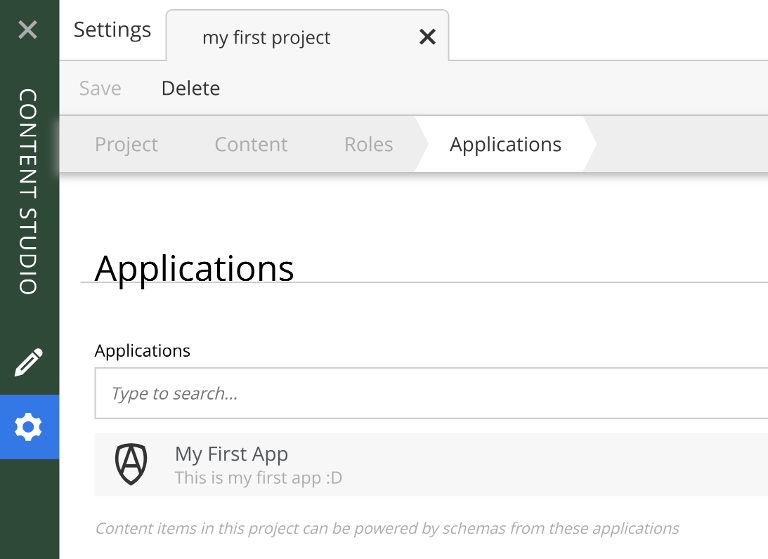
With all this in mind, note that one of the last steps on the previous creation wizard was to assign your app to the project. If you followed along, you should have your app assigned to the your first project, and in case you missed it, no worries, let’s assign it to the created project:
-
On the green widget sidebar, click on settings
-
Double click on the project you just created to edit it
-
Scroll down and on the "Applications" section, select the application you’ve previously deployed to this sandbox
Apps vs projects
We’ve reached a certain point in this guide where its worth giving a section to reiterate the differences between:
-
XP project (app folder and files)
-
XP app
-
Content Studio project
An XP project folder is the folder containing the files needed in order to create an XP app. The folder was automatically generated from the Vanilla starter when we ran the command: enonic project create.
The XP app is the compiled file that is generated when you run the command enonic project build on the project root folder.
A Content Project, as explained above, is a place you can store content. Content can be created based on the apps you assign to a project.
In summary, you can have the following flow in mind:
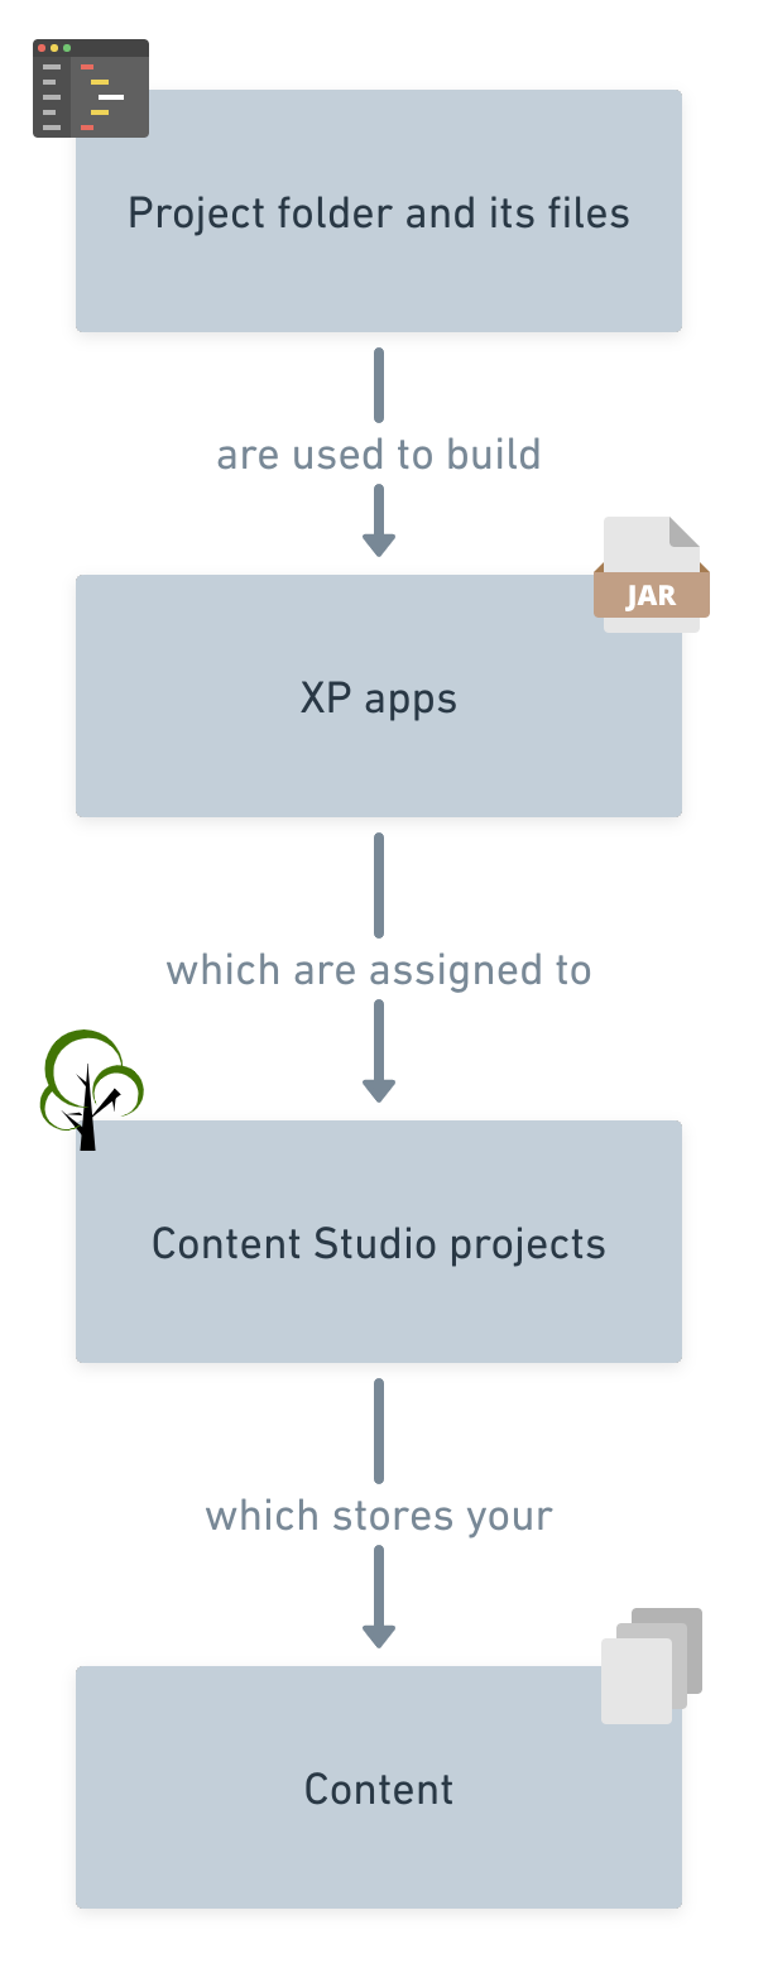
| This flow is super simplified and there are a lot of details to each one of those boxes, but it should be sufficient to explain the main difference between those ideas and how they connect to eachother. |
From now on, we’ll use the term "project" to refer to both XP app project and Content projects, as they can be easily distinguished based on the context.
We believe that this will help to avoid any confusion from your side. Now, back to work!
What are content types?
Every content item created in Enonic has a specific content type. The content type defines the data fields (aka properties) that piece of content can and must have.
A JavaScript analogy: If a content type is a JSON schema, then the content item is a JSON that matches the schema. Actually, this is not so far from how things actually work - as you will see later!
| As mentioned before, content types are defined and installed via applications. If you unassign an application from the project you’re currently working on, you’ll no longer be able to create or edit content of that type. |
Task: your first content type
Now that we know what a content type is, let’s look at how we create them.
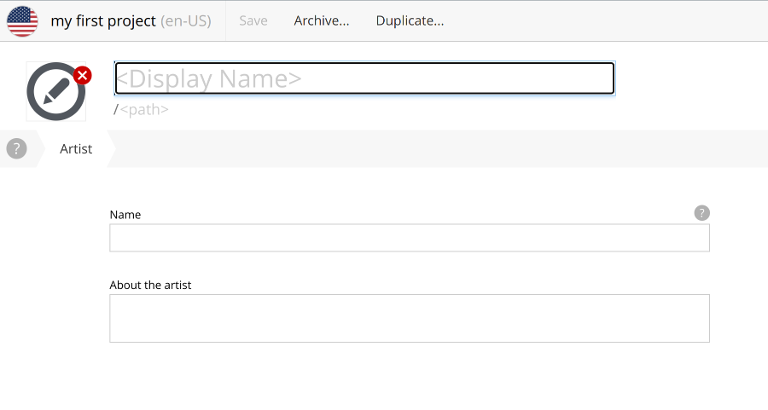
We’ll create a content type that contains two input fields. When shown in Content Studio, it will look like this:
Back to your preferred editor, make sure you’re in the project folder (myapp/) that you created in a previous chapter. All paths will be relative to this root folder.
-
Create a directory for content types:
src/main/resources/site/content-types/. XP is quite particular about project folder structure, so you need to put content types right where it expects to find them. -
Create a directory called
artistin the newly createdcontent-types/directory. XP expects all content types to have their own directories. -
Within the
artistdirectory, create a file calledartist.xml. The file name must match the directory name (except for the file extension). The full path to the content type from the project root should besrc/main/resources/site/content-types/artist/artist.xml. -
In the
artist.xmlfile, place the following content:The 'Artist' content type<content-type> <display-name>Artist</display-name> (1) <description>Information about an artist</description> (2) <super-type>base:structured</super-type> <form> (3) <input name="name" type="TextLine"> (4) <label>Name</label> <help-text> The artist's name (if different from their professional moniker). </help-text> </input> <input type="TextArea" name="about"> <label>About the artist</label> </input> </form> </content-type>1 This is what will be displayed in Content Studio when creating new content. 2 This is an optional description, but it is still recommended to add, as it will make life easier for your editors. 3 This is where we specify which fields (aka inputs) this content type shall have, basically the form, as seen in Content Studio. 4 The typeattribute specifies what kind of input input the user will see in Content Studio, and thelabelspecifies how the input will be labeled.Content types also have a large number of other, optional fields that we won’t get into here. If you’d like to learn more about this, consult the reference documentation. XP’s inputelements are not the same as HTMLinputelements. To read more about it, see the chapter on input types . -
Now run:
enonic project devThis command will watch for changes under myapp/ and redeploy as needed.
Make sure you’re already running your sandbox with the --dev flag in another terminal, otherwise the sandbox will be started in detached mode, so you’ll lose logs. More on CLI’s dev command here. |
If everything goes well, you should see your sandbox logs update now. And that’s the basics of creating new content types.
Next, let’s go back to Content Studio and create some actual content!
Task: your first content creation
Go back to content studio and make sure you are on the project you’ve created on the beginning of this chapter.
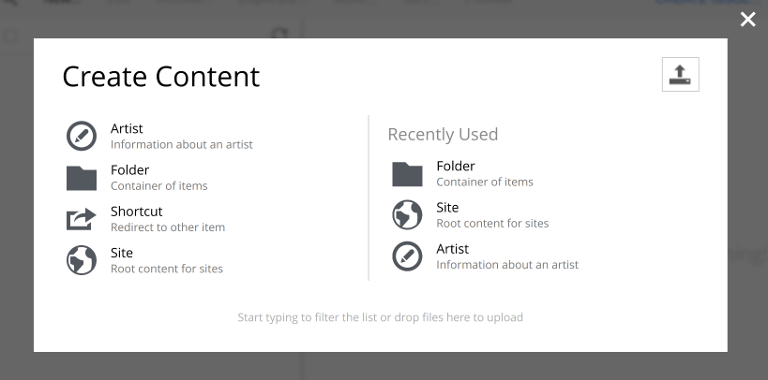
Press New … to open a new dialog. You should see a content type called Artist.
| This content type is only visible there because of the update we did to the app, i.e, your app is responsible to be delivering the artist definition which content studio can use to actually create content. |
However, before we start creating artists, let’s create a folder.
Since we’ll be using this project in the coming chapters with more content types, having some hierarchy will make things easier. Create a new folder and call it "artists".
Next, let’s create a few artists to get used to the workflow. We’ll start with Cardi B.
-
Select the artists folder (make sure it’s highlighted).
-
Create a new artist.
-
Give it the display name "Cardi B".
-
Use these details to fill in the form:
Artist details (Cardi B on Wikipedia)- Name
-
Belcalis Marlenis Almánzar
- About
-
Belcalis Marlenis Almánzar (born October 11, 1992), known professionally as Cardi B, is an American rapper and songwriter.
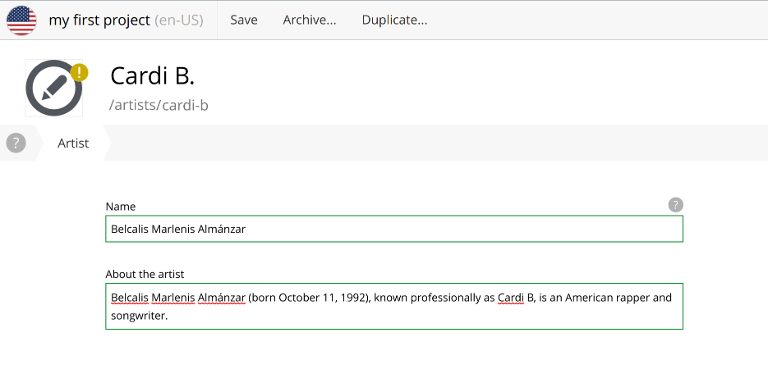 Figure 6. The content form filled out for the artist "Cardi B"
 -
Again, save and close the tab. Now repeat this process for these next two entries. Be aware that Content Studio lets you nest content, so if you try and create new content when "Cardi B" is selected in the hierarchy, it’ll nest the new content under "Cardi B". In this case, though, we want the artists to be nested directly under the current folder, so make sure "artists" folder is selected when you create new content.
Missy Elliott (Missy Elliott on Wikipedia)- Name
-
Melissa Arnette Elliott
- About
-
Melissa Arnette Elliott (born July 1, 1971) is an American rapper, singer, songwriter, and record producer.
P!nk (P!nk on Wikipedia)- Name
-
Alecia Beth Moore
- About
-
Alecia Beth Moore (born September 8, 1979), known professionally as Pink (stylized as P!nk), is an American singer and songwriter.
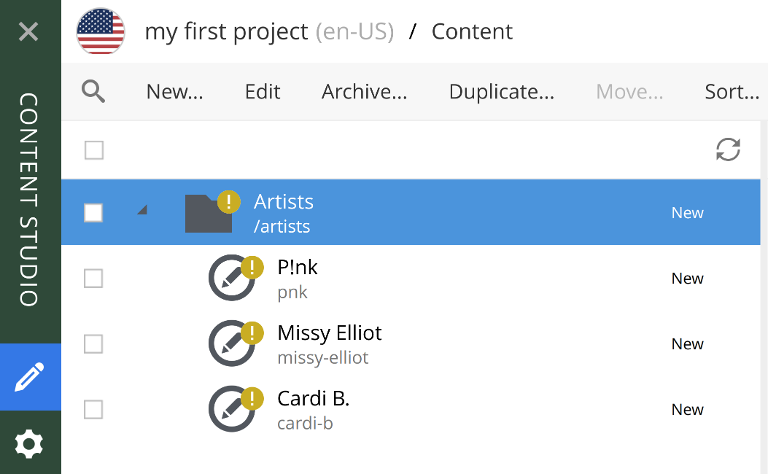
With these artists created, your content hierarchy should now list the artists folder and the three artists.
Content type validation
Enonic provides XML Schema Definitions (XSDs) for text editor integration and validation of your XML schemas. To use it, add the attribute xmlns, xmlns:xsi, and xsi:schemaLocation to your content types as shown below:
<?xml version="1.0" encoding="utf-8"?>
<content-type
    xmlns="urn:enonic:xp:model:1.0"
    xmlns:xsi="http://www.w3.org/2001/XMLSchema-instance"
    xsi:schemaLocation="urn:enonic:xp:model:1.0 https://raw.githubusercontent.com/enonic/xp/master/modules/core/core-api/src/main/resources/META-INF/xsd/model.xsd">
  <display-name>Content type display name</display-name>

  <!-- rest of content elided for brevity -->

</content-type>
Note that in-editor schema validation depends on whether your text editor supports validating against XSD schemas or not. If your editor doesn’t support it out of the box, it may be available via a Language Server Protocol (LSP) client.
Publishing your content
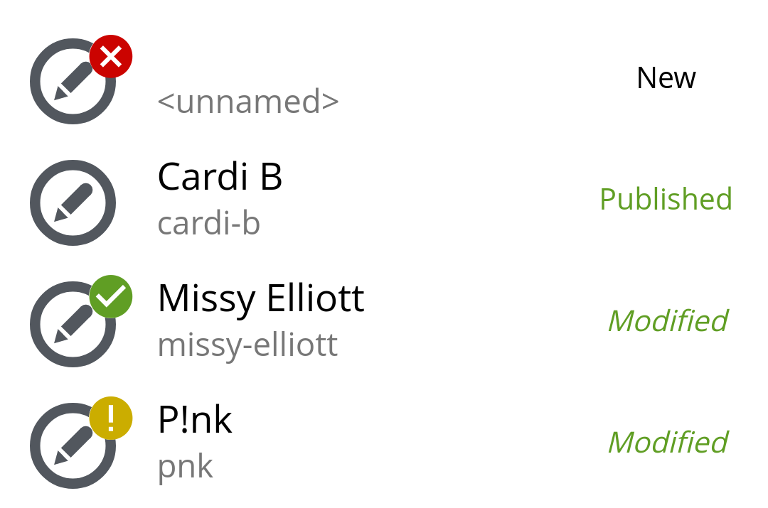
You might have noticed the yellow circles with exclamation marks displayed on all the content we’ve been working on, both in the wizard and in the content grid. This is how Content Studio indicates whether something is published or not and whether there are any errors with it. There are four states:
- Error (red circle with a cross)
-
This indicates that there is something wrong with your content. Because XP uses structured content it can also validate content as it is created. If something doesn’t conform to the specified schema (for example: a required field has no value), it will fail to validate and be marked with this symbol.
- Work in progress (yellow circle with exclamation mark)
-
This symbol indicates that this piece of content has unpublished changes. That could be either because this is new content that has never been published, or it could be because there have been changes to this piece of content since it was last published.
- Ready for publishing (green circle with a check mark)
-
This piece of content is marked as ready to be published.
- Published (no icon)
-
This piece of content is published and has not been modified since.
So what does it mean for content to be published? It doesn’t make much of a difference to us at this stage of the tutorial, but when you’re working on production systems, it’s very important. So let’s talk briefly about Content Studio’s branching and publishing system.
Branches
Content Studio operates with two branches:
-
draft branch, where you work and edit;
-
master branch, holds the published content.
When you work on something in Content Studio, you’re working on the draft branch.
When you publish something, the master branch gets updated with the new content.
When you edit that same piece of content in Content Studio again, you’re back to working on the draft, and you have to publish it to see changes to the published content.
To publish a piece of content, right click it and select "Publish".
| You can also publish a piece of content by using the keyboard shortcut Ctrl+Alt+P/control+option+P. |
Summary
You’ve been introduced to Content Studio, content projects and content types, and how to create and publish content.
Next up, we’ll have a look at what is going on under the hood.