Sets
Contents
XP also offers ways for you to group inputs, both visually and structurally. Collectively, these are known as sets. This chapter explains what they are and how to use them.
| The tasks and examples in this chapter are based on work done in previous chapters (starting with the sandboxes chapter). If you want to follow along with the examples, make sure you’re all caught up. |
Field sets
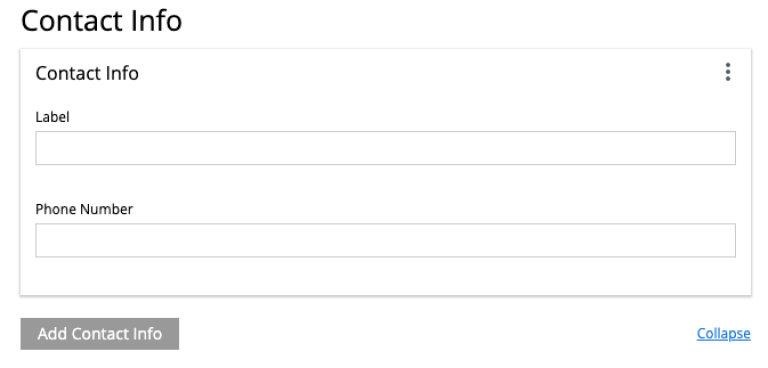
Field sets are the simplest form of sets XP offers… they group inputs visually and have no effect on the data model.
In a schema, the field set element wraps the input elements it should contain.
To create a field set that contains a TextLine and a TextArea, the markup would look like this:
<field-set>
  <label>FieldSet</label>
  <items> (1)
    <input type="TextLine" name="fieldSetTextLine">
      <label>Heading</label>
    </input>
    <input type="TextArea" name="fieldSetTextArea">
      <label>Text</label>
      <help-text>Write something? 🖊️</help-text>
    </input>
  </items>
</field-set>| 1 | Use the items element place other inputs inside the field set. |

Item sets
Item sets also allow you to group input fields, but as opposed to field sets, item sets group values both visually and on a structural level. Item sets can be arbitrarily nested.
-
The item set documentation does a standout job of explaining exactly how they work, so check that out for an overview.
Option sets
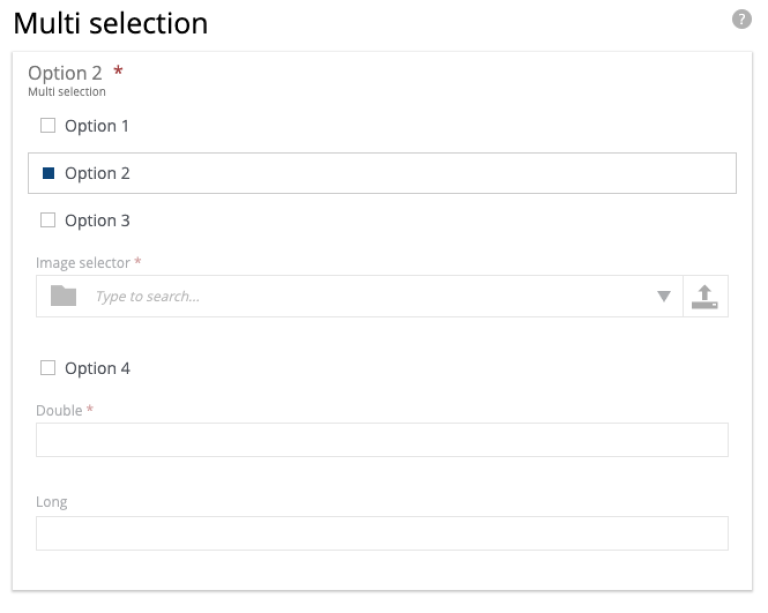
Option sets enable editors (working in Content Studio) to choose from a set of predefined options. This is similar to the ComboBox element, but option sets also allow options to carry extra data.
Option sets where users can select only one of a number of options are known as single-select option sets. You can also use a multi-select option set if the user should be able to select multiple options simultaneously. We’ll look at this too in a task.
-
The option set reference documentation provides a good overview (with accompanying pictures) of how option sets work.
Mixins
Mixins facilitate a form of reuse in XP. They allow you to reuse fields across several content types.
They won’t look or behave any different from if you manually typed the same fields into multiple content types, but it lets you keep them in sync.
Mixins go in the /src/main/resources/site/mixins directory, following the same naming pattern as the other schemas we’ve seen (<mixin-name>/<mixin-name>.xml).
We’ll see them in the upcoming task, but if you want to learn more about them, consult the mixins reference documentation.
Tasks
So far we’ve theoretically presented sets. For a proper understanding of those concepts, we’ll introduce some tasks. Make sure to follow along in order to strengthen your knowledge on this subject.
Adding an item set to Artist
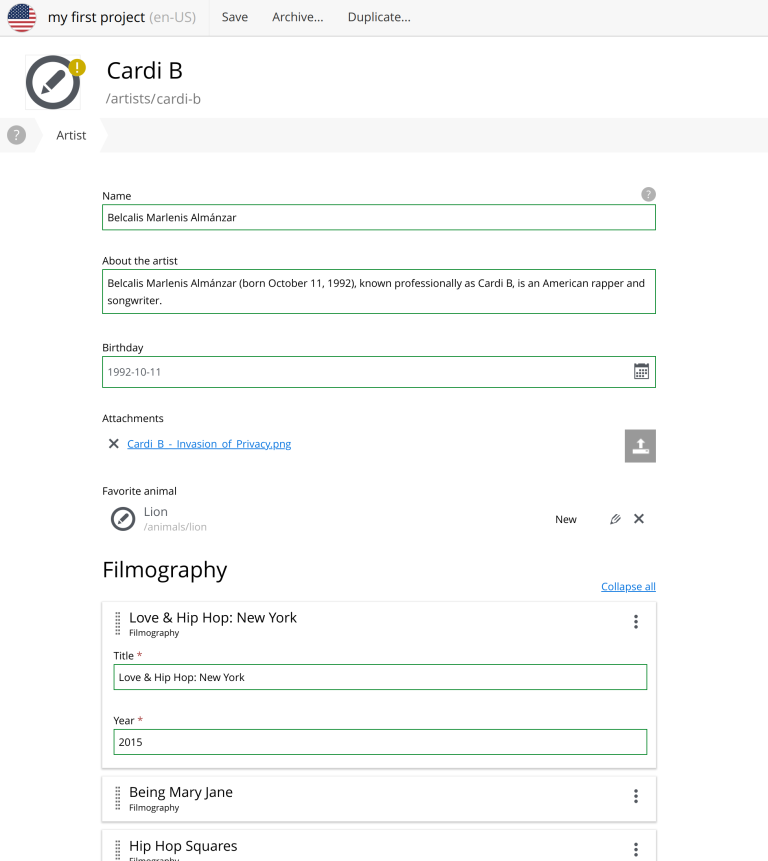
Let’s add an item set to the Artist. The goal will be to add a Filmography item set, featuring where and when a specific artist was featured in a movie.
To add an item set, use it as you would any other input type: place it within the form element of a content type.
If we add it to the Artist content type, it’d look something like this:
<content-type>
  <display-name>Artist</display-name>
  <description>A description of an artist</description>
  <super-type>base:structured</super-type>
  <form>

    <!-- Other fields elided for brevity -->

    <item-set name="filmography">
      <label>Filmography</label>
      <occurrences minimum="0" maximum="0" />
      <items> (1)
        <input name="title" type="TextLine">
          <label>Title</label>
          <occurrences minimum="1" maximum="1" />
        </input>
        <input name="year" type="Double">
            <label>Year</label>
            <occurrences minimum="1" maximum="1" />
            <config>
              <min>0</min>
            </config>
        </input>
      </items>
    </item-set>

  </form>
</content-type>| 1 | Much like with field sets, use the items element to nest inputs within the item set. |
Note that the remaining fields of the form have been left out in the above example.
With this new item set added to the Artist content type, make sure to add some data:
Adding an option set to Animal
In this section, we’ll use option sets to add some extra data to Animal data type. The goal is:
-
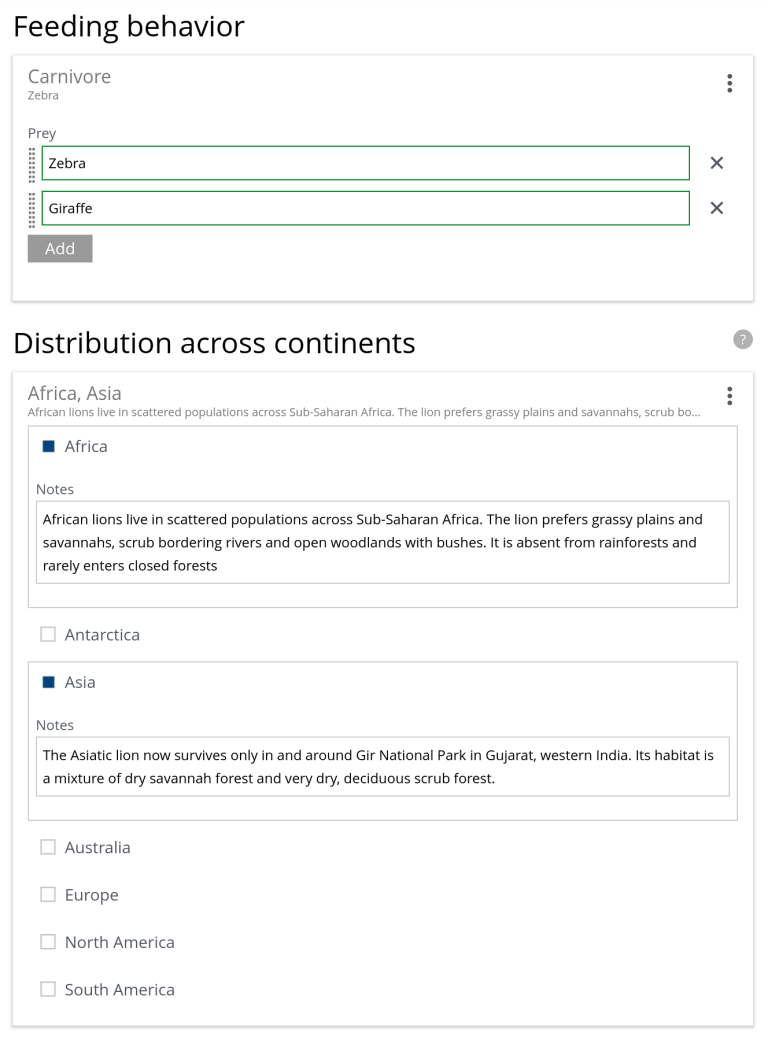
Add an option set for feeding behavior. Intentionally simplified, this option set should indicate whether the animal is an herbivore or a carnivore. If it is a carnivore, it should also let the user add a list of prey.
-
Create a mixin for distribution options. Because each distribution option should have the same fields, create a mixin to reuse it.
-
Add an option for distribution across continents. The user should be able to select as many as they want from the 7 continents to indicate where the animal lives. Each option should have an associated
TextAreacalled "notes", where the user can add more data for each option.
Single-select: dietary data
Open your animal content type and add a single-select option set. As before, we use option sets as we would any other input type.
Animal content type with feeding behavior
<?xml version="1.0" encoding="utf-8"?>
<content-type>
  <display-name>Animal</display-name>
  <description>An animal that lives on planet Earth</description>
  <super-type>base:structured</super-type>
  <form>

    <!-- other fields elided for brevity -->

    <option-set name="feedingBehavior">
      <label>Feeding behavior</label>
      <options minimum="1" maximum="1"> (1)

        <option name="herbivore"> (2)
          <help-text>Subsists primarily on plant material.</help-text>
          <label>Herbivore</label>
        </option>

        <option name="carnivore"> (3)
          <label>Carnivore</label>
          <help-text>Subsists primarily on animal tissue and meat.</help-text>
          <items>
            <input name="prey" type="TextLine">
              <label>Prey</label>
              <occurrences minimum="0" maximum="0" />
            </input>
          </items>
        </option>

      </options>
    </option-set>

  </form>
</content-type>| 1 | This specifies that if you add feeding behavior, you must select one of the options, and you can not select more than one. |
| 2 | The herbivore option has no associated data, so it consists solely of a label. |
| 3 | The carnivore option allows you to optionally specify prey for the animal. |
Multi-select: distribution
-
Start by creating the mixin. Call it
distributionDataand place it insrc/main/resources/site/mixins/distributionData/distributionData.xml. It only contains a text area:ThedistributionDatamixin<mixin> <display-name>Distribution data</display-name> <form> <input type="TextArea" name="notes"> <label>Notes</label> </input> </form> </mixin> -
Moving onto animals, add the multi-select option set.
TheAnimalcontent type with distribution data<?xml version="1.0" encoding="utf-8"?> <content-type> <display-name>Animal</display-name> <description>An animal that lives on planet Earth</description> <super-type>base:structured</super-type> <form> <!-- other fields elided for brevity --> <option-set name="distribution"> <label>Distribution across continents</label> <help-text>Continents where the animal can be found in the wild</help-text> <options minimum="0" maximum="0"> (1) <option name="africa"> <label>Africa</label> <items> <mixin name="distributionData" /> </items> </option> <option name="antarctica"> <label>Antarctica</label> <items> <mixin name="distributionData" /> </items> </option> <option name="asia"> <label>Asia</label> <items> <mixin name="distributionData" /> </items> </option> <option name="australia"> <label>Australia</label> <items> <mixin name="distributionData" /> </items> </option> <option name="europe"> <label>Europe</label> <items> <mixin name="distributionData" /> </items> </option> <option name="northAmerica"> <label>North America</label> <items> <mixin name="distributionData" /> </items> </option> <option name="southAmerica"> <label>South America</label> <items> <mixin name="distributionData" /> </items> </option> </options> </option-set> </form> </content-type>
| 1 | This specifies that you can add as many distributions as you want. |
The use of the mixin helps us both reduce duplication and keep all options in sync. If we wanted to add more data, such as current population, we would only have to add it to the mixin to have it duplicate to all distributions. |
Result
With the new option sets and added, the Lion entry could look something like this:
Querying item sets and option sets
Let’s look at how option and item sets work in headless contexts.
Item sets
Getting item sets via GraphQL is not much different than anything else we’ve seen:
{
  guillotine {
    queryDsl(
      query: {
        boolean: {
          must: [
            {
              term: {
                field: "type",
                value: {
                  string: "com.example.myapp:artist"
                }
              }
            },
            {
              term: {
                field: "displayName",
                value: {
                  string: "Cardi B"
                }
              }
            }
          ]
        }

      }
    ) {
      displayName
      ... on com_example_myapp_Artist {
        data {
          filmography {
            title
            year
          }
        }
      }
    }
  }
}
With some data added for Cardi B, you’d get a result like this:
{
  "data": {
    "guillotine": {
      "queryDsl": [
        {
          "displayName": "Cardi B",
          "data": {
            "filmography": [
              {
                "title": "Love & Hip Hop: New York",
                "year": 2015
              },
              {
                "title": "Being Mary Jane",
                "year": 2017
              },
              {
                "title": "Hip Hop Squares",
                "year": 2017
              },
              {
                "title": "Saturday Night Live",
                "year": 2018
              },
              {
                "title": "The Tonight Show Starring Jimmy Fallon",
                "year": 2018
              },
              {
                "title": "Untold Stories of Hip Hop",
                "year": 2019
              },
              {
                "title": "Rhythm + Flow",
                "year": 2019
              }
            ]
          }
        }
      ]
    }
  }
}
Option sets
When fetching option set data, you can get the list of currently selected items and each item separately.
{
  guillotine {
    queryDsl(
      query: {
        boolean: {
          must: [
            {
              term: {
                field: "type",
                value: {
                  string: "com.example.myapp:animal"
                }
              }
            },
            {
              term: {
                field: "displayName",
                value: {
                  string: "Lion"
                }
              }
            }
          ]
        }

      }
    ) {
      displayName
      ... on com_example_myapp_Animal {
        data {
          feedingBehavior {
            _selected (1)
            carnivore { (2)
              prey
            }
          }
          distribution {
            _selected
            africa {
              notes
            }
          }
        }
      }
    }
  }
}| 1 | This provides data about what the animals selected feeding behavior is. |
| 2 | This gives more data about a particular option |
{
  "data": {
    "guillotine": {
      "queryDsl": [
        {
          "displayName": "Lion",
          "data": {
            "feedingBehavior": {
              "_selected": "carnivore",
              "carnivore": {
                "prey": [
                  "Zebra",
                  "Giraffe"
                ]
              }
            },
            "distribution": {
              "_selected": [
                "africa",
                "asia"
              ],
              "africa": {
                "notes": "African lions live in scattered populations across Sub-Saharan Africa. The lion prefers grassy plains and savannahs, scrub bordering rivers and open woodland with bushes. It is absent from rainforests and rarely enters closed forests."
              }
            }
          }
        }
      ]
    }
  }
}