Rich text
Contents
If you want to work with rich text, HtmlArea is the input type to go.
This input type offers some very powerful editing capabilities and a lot of configuration options.
This whole chapter is dedicated to the HtmlArea input type and the editor used to define its data.
The user-oriented documentation of the Rich text editor can be found in the Content Studio docs.
| The tasks and examples in this chapter are based on work done in previous chapters (starting with the sandboxes chapter). If you want to follow along with the examples, make sure you’re all caught up. |
Overview
The HtmlArea input type gives you a multi-line input field with rich formatting options, much like what you’re used to from your favorite word processor. It supports text formatting and justification, lists, links, and even lets you insert images.
You can configure the HtmlArea to be exactly what you want by dictating what formatting tools to include or exclude (the include and exclude attributes, respectively), by what heading levels are allowed (allowedHeadings), and by giving it a default value (default).
Additionally, the HtmlArea supports the use of macros, giving you the ability to insert prefabricated rich components into your markup.
HtmlArea include and exclude
We can use the HtmlArea’s config section to specify which rich text controls should be available when editing. Using a combination of the include and exclude tags, we can customize the input’s appearance.
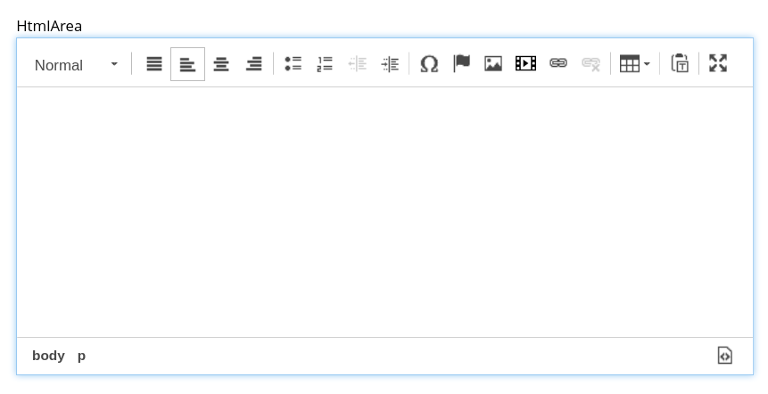
By default, it includes a limited, but useful selection of tools at your disposal. Using <include>*</include> as an option is the same as including the default tools.
<input type="HtmlArea" name="everything">
  <label>HtmlArea</label>
</input>
If you want to exclude all controls, use <exclude>*</exclude>:
<input type="HtmlArea" name="nothing">
  <label>HtmlArea with exclude: *</label>
  <config>
    <exclude>*</exclude>
  </config>
</input>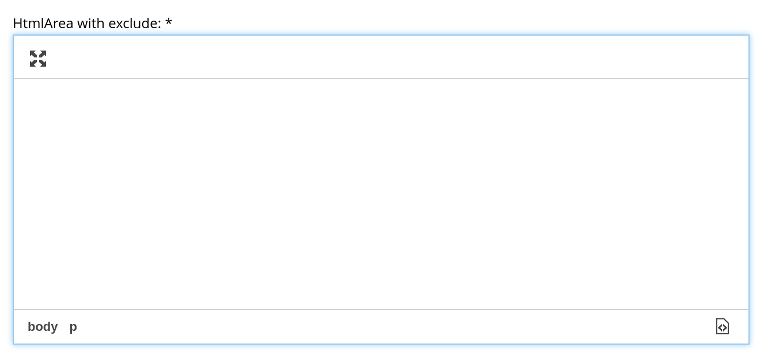
<exclude>*</exclude> and a selection of tools.
Finally, if you want to exclude most tools, but not all, you can exclude all and then add back in the ones you want:
<input type="HtmlArea" name="something">
  <label>HtmlArea with some controls</label>
  <config>
    <exclude>*</exclude>
    <include>Format | Bold Italic Underline | JustifyBlock
    JustifyLeft JustifyCenter JustifyRight | HorizontalRule Blockquote</include>
  </config>
</input>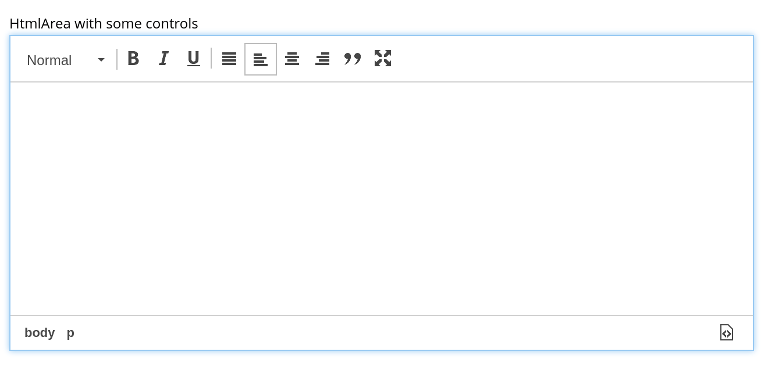
<exclude>*</exclude>
As introduced in the beginning, for a full overview of the available text tools and HtmlArea configuration options, visit the HtmlArea input type reference docs.
Task: Animal description
Let’s add a rich-text description field to the animal content type. The input should be optional and have at most a single occurrence. You can include any editor tools you want, but it must at least have the Link ,Image and Macro tools, as we’ll be using these later. Otherwise, configure it as you want.
Your content type should now look something like this:
<?xml version="1.0" encoding="utf-8"?>
<content-type>
  <display-name>Animal</display-name>
  <description>An animal that lives on planet Earth</description>
  <super-type>base:structured</super-type>
  <form>

    <!-- other fields elided for brevity -->

    <input name="description" type="HtmlArea">
      <label>Description</label>
      <help-text>
        Describe the animal. Where its habitats are, what it eats, etc.
      </help-text>
      <config>
        <exclude>*</exclude>
        <include>Format Link Macro Image</include>
      </config>
    </input>

  </form>
</content-type>
With the new content type deployed, you are ready to continue with further tasks we’ll introduce in next sections.
Links
In addition to good old URLs, the Rich text editor provides a more powerful way of creating links, in which you can:
-
Reference other content items (possbily passing query parameters);
-
If the referenced content is of type media, you can set a specific link to: open the file, directly download the file, or treat it as a regular content;
-
Insert url links of type: https, http, ftp, cel or relative;
An important feature, is that when creating internal links (content or media links), XP will save references to the target items, similar to how the ContentSelector works. This is useful when looking for usage and dependencies between content items later.
| Because links are created using the item’s unique id. It is perfectly safe to move items around in the tree structure, or change it’s path name. The links will not break. |
Task: Internal link
In this task, you’ll create an internal link to another animal.
Create a new animal, "Lynx".
-
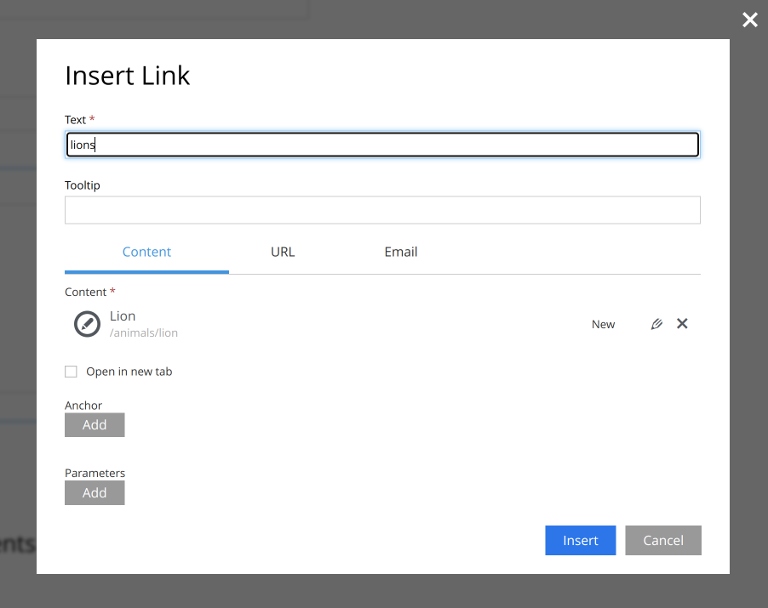
In the
Descriptionfield, type some text, i.e. "Lynx are cats, just like lions". Select the "lions" text and click "insert link" in the toolbar.You can also use ctrl+K to insert the link. -
You’ll be greeted by the "Insert link" dialog: .Choose the content tab, and select the previously created "Lion" as the target item
When done, save the item - but keep the tab open to complete the upcoming tasks.
Images
With the image tool enabled, you insert an image anywhere within your document. During the insert process, you may customize the image further.
The following options are available: Caption, alt text, change the image’s justification, and apply a predefined image styles.
Task: Animal pictures
Try out the image controls that Content Studio give you by uploading a picture and seeing what you can do with it.
We looked at editing images in the input types chapter, but when inserting images in the HtmlArea, you also have something called "image styles", which we’ll have a look at now.
Continue editing the "Lynx" content created in the previous task.
-
Insert an image below the existing text. Use the "insert image" button in the toolbar.
 Figure 4. The toolbar with the image tool highlighted
 -
You’ll be greeted by the "insert image" dialog:
 Figure 5. The HtmlArea insert image dialog. Photo by Zdeněk Macháček
 -
When accessing the "image styles" dropdown, you’ll find that it’s only got two options and neither of them seem to do much. To make this more exciting, let’s also create a custom image style.
In your app, add a new file:
src/main/resources/site/styles.xml<styles> <image name="square-grayscale"> <display-name>Grayscale</display-name> <aspect-ratio>1:1</aspect-ratio> (1) <filter>hsbcolorize(0x000000); grayscale(); border(6, 0x000000)</filter> (2) </image> </styles>1 The aspect ratio controls how the image is displayed. 1:1 makes the image square. 2 The filters add a grayscale effect and then a border The styles reference doc has more information on how you can style your images, so go check it out for a deeper dive. -
With this style picked up by XP, you’ll have the "Grayscale" option available in the image styles dropdown. Select it to apply it to the image and update your image.
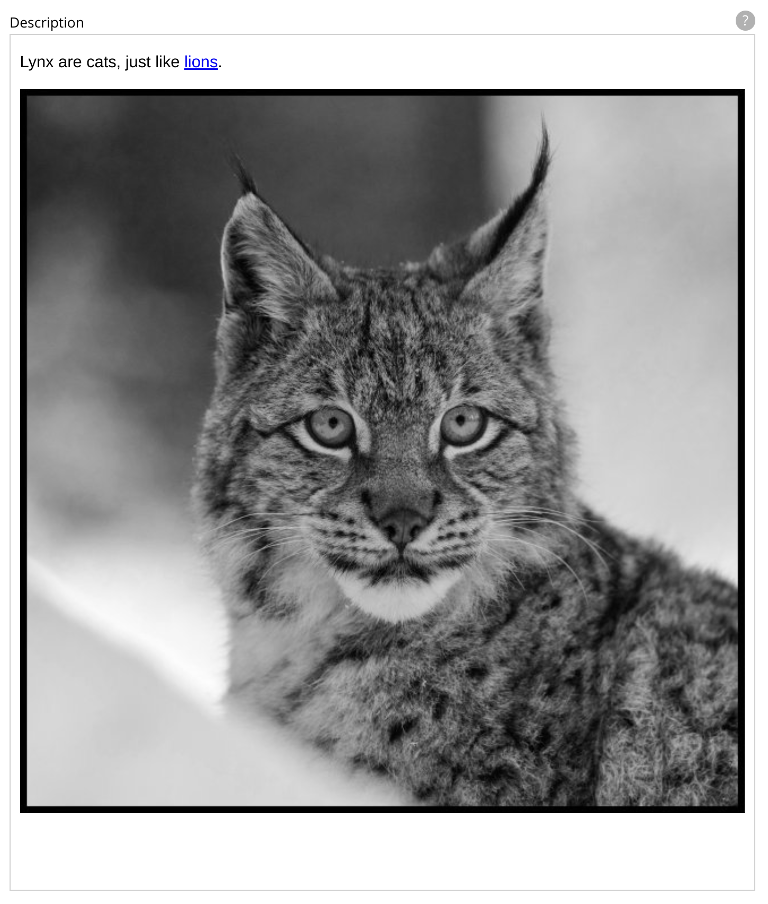 Figure 6. Example of description with inserted image styled
Macros
Macros enable you to insert custom components within your rich text field
When the content is rendered, the macro is replaced with the actual component implementation.
Similar to content types, macros can define forms that help editors configure them.
Task: Embed iframe macro
The embed macro enable you to insert iframes. In this context, we’ll embed this Lynx youtube video.
Let’s add the macro to the "Lynx" content item.

-
Click "insert macro".
-
Select the "Embed iframe" macro
-
Add the following iframe to it:
<iframe width="560" height="315" src="https://www.youtube.com/embed/gr5EwZo_CHQ?si=IlkTGRuGVV7BxEOs" title="YouTube video player" frameborder="0" allow="accelerometer; autoplay; clipboard-write; encrypted-media; gyroscope; picture-in-picture; web-share" allowfullscreen></iframe>
| This macro can’t be previewed because the Embed iframe macro does not includes a standard preview. |
As you’ll see in next section, when querying the description of an Animal content, you’ll be able to properly get the iframe we passed to "Embed iframe" macro and process it as you’d like in your front-end.
| For more information on macros, including how to create your very own, visit to the macro reference docs. |
GraphQL API
When fetching rich text via the API, the most commonly used output is "processed html". This is essentially unstyled, semantic HTML. It’s then up to you to style the content in your client.
Links, images and macros will potentially require additional client-side processing.
The following query returns the "Lynx" content, and the description field al processed HTML.
{
  guillotine {
    queryDsl(
      query: {
        term: {
          field: "displayName",
          value: {
            string: "Lynx"
          }
        }
      }
    ) {
      ... on com_example_myapp_Animal {
        data {
          description {
            processedHtml
          }
        }
      }
    }
  }
}{
"data": {
"guillotine": {
"queryDsl": [
{
"data": {
"description": {
"processedHtml": "<p>Lynx are cats, just like <a href=\"/admin/site/preview/my-first-project/draft/animals/lion\" data-link-ref=\"8cc82fd1-9063-4604-9f51-5f059d7a5d2e\">lions</a>.</p>\n\n<figure class=\"captioned editor-align-justify square-grayscale\"><img alt=\"lynx.jpg\" src=\"/admin/site/preview/my-first-project/draft/_/image/be6bb93a-7d99-4ed2-b424-4e435b89f392:6a1e144ef4ebab19e9071794ad753130d5bb5497/width-768/lynx.jpg\" style=\"width:100%\" data-image-ref=\"4dced964-cd1c-445d-bb9f-80387467e165\">\n\n</figure>\n\n<p><editor-macro data-macro-name=\"embed\" data-macro-ref=\"a1490c65-3654-4b29-9b1a-eb3894b6f59f\"><iframe title=\"YouTube video player\" src=\"https://www.youtube.com/embed/gr5EwZo_CHQ?si=IlkTGRuGVV7BxEOs\" height=\"315\" width=\"560\"></iframe></editor-macro></p>\n"
}
}
}
]
}
}
}By unescaping the HTML, you will find the following:
<p>
Lynx are cats, just like <a href="/admin/site/preview/my-first-project/draft/animals/lion" data-link-ref="8cc82fd1-9063-4604-9f51-5f059d7a5d2e">lions</a>.
</p>
<figure class="captioned editor-align-justify square-grayscale">
<img alt="lynx.jpg" src="/admin/site/preview/my-first-project/draft/_/image/be6bb93a-7d99-4ed2-b424-4e435b89f392:6a1e144ef4ebab19e9071794ad753130d5bb5497/width-768/lynx.jpg" style="width:100%" data-image-ref="4dced964-cd1c-445d-bb9f-80387467e165">
</figure>
<p>
<editor-macro data-macro-name="embed" data-macro-ref="a1490c65-3654-4b29-9b1a-eb3894b6f59f">
<iframe title=\"YouTube video player\" src=\"https://www.youtube.com/embed/gr5EwZo_CHQ?si=IlkTGRuGVV7BxEOs\" height=\"315\" width=\"560\"></iframe>
</editor-macro>
</p>With the excepton of macro’s this is all valid HTML. Below, you’ll learn more about handling these elements.
Links
Looking specifically at the processed html link output above, the most interesting part is the data-link-ref attribute.
| Wondering why the href points to a location within the admin? No worries. Guillotine automatically generates contextual links. When deploying the API to production, you may customize the base url as needed. |
This example is an internal link, you may want access more details about it, for instance to override the URL, optimize accessibility etc.
To acccess these details, you need to extend your query with the links field:
{
  guillotine {
    queryDsl(
      query: {
        term: {
          field: "displayName",
          value: {
            string: "Lynx"
          }
        }
      }
    ) {
      ... on com_example_myapp_Animal {
        data {
          description {
            processedHtml
            links {
              ref
              uri
              content {
                displayName
                _path
                type
              }
            }
          }
        }
      }
    }
  }
}
By executing this query, you will get some more data. Specifically:
...
"links": [
  {
    "ref": "5c351456-b22f-4162-aad6-6d921c686544",
    "uri": "content://89daa74e-1482-493d-9a22-8ec08acaf4f8",
    "content": {
      "displayName": "Lion",
      "_path": "/animals/lion",
      "type": "com.example.myproject:animal"
    }
  }
]
...
As you can see, you now have access to the full name of the referenced item, as well as it’s type. Use the ref values from the HTML link element to match it with the specific link data - as you may have more than one link.
Image srcset
In the processed HTML, you can see the <img> element with style attributes. Additionally, by looking more closely at the src value, you will find that the style settings are applied in the image service URL.
..../_/image/<id>:<version>/width-768/lynx.jpg
But wait, there’s more!
If you want to optimize how fast images load on various devices, Guillotine can also return the image in multiple different sizes (using the srcset attribute (MDN)). This is achieved by adding an argument to the description field:
srcset
{
  guillotine {
    queryDsl(
      query: {
        term: {
          field: "displayName",
          value: {
            string: "Lynx"
          }
        }
      }
    ) {
      ... on {project-name-query}_{content-type-2-Capitalized} {
        data {
          description(processHtml: {imageWidths: [200, 500]}) {
            processedHtml
          }
        }
      }
    }
  }
}
This time, you should find the '<img>' element will include srcset with links to a 200w and 500w respectively.
<img alt="lynx.jpg"
  src=".../width-768/lynx.jpg"
  style="width:100%"
  srcset=".../width-200/lynx jpg 200w,.../width-500/lynx.jpg 500w"
data-image-ref="c771dac7-8158-4791-92fb-18ebd5ef2fd3" />| URLs about above were shortened for readability |
Image details
If you prefer to handle all details related to images yourself, or optimize the markup further, you may access more details about the image - like you did for links.
{
  guillotine {
    queryDsl(
      query: {
        term: {
          field: "displayName",
          value: {
            string: "Lynx"
          }
        }
      }
    ) {
      ... on com_example_myapp_Animal {
        data {
          description {
            images {
              style {
                name
                aspectRatio
                filter
              }
            }
          }
        }
      }
    }
  }
}
You can extract the properties that you specified in your styles.xml previously:
...
"images": [
  {
    "style": {
      "name": "editor-style-grayscale",
      "aspectRatio": "1:1",
      "filter": "hsbcolorize(0x000000); grayscale(); border(6, 0x000000)"
    }
  }
]
...
Macros
In the headless context, the client is responsible for rendering of your content. In the case of macros - this gets obvious.
In the processed HTML, each macro is represented by an <editor-macro> element containing a unique reference key. As for links and images, this reference can be used to access detailed data fields for the macro.
{
  guillotine {
    queryDsl(
      query: {
        term: {
          field: "displayName",
          value: {
            string: "Lynx"
          }
        }
      }
    ) {
      ... on com_example_myapp_Animal {
        data {
          description {
            processedHtml
            macrosAsJson
          }
        }
      }
    }
  }
}...
"macrosAsJson": [
{
"ref": "1f8703bc-ee13-4871-89b3-937a7299abc4",
"name": "embed",
"descriptor": "system:embed",
"config": {
"embed": {
"body": "<iframe title=\"YouTube video player\" src=\"https://www.youtube.com/embed/gr5EwZo_CHQ?si=IlkTGRuGVV7BxEOs\" height=\"315\" width=\"560\"></iframe>"
}
}
}
]
...To access specific macros and fields, like for content type may use the full GraphQL schema. Try the following:
| If you used a different macro than the "Embed iframe" macro, the query must be updated to match the specific macro. |
{
  guillotine {
    queryDsl(
      query: {
        term: {
          field: "displayName",
          value: {
            string: "Lynx"
          }
        }
      }
    ) {
      ... on com_example_myapp_Animal {
        data {
          description {
            processedHtml
            macros {
              ref
              name
              descriptor
              config {
                embed {
                  body
                }
              }
            }
          }
        }
      }
    }
  }
}
This time, you only get the explicit fields you were looking for
...
"macros": [
  {
    "ref": "9918c7b2-c87d-4d0b-8d6c-56ab85805f3a",
    "name": "embed",
    "descriptor": "system:embed",
    "config": {
      "embed": {
        "body": "<iframe title=\"YouTube video player\" src=\"https://www.youtube.com/embed/gr5EwZo_CHQ?si=IlkTGRuGVV7BxEOs\" height=\"315\" width=\"560\"></iframe>"
      }
    }
  }
]
...
By accessing the macro config, you are able to down drill into every single field, accessing all the details you actually you need.