Internationalization
Contents
In this chapter you will add a second language to your site, in both Content Studio and Next.js.
Introduction
Next.js has native multi-language support, allowing your projects to switch language on the fly.
To back this, Content Studio has a feature called content layering.
Task: Create a layered project
To demonstrate multi-language, you first need to activate support for translating your content in Content Studio. This chapter uses Norwegian as the example.
-
Open the project settings - In Content Studio, click the
Settingscog icon on the left-hand side of the grid. You will be presented with the currently available projects: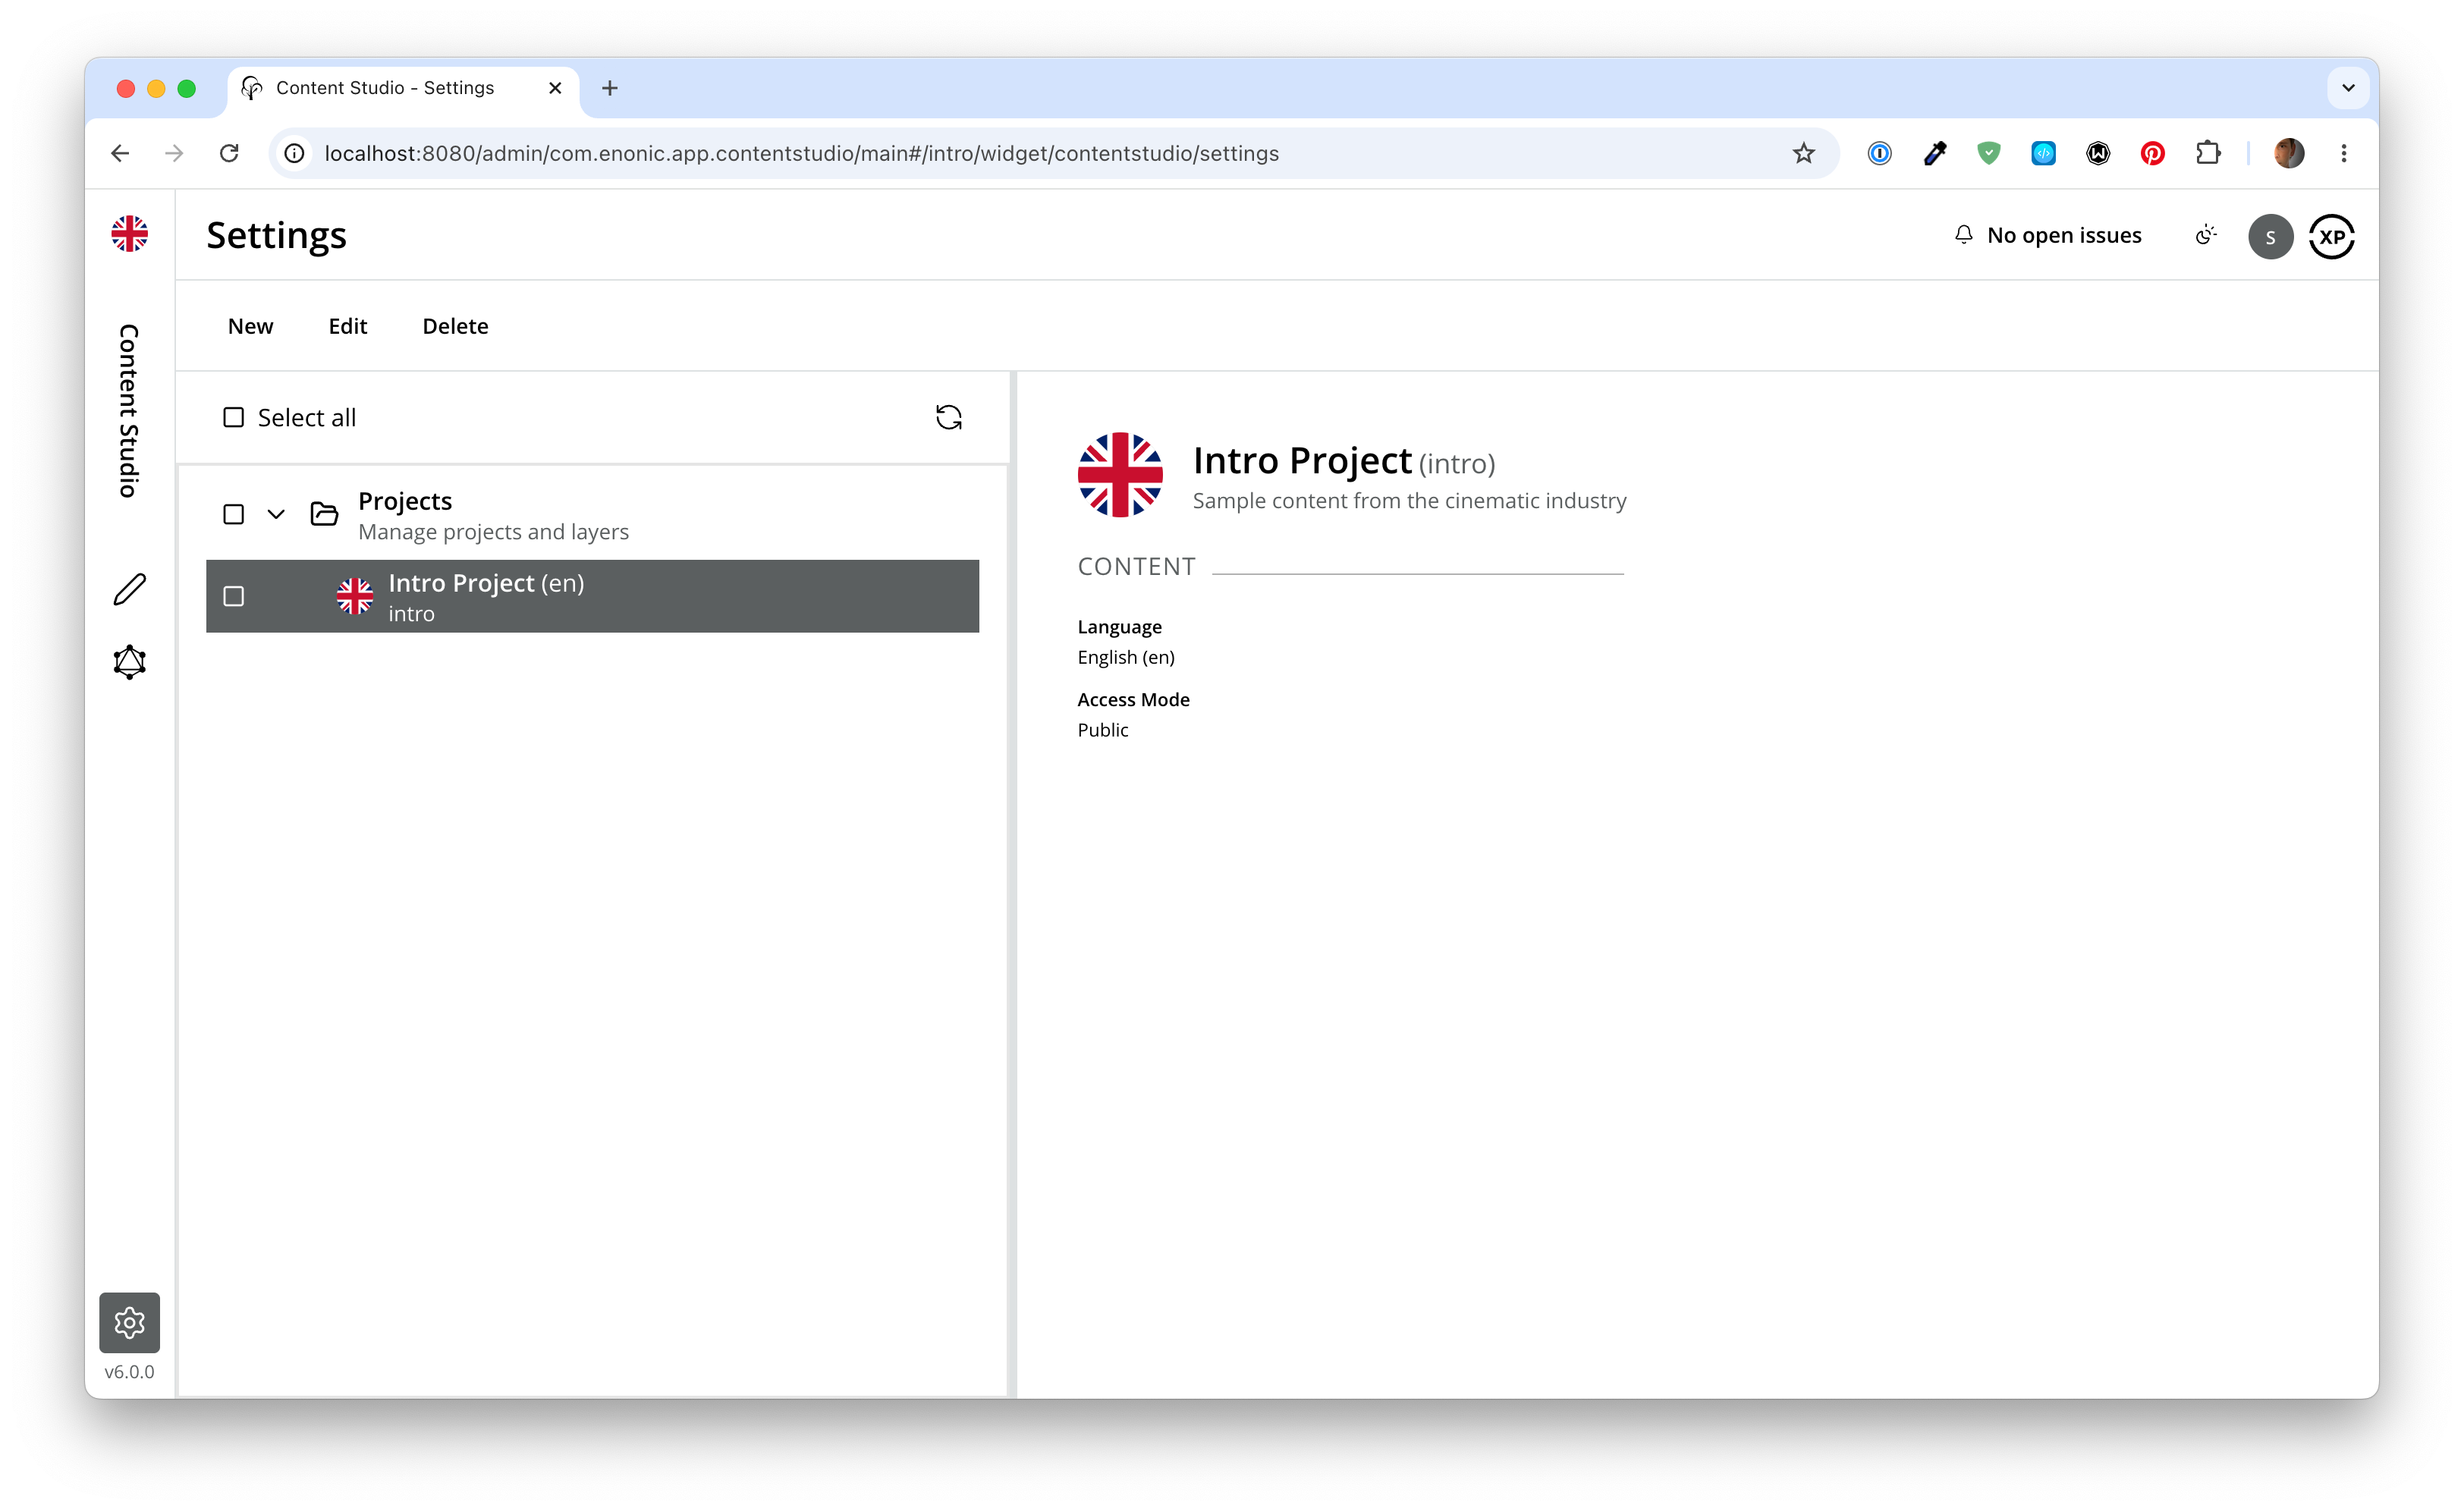
-
Create a layer - Select the existing
Intro Projectand click theNewbutton. This opens the project wizard withIntro Projectpreselected as the parent project, so the new project becomes a layer.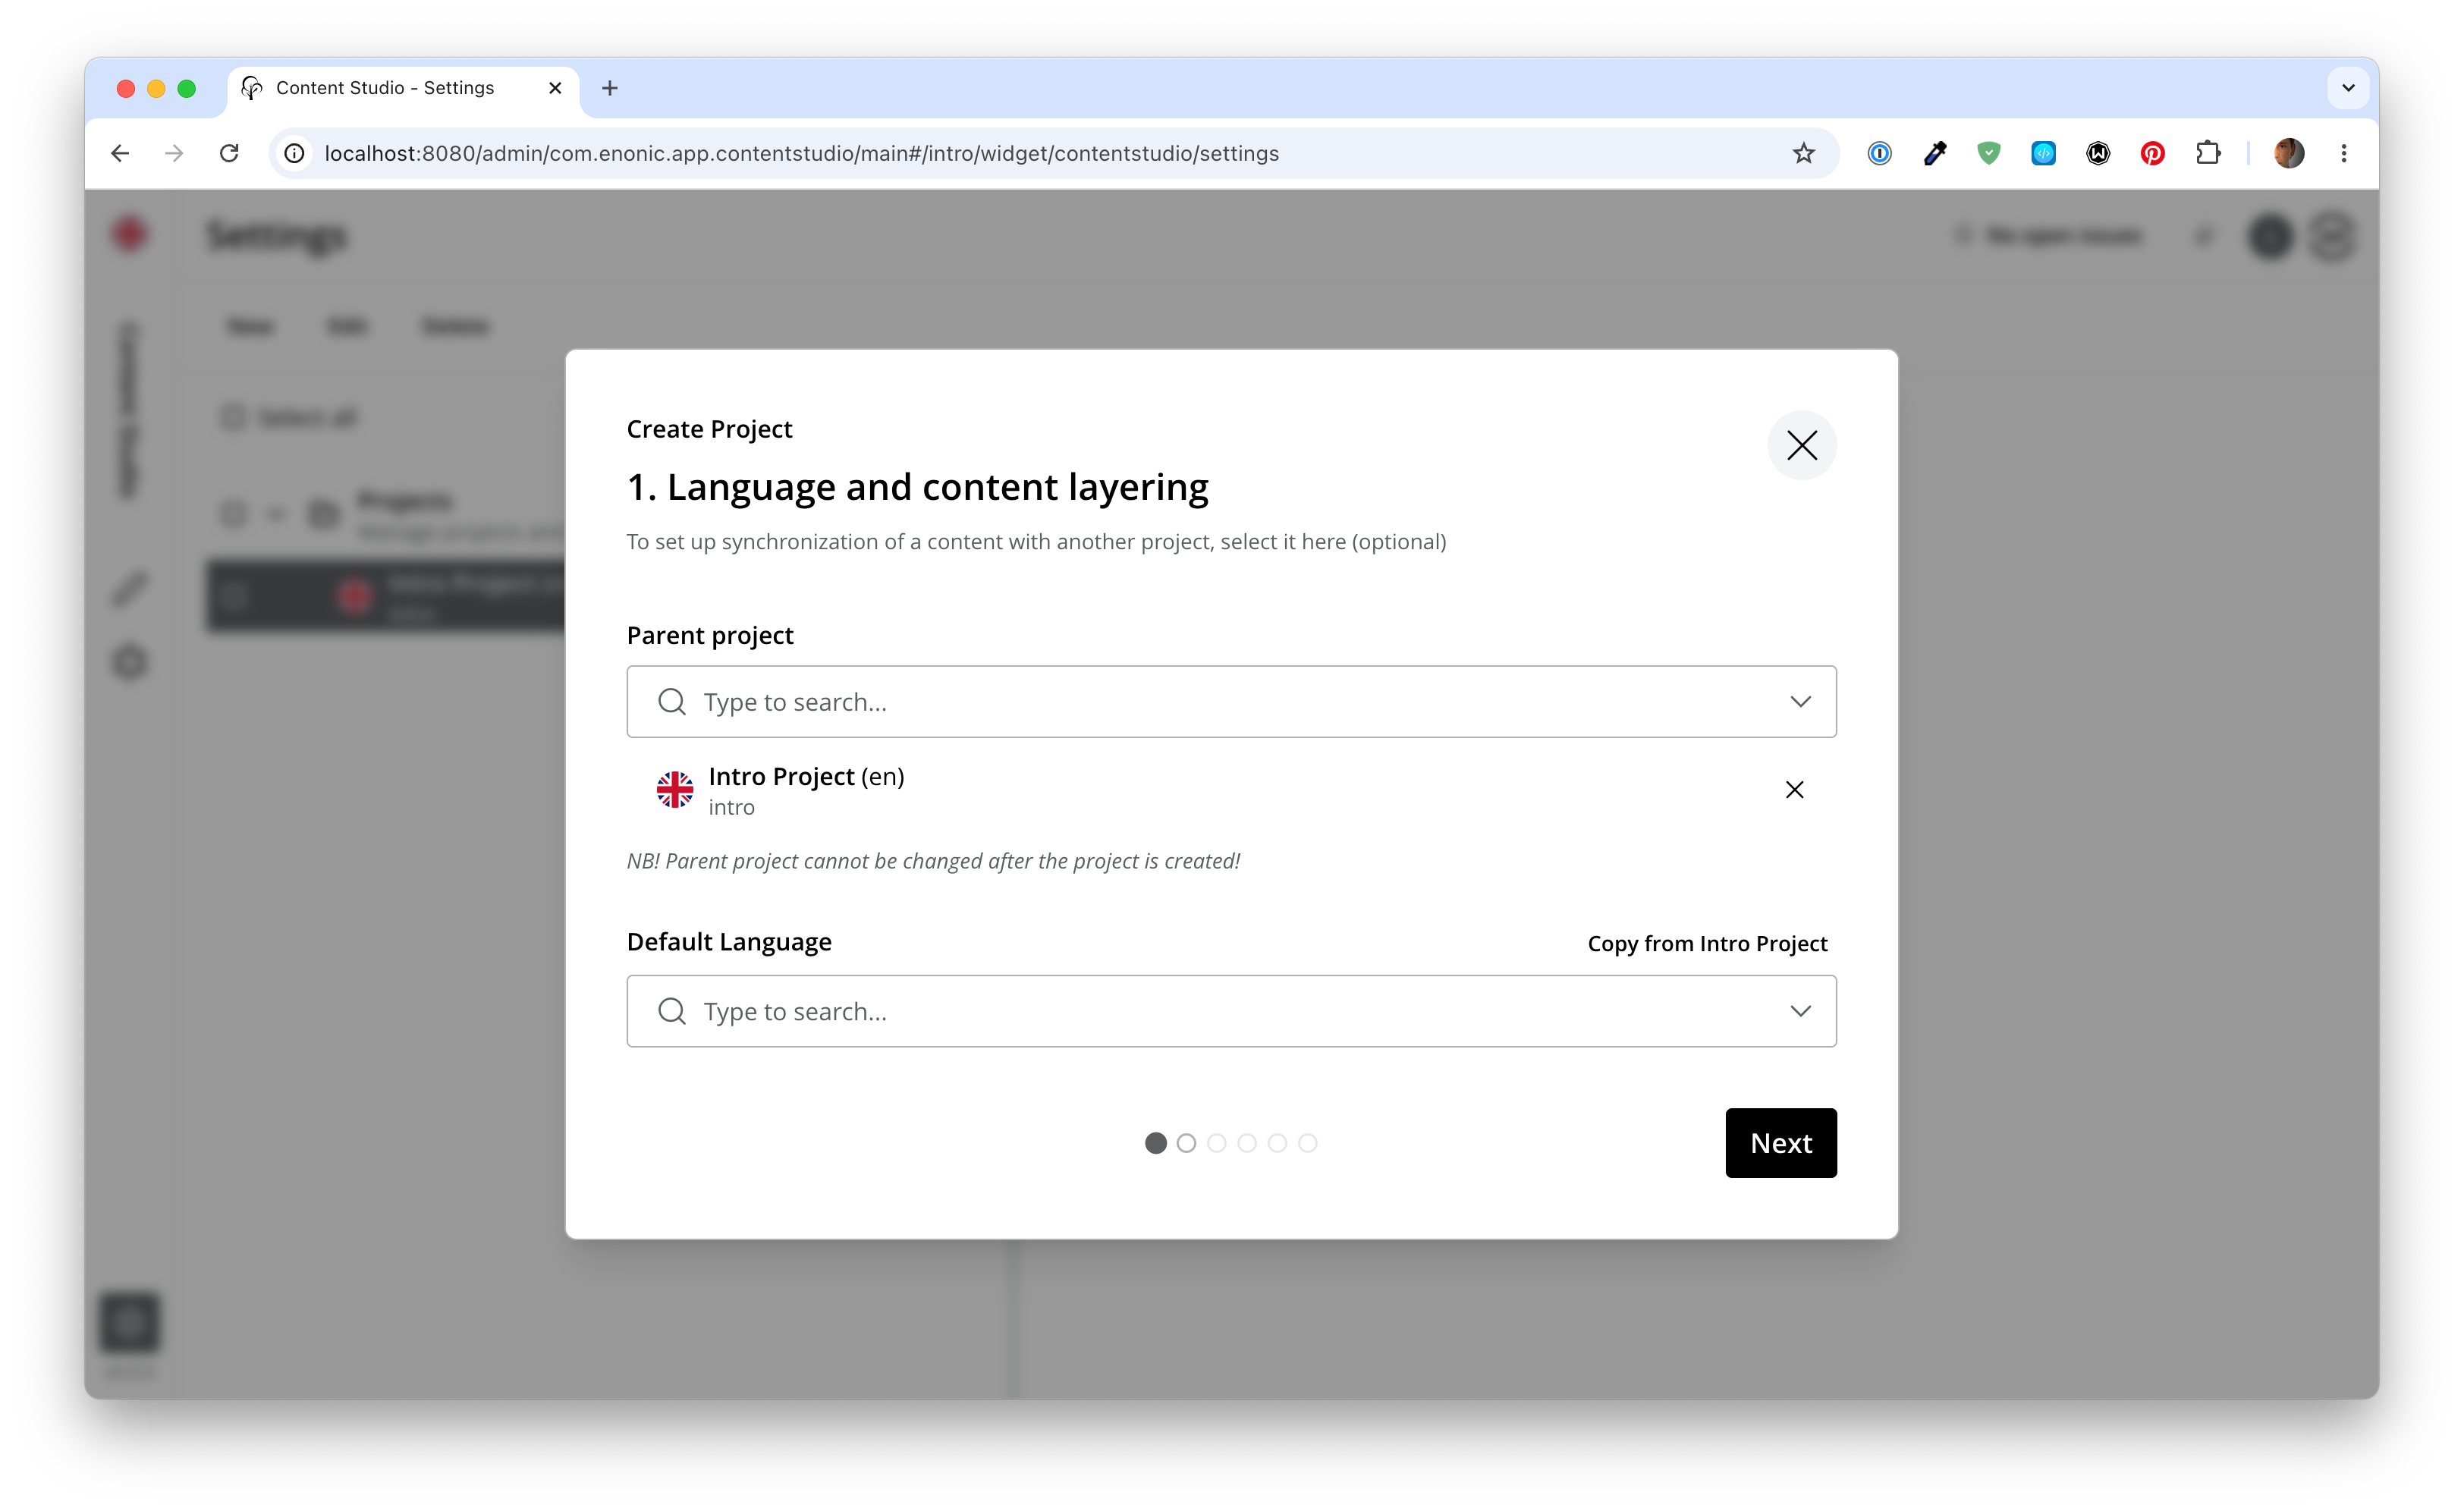
Walk through the wizard steps, using the following values:
-
Default Language:
norsk (no) -
Display Name:
Film DB -
Identifier:
intro-no -
Access Mode:
Public -
The
RolesandApplicationssteps may be skipped (theIntroapp is copied from the parent project)Click
Create Projectin theSummarystep, and the new layer appears in the list underIntro Project.
-
-
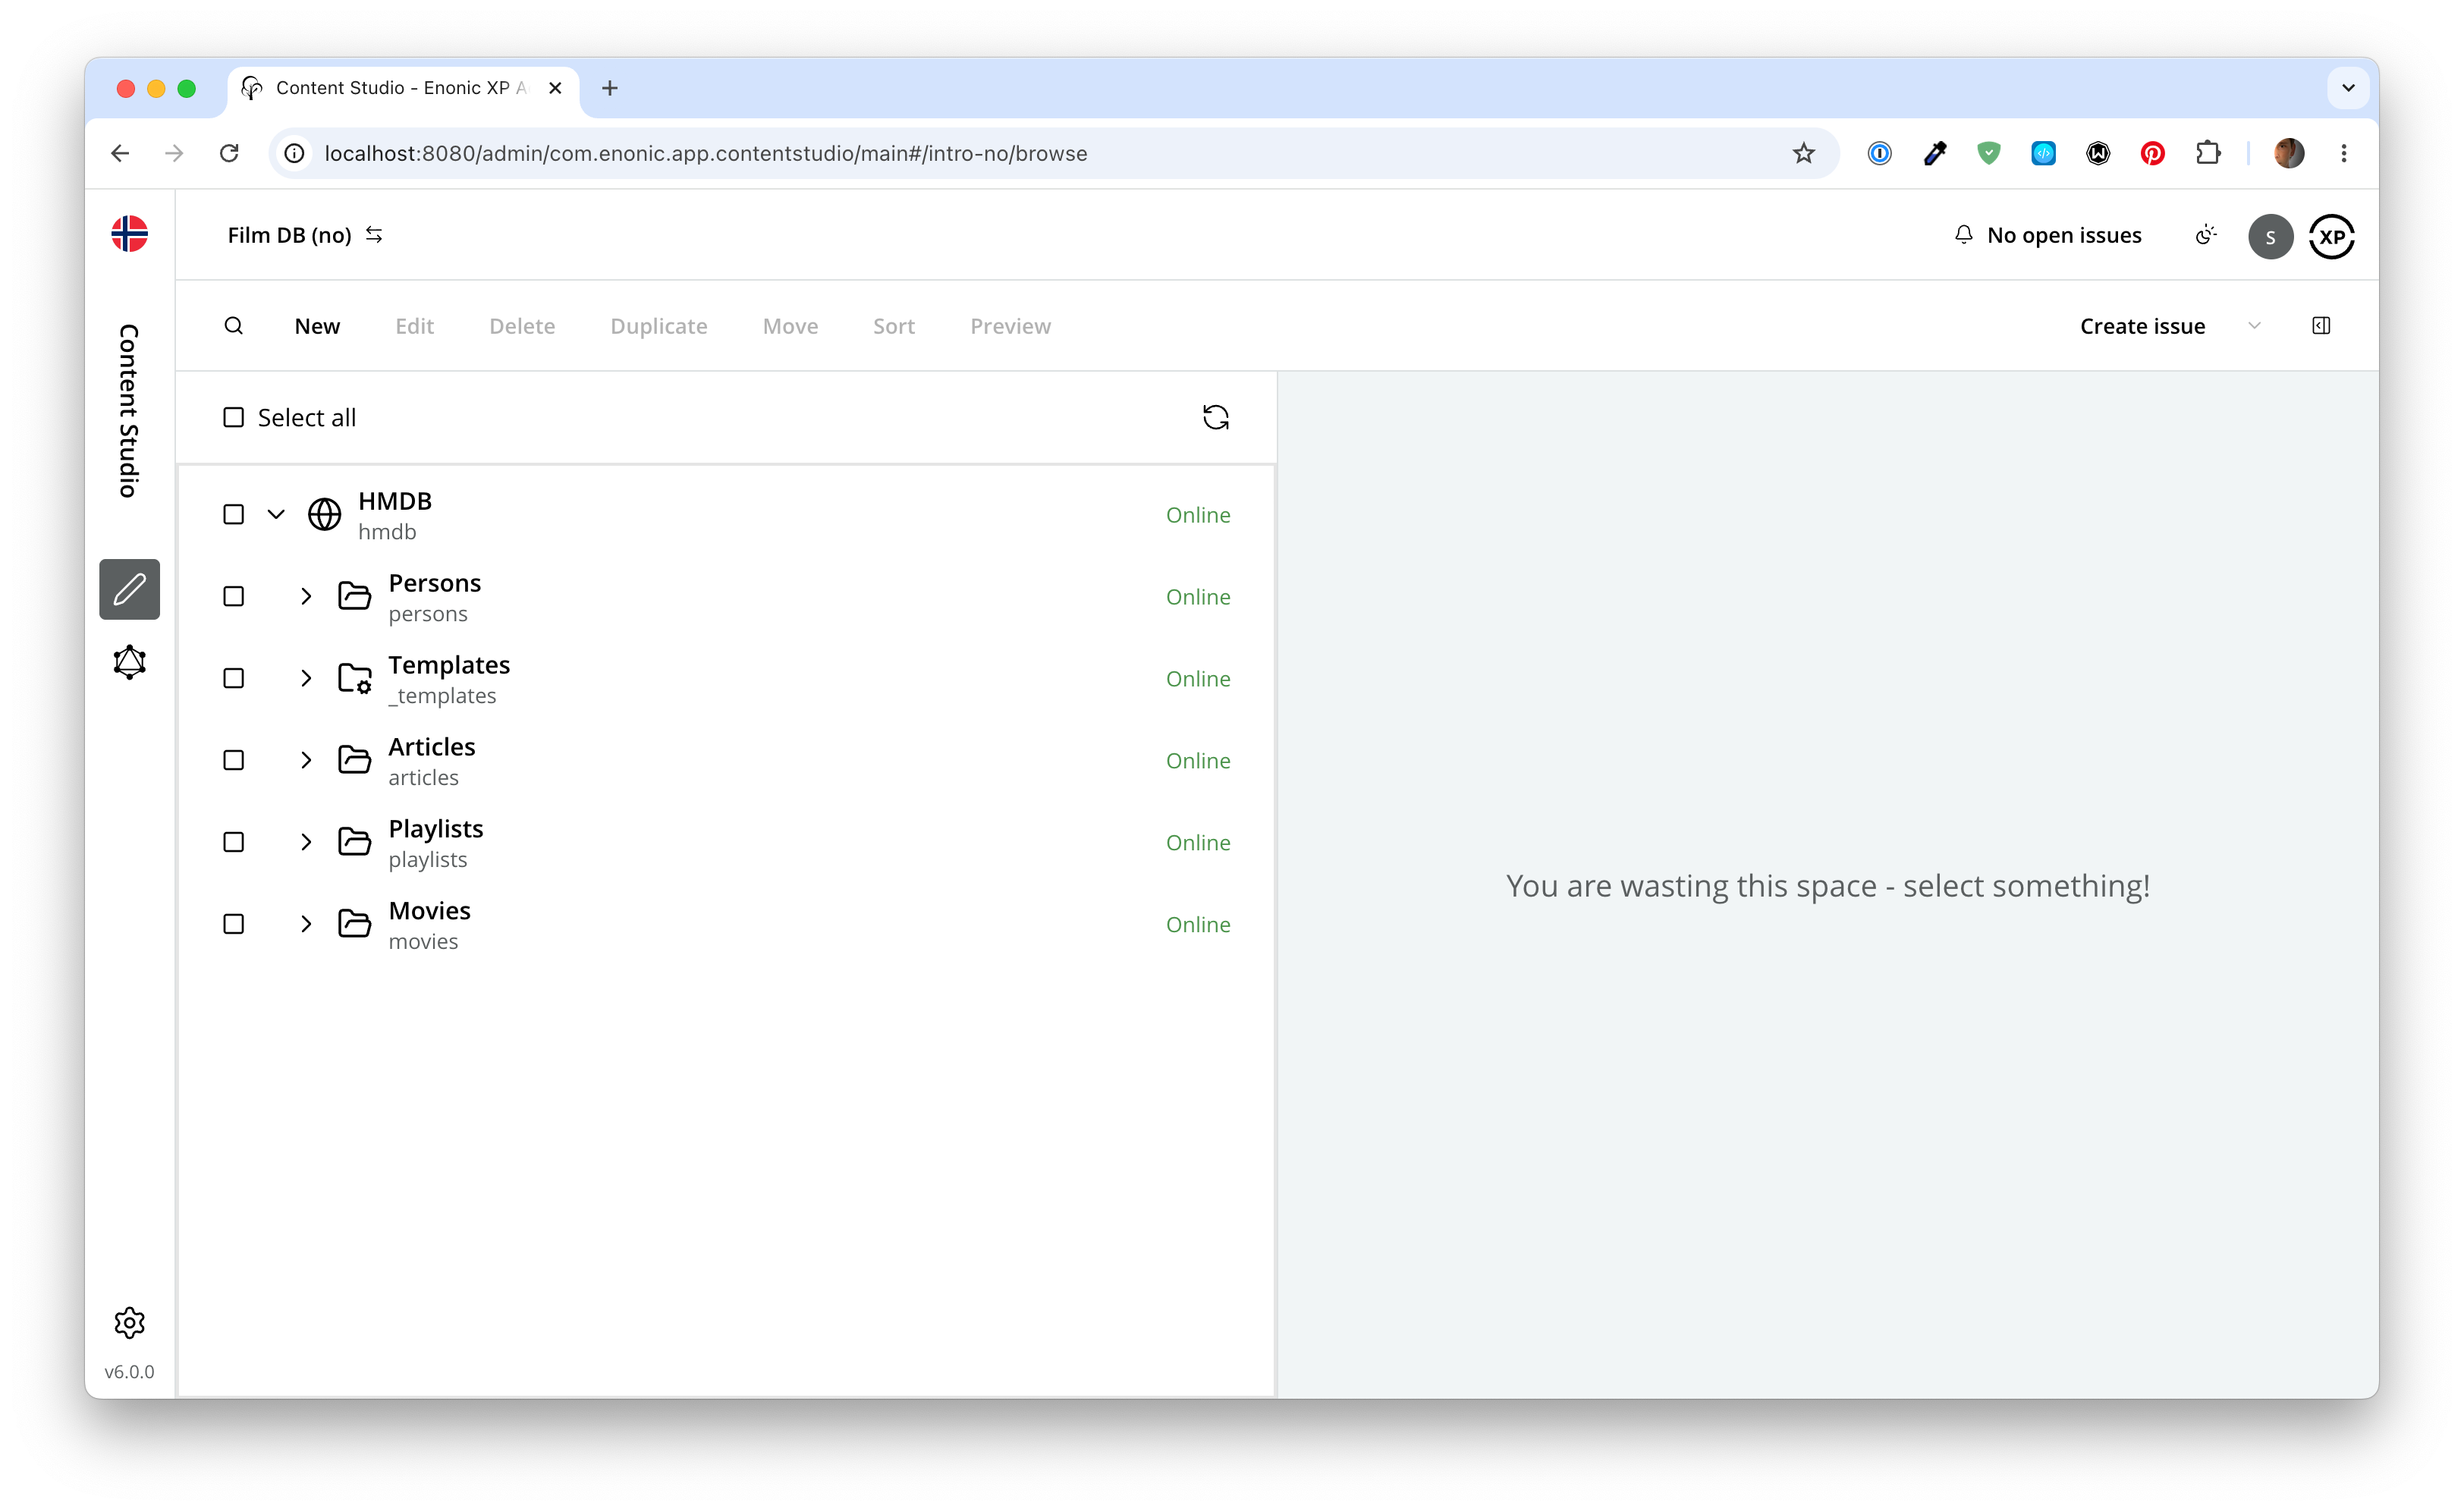
Verify the new layer - Go back to the content list (
Contentin the sidebar), and then switch project with the project selector in the top left corner.After switching context, you should see the following:
-
Publish the project - Select the
HMDBsite, clickPublishin the toolbar, toggleInclude child items, clickApplyand thenPublish now.
Task: Set up i18n in Next.js
With the layer in place, turn on multi-language support in Next.js.
The starter comes with a proxy (src/proxy.ts) that keeps the default locale out of public URLs: http://localhost:3000/persons/x is rendered by the internal /en/persons/x route, and /en/persons/x itself redirects to /persons/x. Other locales keep their prefix (/no/persons/x). Content Studio preview URLs and links rendered with pageUrl(data, meta) follow the same rule.
-
Configure the Enonic adapter - Specify which content project to use for each locale:
.env# ... ENONIC_MAPPINGS=en:intro/hmdb,no:intro-no/hmdb # ...Each comma-separated entry follows the pattern
<locale>:<project>/<sitekey>. In the example above, the entries areen:intro/hmdbandno:intro-no/hmdb.The first entry maps to the
defaultLocalethat is used in the locale-related methods of the Enonic adapter.The reason for repeating paths is that the path may be different in each project/translation. -
Add the phrases - Add a static texts file for every locale to the
src/phrasesfolder. The file name should be<locale>.json, e.g.no.jsonfor Norwegian.src/phrases/no.json{ "title": "Next.XP", "back": "Tilbake", "built-with": "Laget med", "powered-by": "Drevet av", "draft-mode": "Utkast modus" } -
Restart your Next.js server to pick up the changes to the environment variables.
In prod mode this means running npm run prodagain. The build callsgenerateStaticParams()for every project inENONIC_MAPPINGS, so publish the new layer first - otherwise the build fails because the site does not exist on the layer’smasterbranch yet.
Task: Translate and publish
As long as your preview configuration was working before you started, Content Studio automatically detects the right locale for each project.
Every project used for preview must be listed in ENONIC_MAPPINGS. Otherwise /api/mappings answers 404 and Content Studio reports that the content cannot be rendered. |
| You may need to restart/rebuild your Next.js server for the changes to be picked up. |
-
Switch editing context - In Content Studio, switch to the
Film DBproject with the project selector in the top left corner.Content Studio detects the correct Next.js locale for the project. Select an item, and you should get a preview.
-
Translate the site content - Select the site and click
Edit. The editor opens with aLocalizebutton in place ofSave: click it to create a local copy in the layer (the item switches fromNot localisedtoLocalisedand gets the layer’s language). You may now show off your skills while translating the page to Norwegian. -
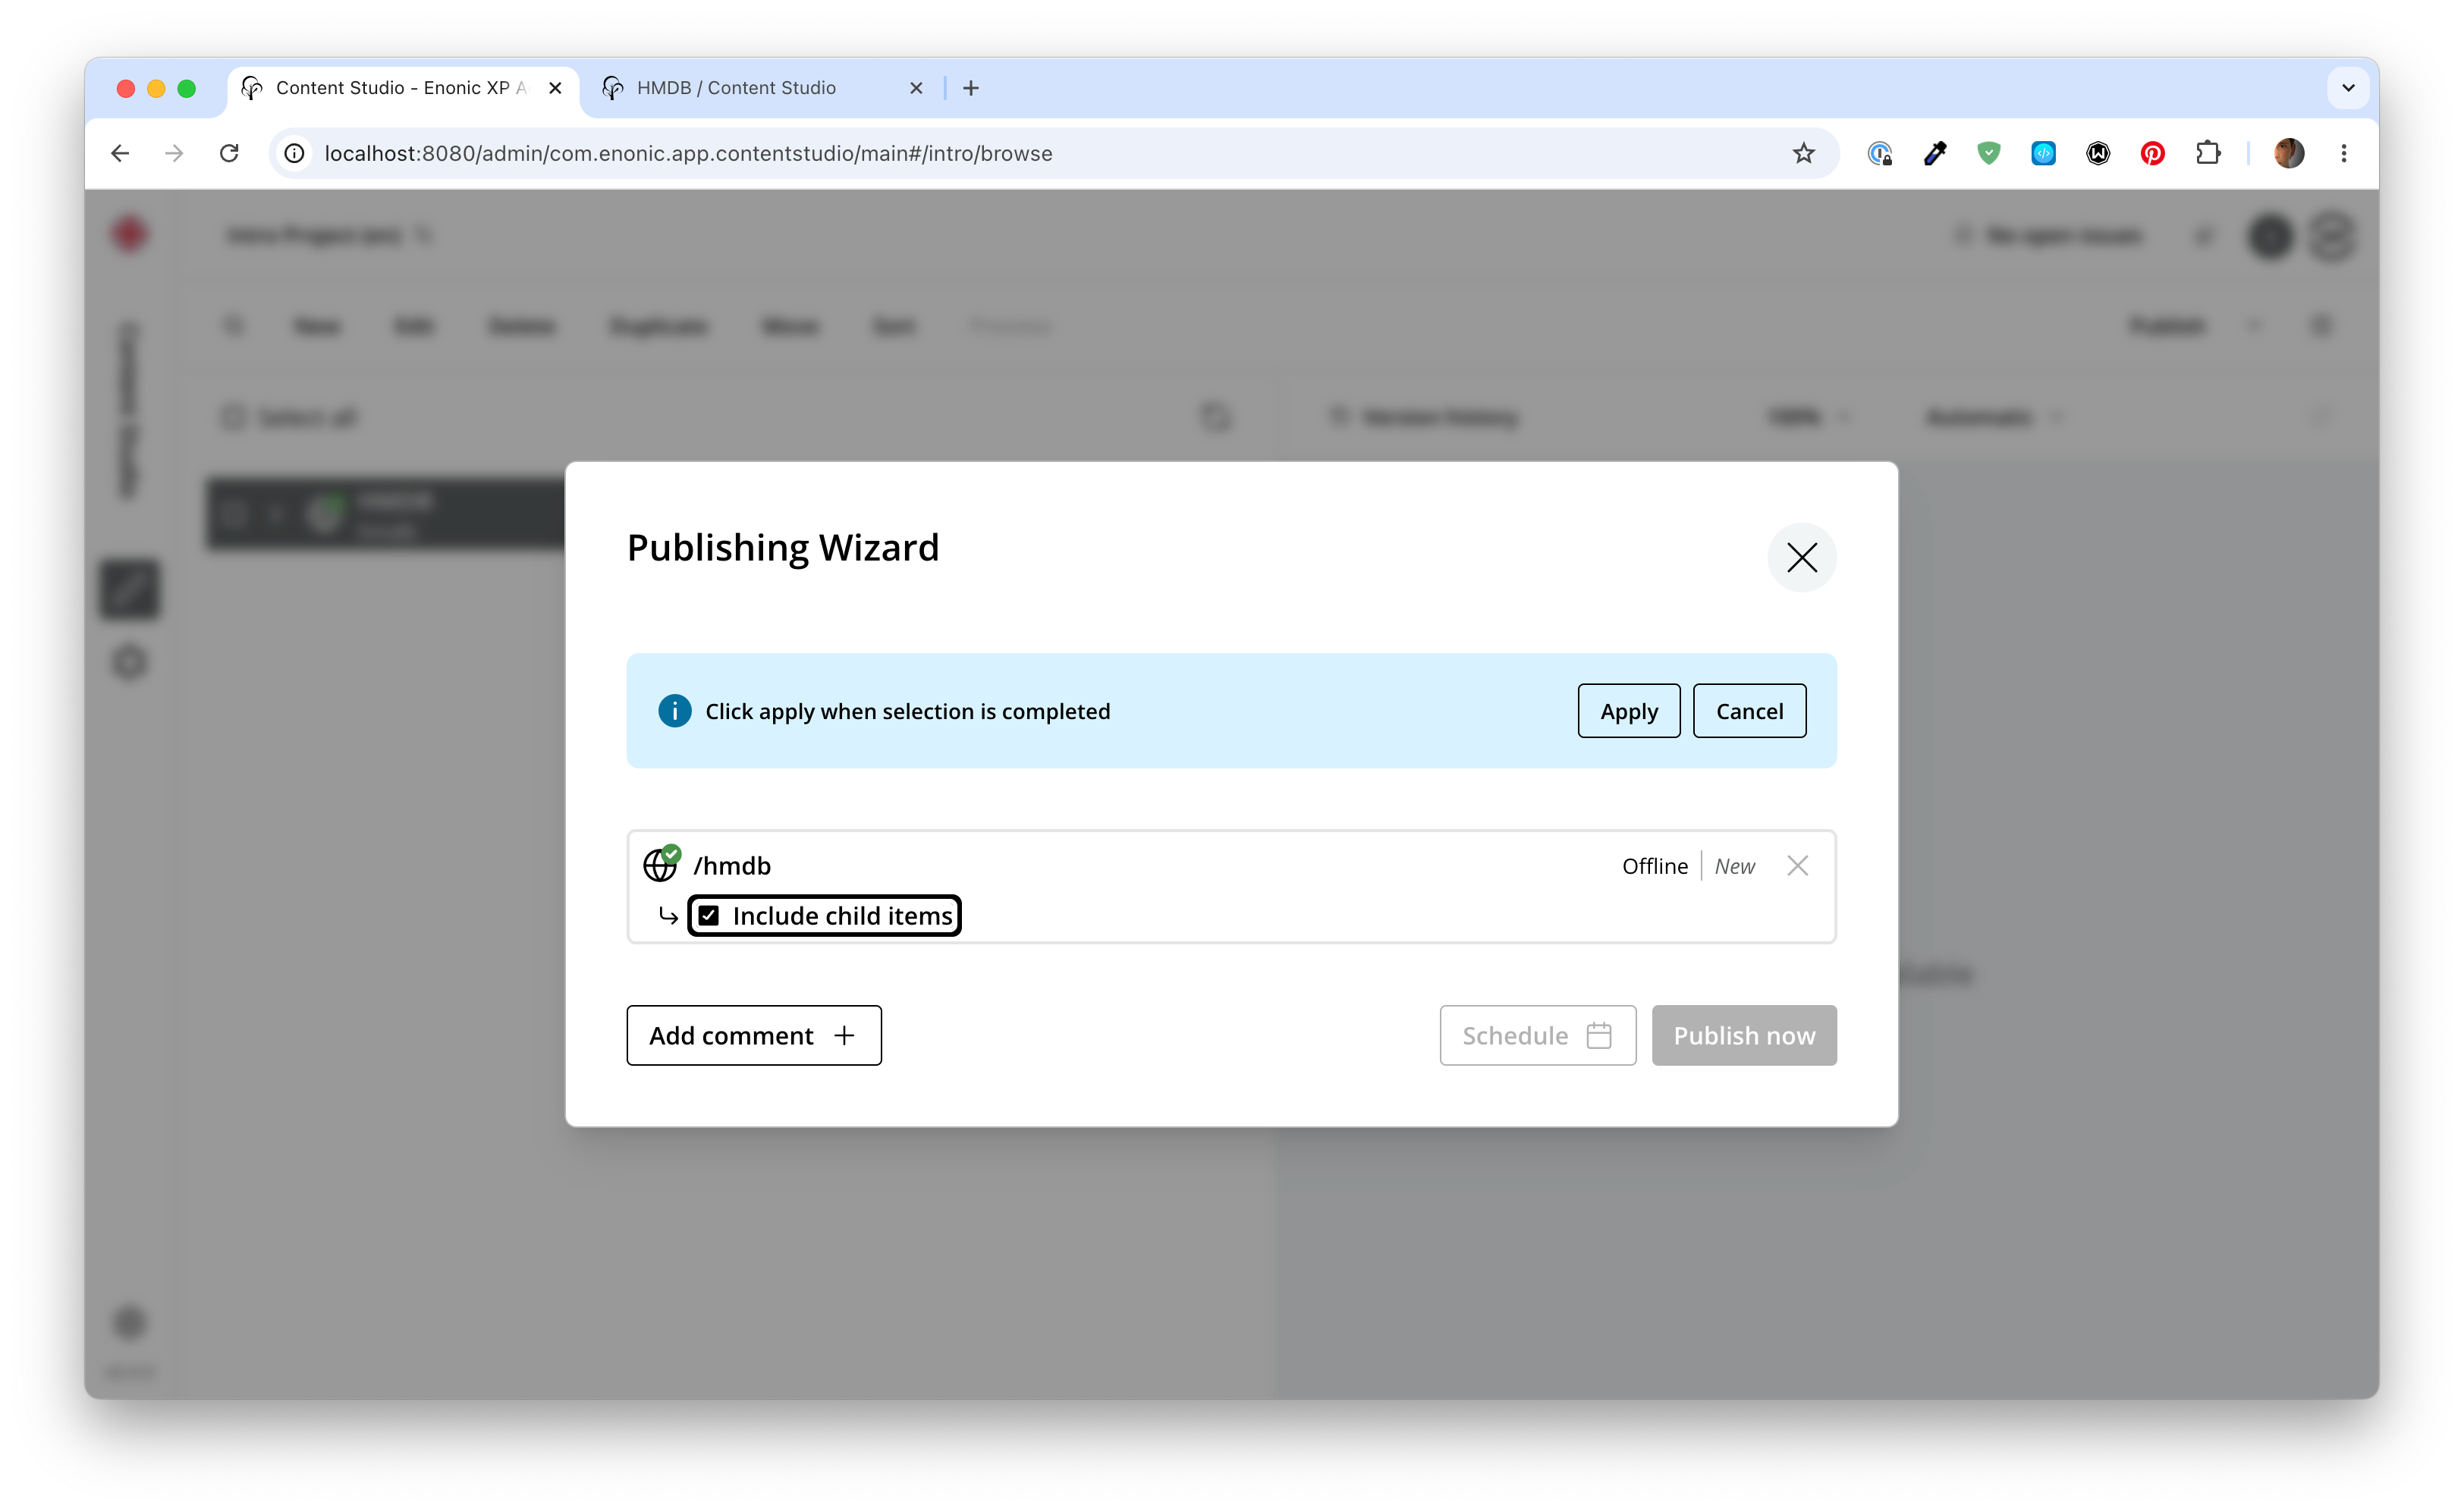
Publish the entire site - Once finished, click
Mark as readyand proceed to publish the entire site structure.Publish the entire tree by selecting the tree icon in the publishing wizard.
-
Verify that your front-end is working - Add
/no(i.e.localhost:3000/no) to the URL of your Next.js server in an incognito window. You should now see the published content from the Norwegian project.
Multi front-end setup
In some cases, you may prefer a setup where each language/market is served by a separate Next.js front-end, or you may have different sites accessing the same Enonic instance. This setup is optional, and not needed for the rest of the tutorial.
Setting up Next.js for this works the same way as handling a single language. For Content Studio preview to know which Next.js server to use, some additional configuration is required.
-
Create the Next.XP configuration file for your Enonic installation, and add an entry for each front-end:
The sandbox configuration files are located in the sandbox' home directory inside your user’s root directory at .enonic/sandboxes/tutorial_nextjs/home/config. The full path is also listed on the sandbox Welcome page at http://localhost:8080, together with the existing configuration files. Create the filecom.enonic.app.nextxp.cfgin this folder.com.enonic.app.nextxp.cfg# uncomment to override default values # nextjs.default.secret=yourSecret # nextjs.default.url=http://localhost:3000 # # config 'prod' nextjs.prod.secret=yourSecret nextjs.prod.url=https://your.next-site.com # # ...Every configured URL is automatically allowed in Content Studio’s Content Security Policy, so the preview works for each front-end without further configuration. -
Assign the configuration to your site by clicking the pencil icon next to the
Next.XPapp name in the site form, and selecting it from the list of named configurations: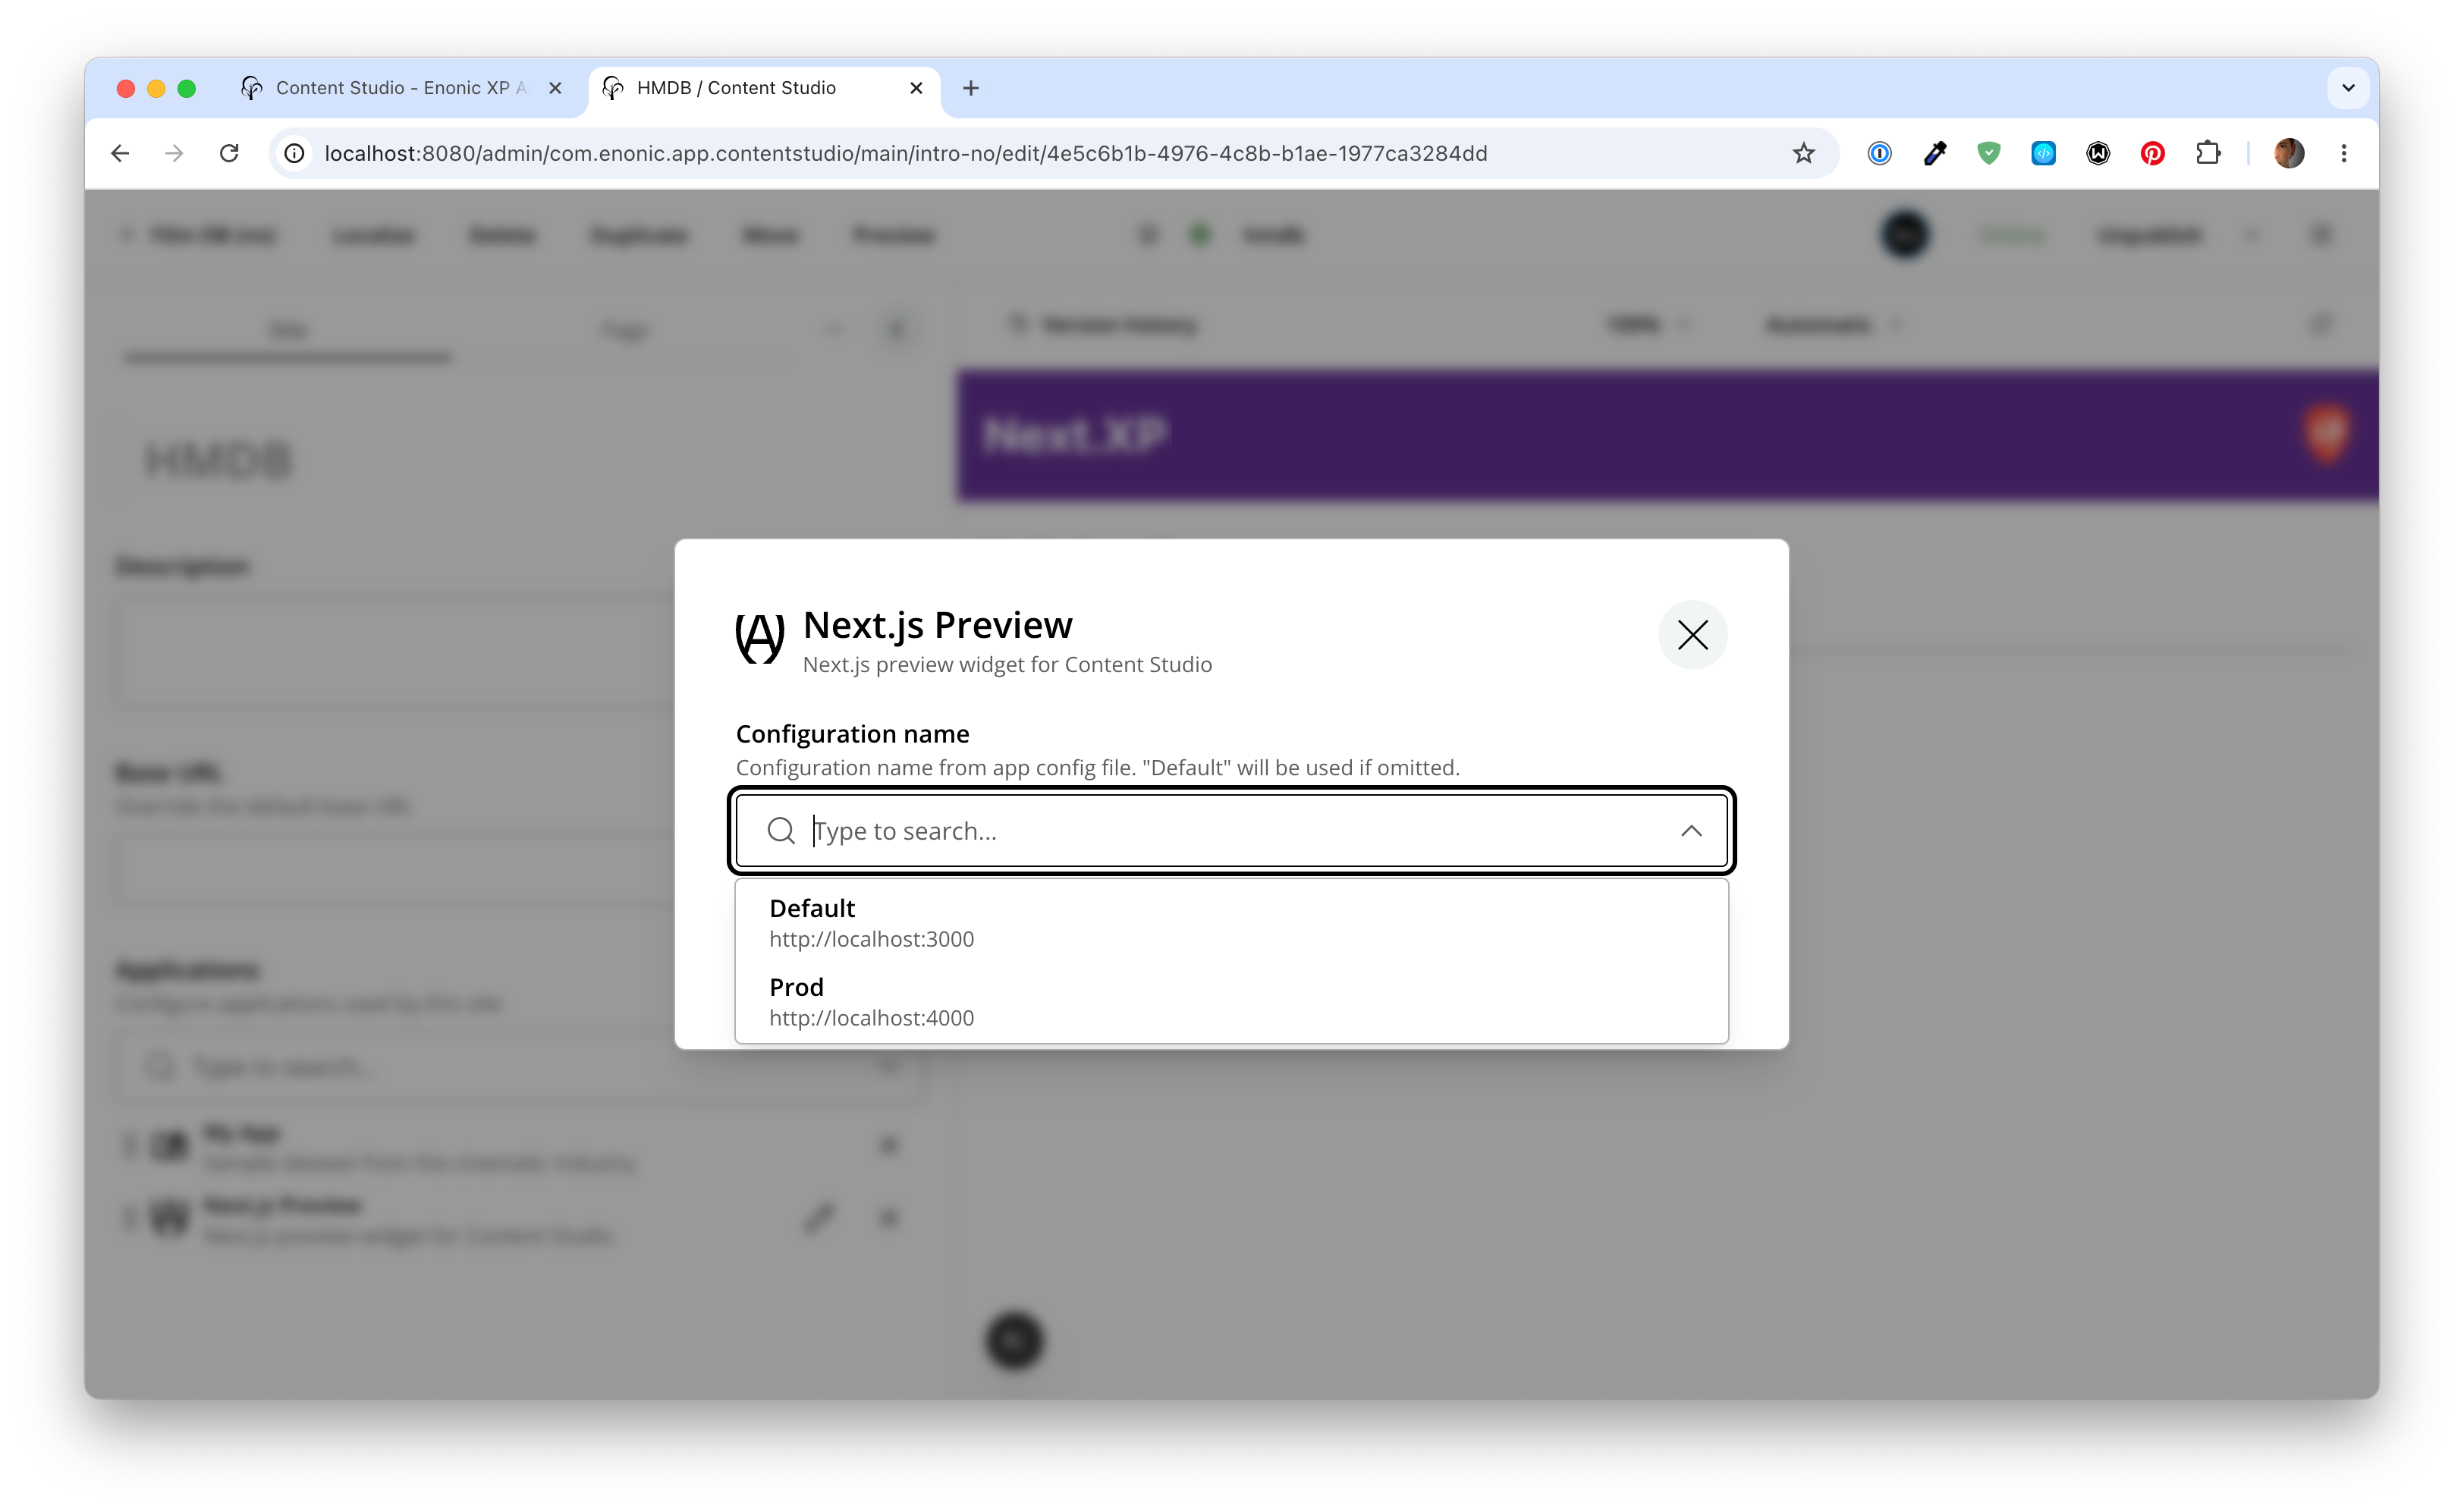
Accessing locale in views
Here are some insights on how to make further use of locales in your Next.js project.
-
The locale is available as a path parameter on the page:
src/app/[locale]/[[…contentPath]]/page.tsxexport type PageProps = { locale: string, contentPath?: string[], } export default async function Page({params}: { params: Promise<PageProps> }) { const resolvedParams = await params; const {locale, contentPath} = resolvedParams; // ... } -
The result of a
fetchContent()call from@enonic/nextjs-adapter/servercontains aMetaDataobject (available in every view) that includeslocaleanddefaultLocale, along with other calculated runtime data:import {PageComponent, RENDER_MODE, XP_REQUEST_TYPE} from '@enonic/nextjs-adapter'; export interface MetaData { type: string; path: string; requestType: XP_REQUEST_TYPE; renderMode: RENDER_MODE; requestedComponent?: PageComponent; canRender: boolean; catchAll: boolean; branch: string; project: string; site: string; baseUrl: string; locale: string; defaultLocale: string; }
You can also use I18n.getLocale() and useLocaleContext() to access the locale in server-side and client-side components respectively. For links, pass meta to pageUrl(data, meta) and the locale prefix is added for non-default locales; pageUrl({path: '/'}, meta) gives the site root (/ or /no).
Localizing the views
So far you have only localized the content. The phrases files you added to the src/phrases folder earlier are used to localize texts in your views:
-
Use
useLocaleContextfrom@enonic/nextjs-adapter/clientto access the current locale in client-side components:'use client'; import {useLocaleContext} from '@enonic/nextjs-adapter/client'; export default function ClientSideComponent() { const {locale, localize} = useLocaleContext(); const localizedText = localize('text.key'); // ... }The useLocaleContexthook is only available in client-side components. -
In server-side components, you can use
I18n.getLocale()from@enonic/nextjs-adapterto do the same:import {I18n} from '@enonic/nextjs-adapter'; export default function ServerSideComponent() { const locale = I18n.getLocale(); const localizedText = I18n.localize('text.key'); // ... }
Summary
You’ve created a Norwegian layer of the content project, mapped it to the no locale in ENONIC_MAPPINGS, added phrases for static texts, and published the translated site at /no.
Next, you’ll deploy to live servers.