Page templates
Contents
Thus far, page rendering has been based on mappings, or editorially composing one page at a time. In this chapter you’ll learn how to make page templates - and reuse them across multiple content items.
Task: Add a movie details part
To complete this chapter, you’ll need one final part for presenting movie details. The content type and content for movies already exist in Enonic.
-
Check the part descriptor - Verify that the Enonic app has the
movie-detailspart descriptor, same procedure as before:src/main/resources/cms/parts/movie-details/movie-details.yamlkind: "Part" title: "Movie Details" description: "Show details of a movie" form: [ ] -
Redeploy the Enonic app - This is only needed if you made any changes, and happens automatically if you started
enonic dev. -
Add the Movie query and view in Next.js:
src/components/parts/MovieDetails.tsximport React from 'react'; import type { ImageUrl, PageUrl } from '@enonic/nextjs-adapter'; import { APP_NAME_UNDERSCORED, I18n, MetaData, PartProps, imageUrl, imageUrlQuery, pageUrl, pageUrlQuery, } from '@enonic/nextjs-adapter'; import Link from 'next/link'; export const getMovie = ` query { guillotine(scopeKey: $scopeKey, branch: $branch, project: $project) { get(key: $path) { type displayName parent { _path ${pageUrlQuery()} } ... on ${APP_NAME_UNDERSCORED}_Movie { data { subtitle abstract trailer release photos { ... on media_Image { ${imageUrlQuery({ scale: 'width(500)' })} attachments { name } } } cast { character actor { ... on ${APP_NAME_UNDERSCORED}_Person { _path ${pageUrlQuery()} displayName data { photos { ... on media_Image { ${imageUrlQuery({ scale: 'block(200,200)' })} attachments { name } } } } } } } } } } } }`; // Root component const MovieView = (props: PartProps) => { const data = props.data?.get.data as MovieInfoProps; const meta = props.meta; const {displayName, parent} = props.data.get; const href = pageUrl(parent?.pageUrl, meta); return ( <> <div> <h2>{displayName}</h2> {data && <MovieInfo {...data} meta={meta}/>} {data?.cast && <Cast cast={data.cast} meta={meta}/>} </div> {href && <p> <Link href={href} data-content-path={parent?._path}>{I18n.localize('back')}</Link> </p> } </> ); }; export default MovieView; interface MovieInfoProps { meta: MetaData; release: string; subtitle: string; abstract: string; cast: CastMemberProps[], photos: { imageUrl: ImageUrl; }[]; } // Main movie info: release year, poster image and abstract text. const MovieInfo = (props: MovieInfoProps) => { const posterSrc = imageUrl((props.photos || [])[0]?.imageUrl, props.meta); return ( <> {props.release && ( <p>({new Date(props.release).getFullYear()})</p> )} {posterSrc && ( <img src={posterSrc} title={props.subtitle} alt={props.subtitle} /> )} <p>{props.abstract}</p> </> ) } interface CastProps { cast: CastMemberProps[]; meta: MetaData; } interface CastMemberProps { character: string; actor: { _path: string; pageUrl: PageUrl; displayName: string; data: { photos: { imageUrl: ImageUrl; attachments: { name: string }[] }[] } } } // List persons starring in the movie. const Cast = (props: CastProps) => ( <div> <h4>Cast</h4> <ul style={{listStyle: "none", display: "flex", flexFlow: "row wrap"}}> {props.cast.map( (person: CastMemberProps, i: number) => person && ( <CastMember key={i} {...person} meta={props.meta}/> ) )} </ul> </div> ); const CastMember = (props: CastMemberProps & { meta: MetaData }) => { const { character, actor } = props; const { displayName, pageUrl: actorPageUrl, data, _path } = actor; const photoSrc = imageUrl((data.photos || [])[0]?.imageUrl, props.meta); return ( <li style={{marginRight: "15px"}}> { photoSrc && <img src={photoSrc} title={`${displayName} as ${character}`} alt={`${displayName} as ${character}`}/> } <div> <p>{character}</p> <p> <Link href={pageUrl(actorPageUrl, props.meta)} data-content-path={_path}> {displayName} </Link> </p> </div> </li> ); } -
Update the component mappings:
src/components/_mappings.tsimport MovieDetails, {getMovie} from './parts/MovieDetails'; // Part mappings ComponentRegistry.addPart(`${APP_NAME}:movie-details`, { query: getMovie, view: MovieDetails });The part is now available in Content Studio. You’ll put it to use in the next task.
Task: Create a template
With the new component registered, put it to use.
-
Edit your favorite movie - In Content Studio, select and edit your favorite movie (or choose "No time to deflate" if you have no favorites).
-
Add the part to the page - Open the context panel by pressing its icon in the top right screen corner, select
Pagein the widget dropdown, thenMainin the Template dropdown. Add theMovie Detailspart to the page: dragPartfrom theInserttab into the region and pick it in the part dropdown.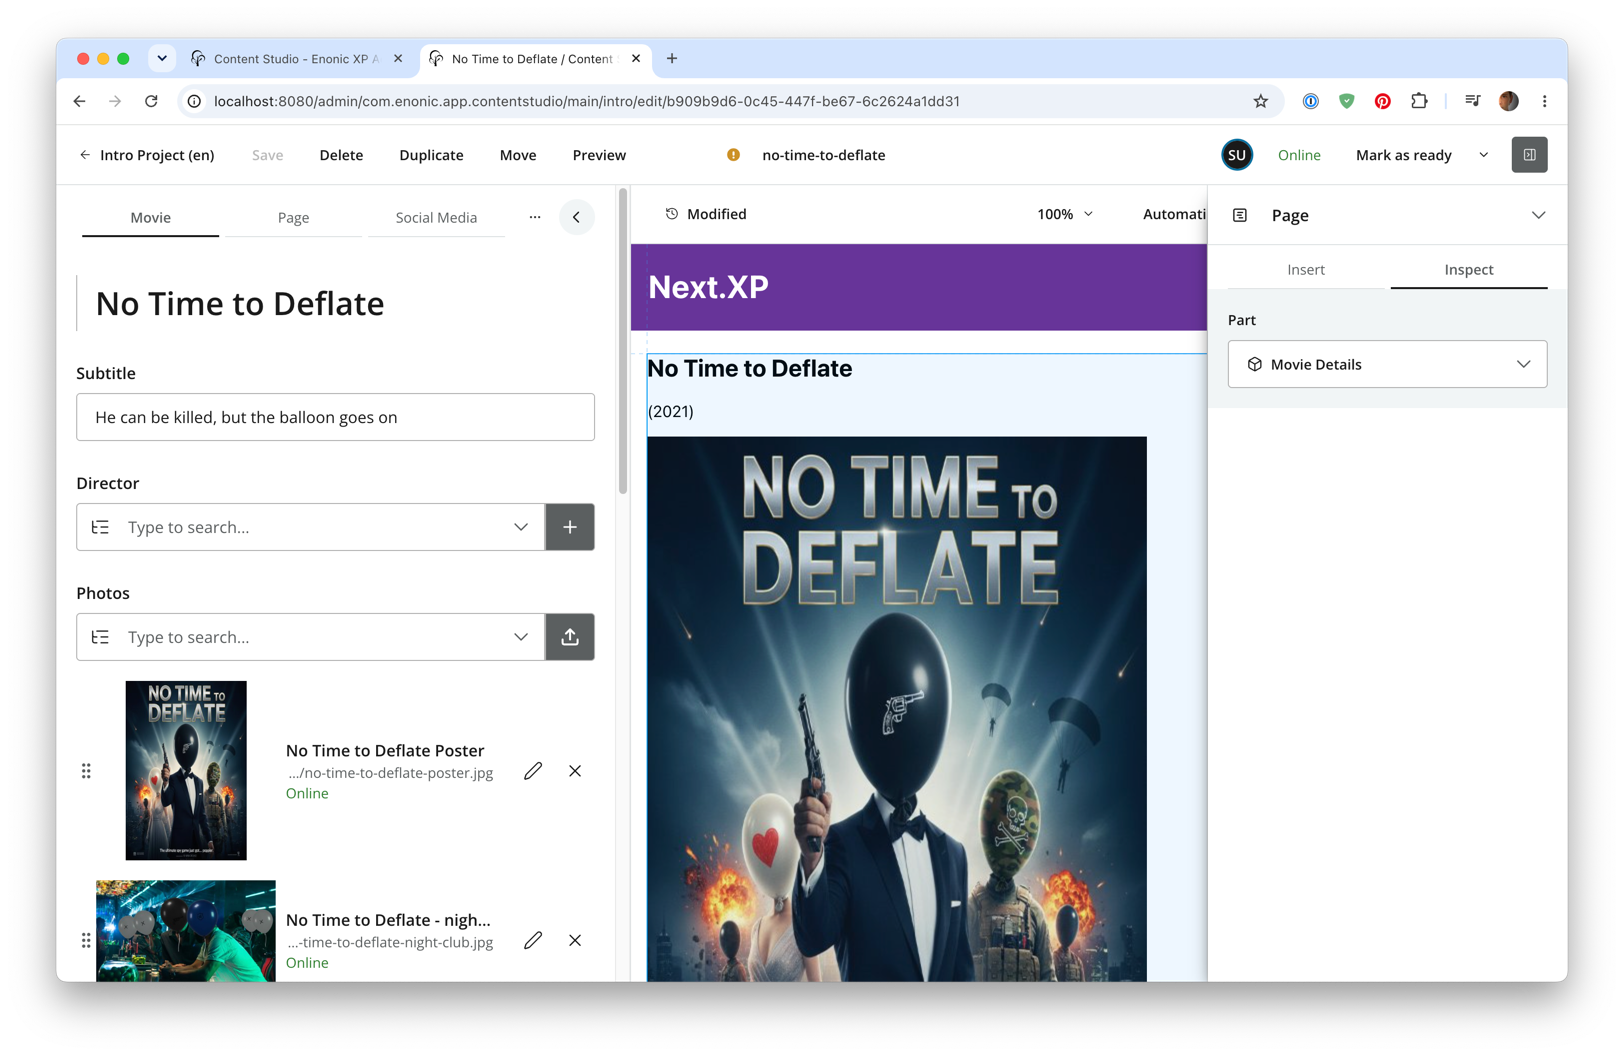
You now have a single movie nicely presented, but it would be cumbersome to configure each movie like this manually. Page templates to the rescue.
-
Select the page component - In the
Pagetab of the form on the left, select the page (root) component namedMain.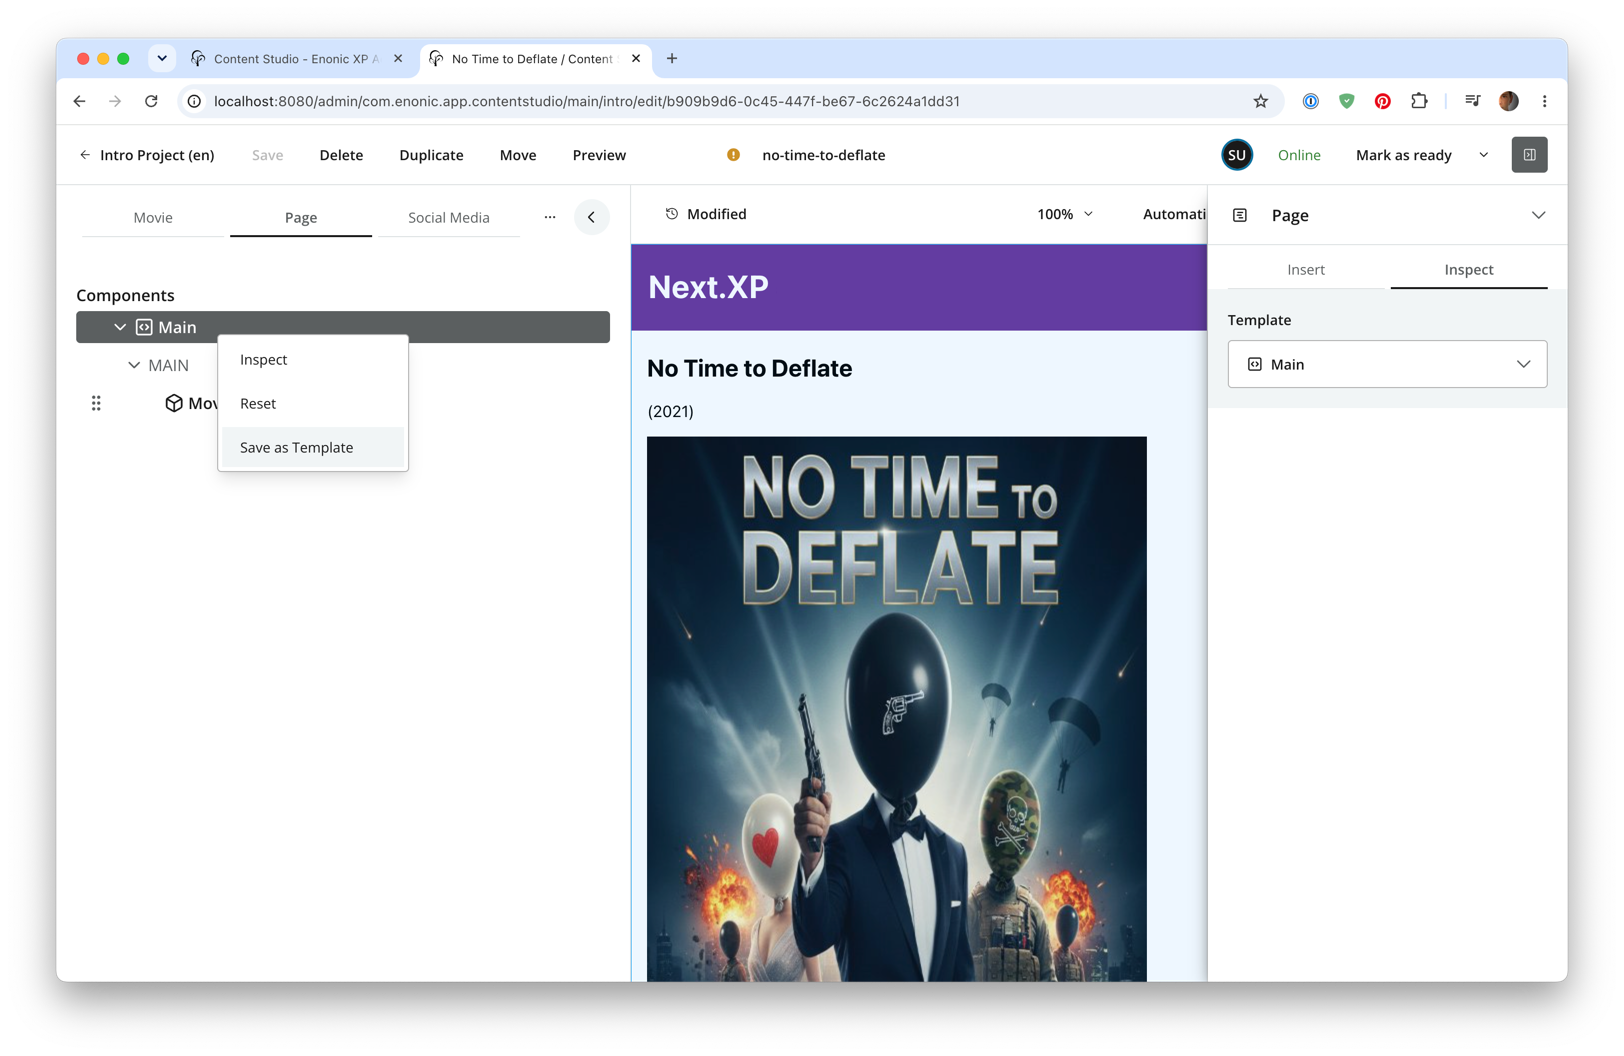
-
Save as template - Right-click the component and select
Save as Templatefrom the context menu.This creates a new page template content item, and opens it in a new tab for editing.
-
Give your template a better name, such as "Movie details". The change is saved automatically. The template already supports the
Moviecontent type.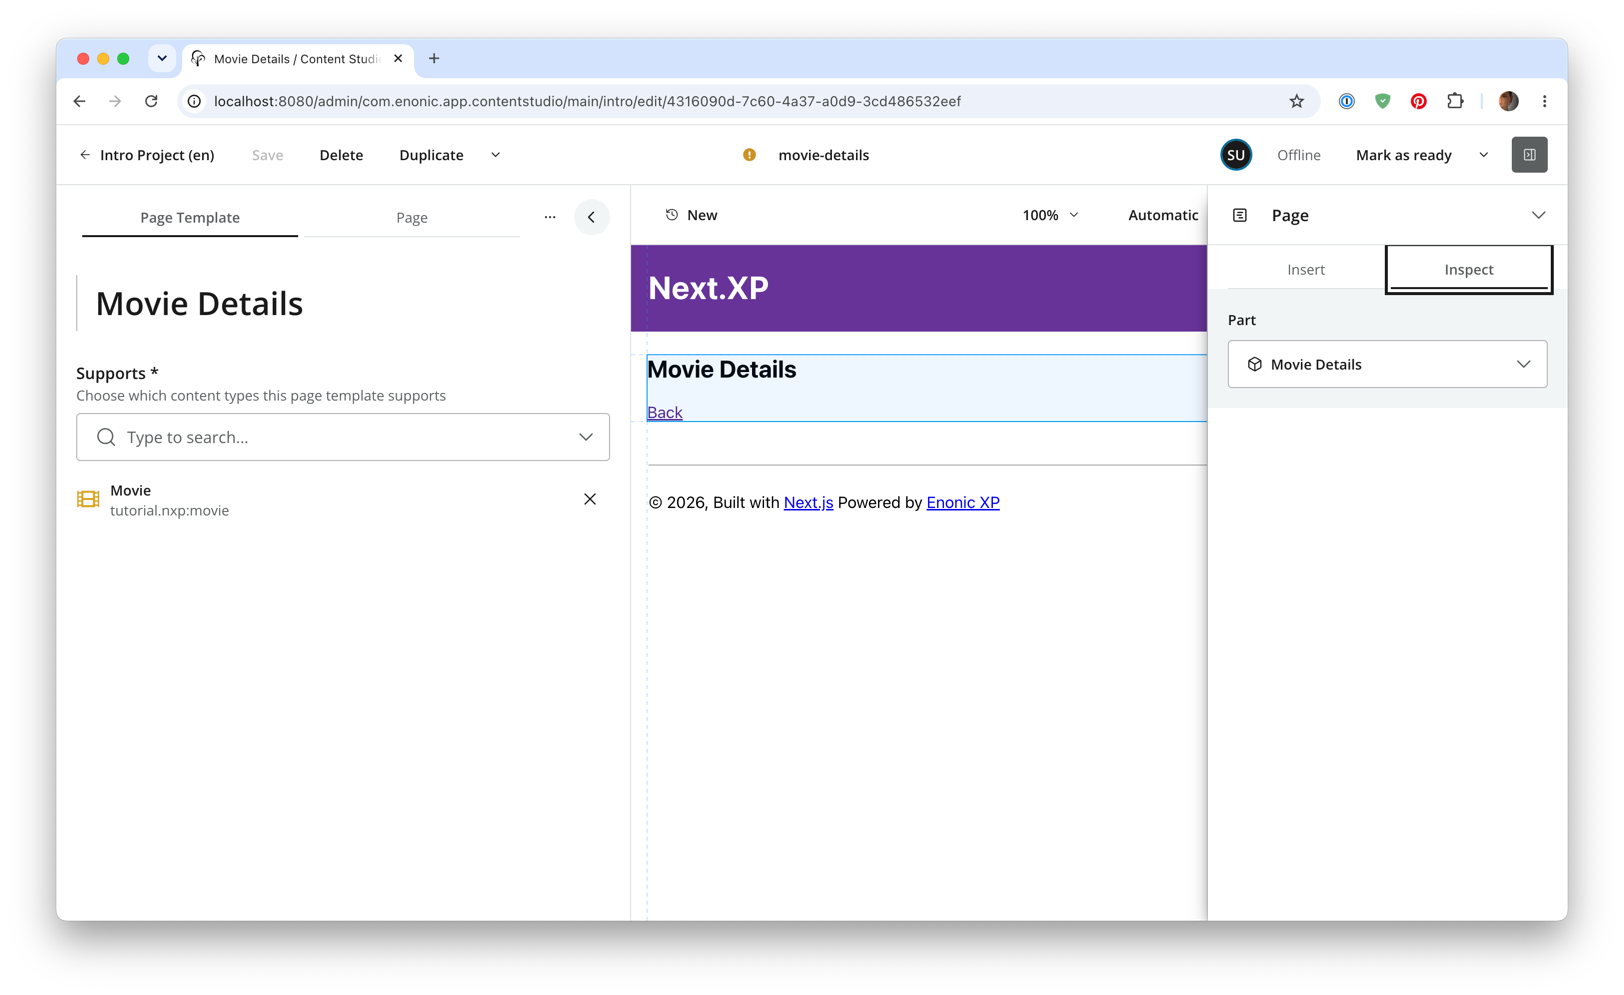
-
Publish the changes - Publish both the movie and the new page template (
Mark as ready→Publish nowfor each). -
Verify the result - Visit other movie items. They now render automatically, using the template.
Summary
You’ve added a MovieDetails part and saved a page as a template, so every movie is rendered with the same page definition.