Rich text
Contents
In this chapter you’ll learn how to render rich text content.
Background
Enonic boasts a rich text input type. Unlike basic text fields, rich-text may contain more complex concepts such as tables, images, links and even custom components (aka macros). Each of these typically need custom processing during rendering. For instance to ensure contextually correct URLs, image sizes etc.
Sample content
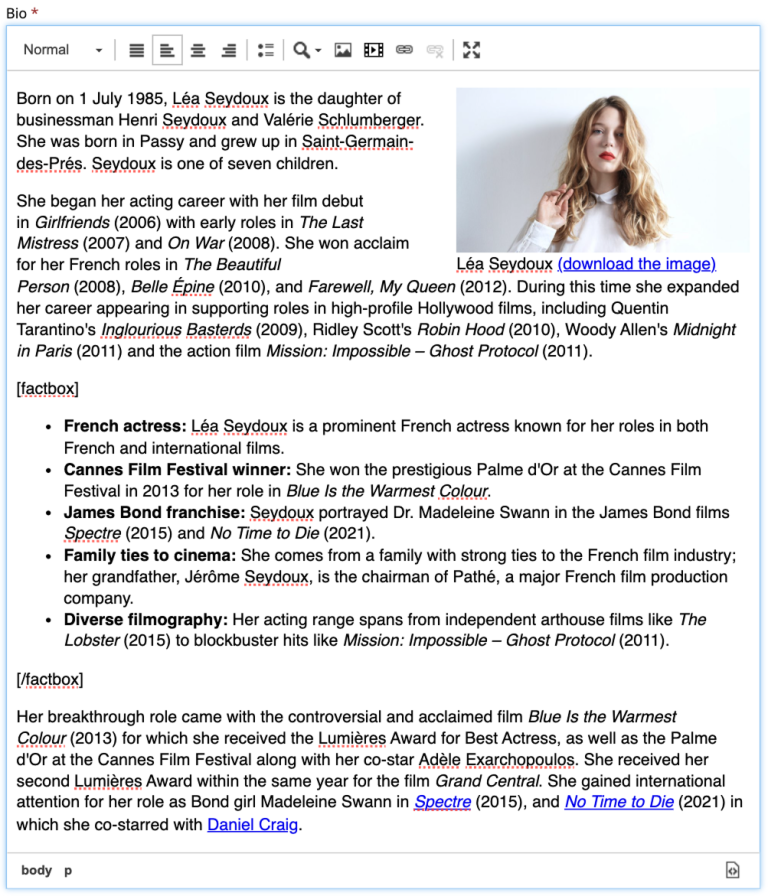
The Bio field in the person content type is exactly what we’re looking for:

Rich text rendering
We’ll be using our existing Person component, and add support for the Bio field.
Follow the steps below:
-
Update the Person processor file to include the
bioprop:/src/main/resources/react4xp/components/content/PersonProcessor.tsimport {processHtml} from '/lib/enonic/react4xp'; import {get as getContentByKey} from '/lib/xp/content'; import {imageUrl} from '/lib/xp/portal'; import {toArray} from "/react4xp/utils/arrayUtils"; import {PageDescriptor} from '@enonic-types/core'; import type {Content} from '@enonic-types/lib-content'; import type {ComponentProcessor} from '@enonic-types/lib-react4xp/DataFetcher'; function fetchAdditionalPhotos(photosIds) { return photosIds.map(photoId => { if (photoId) { const photoContent = getContentByKey<Content>({key: photoId}); return { _id: photoContent._id, title: photoContent.displayName, imageUrl: imageUrl({id: photoContent._id, scale: 'block(175, 175)'}) }; } }); } export const personProcessor: ComponentProcessor<PageDescriptor> = (params) => { const photos: string[] = toArray<string>(params.content.data.photos as string | string[]) const firstPhotoId = photos[0] || ''; const remainingPhotoIds = photos.slice(1); let firstPhoto = null; if (firstPhotoId) { const {_id, displayName} = getContentByKey<Content>({key: firstPhotoId}); firstPhoto = { _id, title: displayName, imageUrl: imageUrl({id: _id, scale: 'block(1200, 675)'}) } } const extraPhotos = fetchAdditionalPhotos(remainingPhotoIds); return { displayName: `${params.content.displayName}`, photo: firstPhoto, birthDate: params.content.data.dateofbirth, restPhotos: extraPhotos, bio: processHtml({ value: params.content.data.bio as string, imageWidths: [200, 400, 800], dataFetcher: params.dataFetcher, component: params.component }) }; };The ProcessHtml function (part of React4XP) outputs a format that the RichText component can use, as you will see below:
-
Update the Person component with the following content:
/src/main/resources/react4xp/components/content/Person.tsximport {RichText, type ComponentProps} from '@enonic/react-components'; import React from 'react' import styles from './Person.module.css'; export const Person = (props: ComponentProps) => { const {meta, common, component} = props; const {displayName, photo, restPhotos, bio, birthDate} = props.data as any; return ( <div className={styles.person}> <h1>{displayName}</h1> <p>{birthDate}</p> <div> { photo ? ( <> <div className={styles.photos}> <img src={photo.imageUrl} title={photo.title} alt={photo.title} height={675} width={1200} loading="eager" /> </div> </> ) : ( <p>No photo available</p> ) } {restPhotos && restPhotos.length > 0 && ( <> <h2>Photos</h2> <div className={styles.photoContainer}> <div className={styles.photoGrid}> <div className={styles.photoScroll}> {restPhotos.map((photo, index) => ( <img key={index} src={photo.imageUrl} title={photo.title} alt={photo.title} height={175} width={175} /> ))} </div> </div> </div> </> )} </div> {bio && ( <> <h2>Bio</h2> <div className={styles.richText}> <RichText data={bio} meta={meta} common={common} component={component} loading="lazy" /> </div> </> )} </div> ) }
Et voilà! And just like that we have a fully functional rich text rendering. The page should now look something like this:

If you have a sharp eye, you might notice there is something missing, the factbox is not rendering properly!
Macros
The HMDB dataset defines a Fact-Box macro, which editors may use inside their rich-text input.
-
Add the following files to your app:
/src/main/resources/react4xp/components/macro/FactBox.tsximport {MacroComponentParams} from '@enonic/react-components'; import React from 'react'; import styles from './FactBox.module.css'; export const Factbox = ({data, children}: MacroComponentParams) => { return ( <ins className={styles.factBox}> <i>💬</i> <strong className={styles.header}>{data.header ? data.header as unknown as string : "Fact Box"}</strong> <div className={styles.bodyContent}> {children}</div> </ins> ); };/src/main/resources/react4xp/components/macro/FactboxProcessor.tsimport type {ComponentProcessor, MacroProcessorParams} from '@enonic-types/lib-react4xp/DataFetcher'; export const factboxProcessor: ComponentProcessor<'com.enonic.app.hmdb:factbox', MacroProcessorParams> = (params) => { const macro = params.macro; return { ...macro.config['factbox'] }; };/src/main/resources/react4xp/components/macro/FactBox.module.css.factBox { display: block; text-decoration: none; border-radius: 8px; clear: both; padding: 10px 20px; max-width: fit-content; margin: 1rem; position: relative; background-color: #0b0425; box-shadow: 0 0 5px #0c022b; ul { padding-left: 20px; } i { font-style: normal; } } .factBox .header { font-size: 20px; line-height: 24px; margin: 0 0 0 1rem; } -
Register the component
/src/main/resources/react4xp/componentRegistry.tsximport {ComponentRegistry} from '@enonic/react-components'; import {Person} from './components/content/Person'; import {Hello} from './components/hello/Hello'; import {Factbox} from './components/macro/FactBox'; export const componentRegistry = new ComponentRegistry(); componentRegistry.addContentType('portal:site', {View: Hello}); componentRegistry.addContentType('com.enonic.app.hmdb:person', {View: Person}); componentRegistry.addMacro('factbox', {View: Factbox}); -
Register the processor
/src/main/resources/react4xp/dataFetcher.tsimport {DataFetcher} from '/lib/enonic/react4xp'; import {commonProcessor} from '/react4xp/components/common/CommonProcessor'; import {personProcessor} from './components/content/PersonProcessor'; import {helloProcessor} from './components/hello/HelloProcessor'; import {factboxProcessor} from "./components/macro/FactboxProcessor"; export const dataFetcher = new DataFetcher(); dataFetcher.addContentType('portal:site', {processor: helloProcessor}); dataFetcher.addCommon({processor: commonProcessor}); dataFetcher.addContentType('com.enonic.app.hmdb:person', {processor: personProcessor}); // @ts-ignore update type in addMacro dataFetcher.addMacro('factbox', {processor: factboxProcessor});
Factbox complete!
You should now see the Factbox rendering properly

Sweet! next up are pages.