Configuration file
Contents
This section describes how to configure Content Studio via the config file.
$XP_HOME/config/com.enonic.app.contentstudio.cfgMatching mode for content type patterns
contentTypePatternMode = MATCHDefines matching mode for content type patterns. Can be MATCH or LEGACY. Default: MATCH. See description.
Max file upload size
uploadMaxFileSize = 100mbUsed for setting size limit on attachments, media content and both project and content thumbnail uploads
Disable path name transliteration
contentWizard.allowPathTransliteration=falseTurn off automatic transliteration of name when generating it based on a value typed into the display name field in the Content form.
Content Security Policy
Enonic XP and Content Studio enforces several layers of Content Security Policy (CSP) to prevent cross-site scripting, clickjacking and other code injection attacks resulting from execution of malicious content in the trusted web page context.
You may override the default CSP header via the contentSecurityPolicy.header property.
Widgets
Content Studio uses widgets from other applications extensively. As widgets are loaded into Content Studio’s context, they must apply with the Content Studio CSP.
By default, widgets with inline scripts/styles or scripts loaded from external domains will be blocked.
Example: Google Analytics Widget
The Google analytics app injects its own scripts referring to an external domains. See CSP example in the GA app documentation.
Example: Disable CSP
If you trust all of the widgets you use in Content Studio, you may disable the CSP completely:
contentSecurityPolicy.enabled=falseSite Engine Preview
Content Studio’s preview uses an Iframe to isolate the front-end.
In production, front-ends built with the Enonic site engine deployed on custom domains. In preview mode however, the site engine is accessed in the same domain and URL context as Content Studio. To mitigate this Site Engine has a standard preview CSP to protect Content Studio and the XP admin.
If your site is not working properly in preview mode, consider improving the implementation. Details on tuning the Site Engine CSP are described in the XP configuration documentation.
| While using Site Engine in visual edit mode, the CSP is strictly enforced, and is currently not possible to override. |
Publishing Wizard
Disable "Mark as Ready" action
publishingWizard.allowContentUpdate = falseWhenever the Publishing Wizard contains at least one item that is "Work in progress", publishing will be disabled. The editor can solve this by clicking the "Mark as ready" link on top of the dialog, which will mark all such items as "Ready for Publishing".
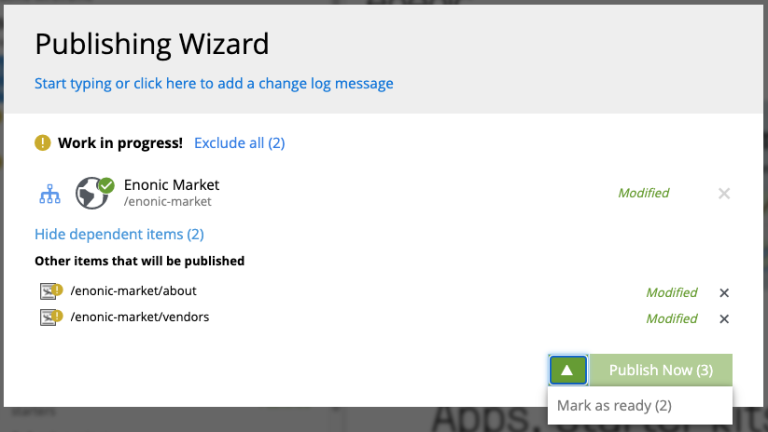
To add another level of restriction and prevent accidental publishing of items that are not ready for publishing, the "Mark as ready" bulk action can be disabled by adding the parameter above to the config file.
Default publish from time
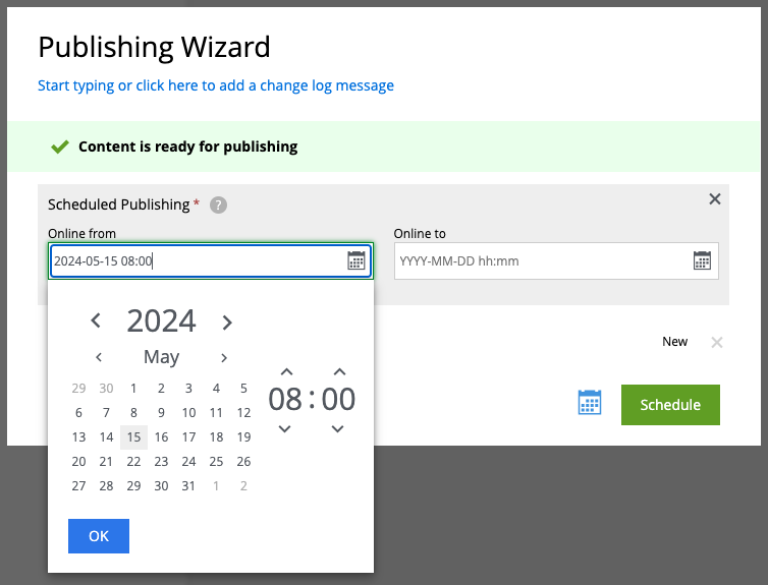
publishingWizard.defaultPublishFromTime = 12:00The default value can be changed by setting the publishingWizard.defaultPublishFromTime config property.
Mandatory "Online from" field
publishingWizard.requiredPublishFrom = trueWhen you schedule publishing, the "Online from" field is by default optional and preset to "Now", which means that content will go online immediately once published. You can change this behaviour and require the "Online from" field to be filled out by adding the parameter above to the config file.
Exclude optional dependencies
publishingWizard.excludeDependencies = trueBy default, all dependencies of content items staged for publishing will also be included to ensure no broken references will appear online. Some of these (for example, all the ascendants of selected items or their inbound dependencies) are required for publishing and cannot be excluded from the publishing batch, while others (like outbound dependencies) are optional.
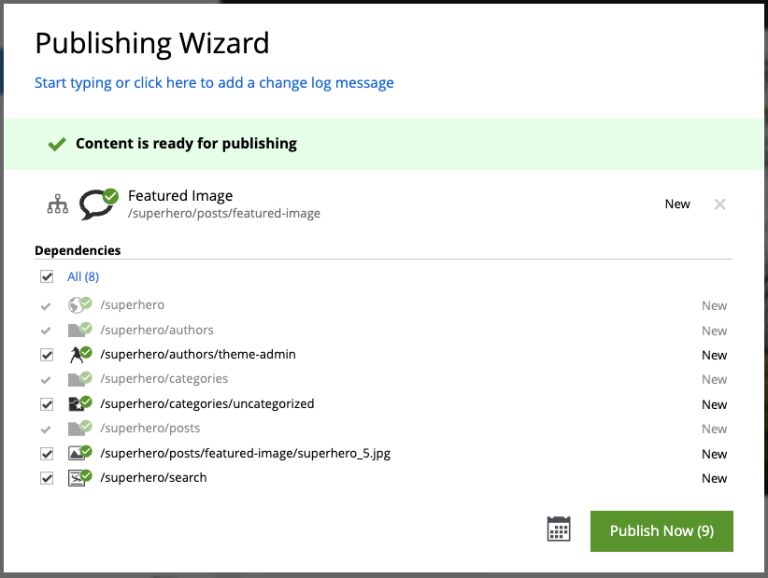
It’s possible to overrule the default behaviour of including all the dependencies by setting the publishingWizard.excludeDependencies config property to true.
With this flag turned on, only mandatory dependencies will be included, while optional can be added from the "Show excluded" mode.
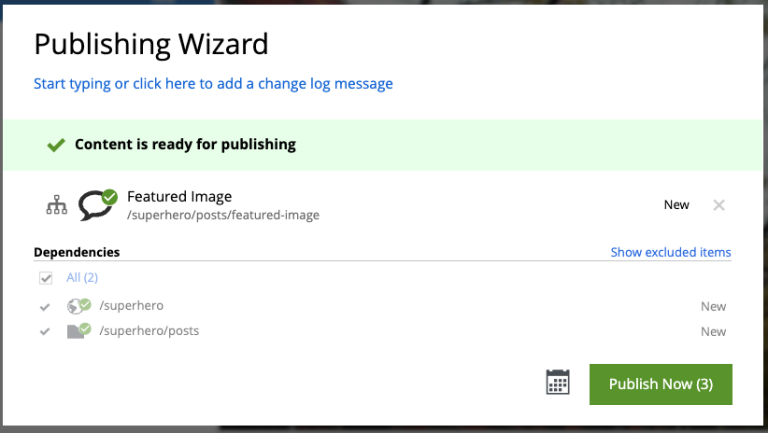
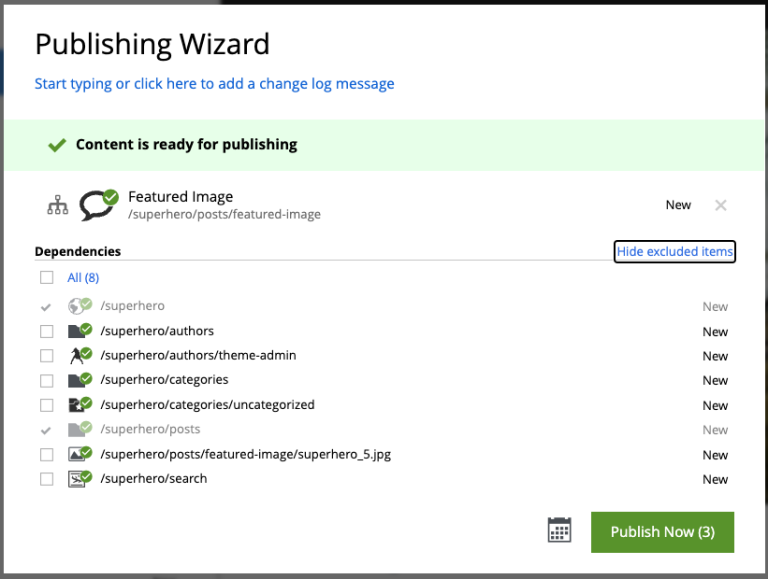
| Use this flag with caution. It makes it very simple to publish a content without its outgoing dependencies, which may result in broken references, missing images etc. |
Enable Default Content Project
Default Content Project is not shown in Content Studio by default.
If you need the Default project (for example, you already have content in it and want to continue working with it after upgrading to Content Studio 5), enable it by setting settings.hideDefaultProject property to false.
settings.hideDefaultProject=false| If the Default project is hidden (default behaviour) and a logged-in user doesn’t have access to any projects and has necessary permissions, he/she will be asked to create a new content project using multistep wizard. |