Manage projects
Contents
Projects are created, edited, and deleted from the Settings section of Content Studio.
Create a project
New projects are created with the project wizard. It launches from the first-run dialog on the Projects page, or from the New button in Settings. You can click the Previous button at any time to review or change your choices, and the X icon to exit without creating a project.
-
Language and content layering
Optionally select a parent project — this makes the new project a layer, inheriting content from the parent. Then select the default language, which will be applied to new content created in the root of the project.
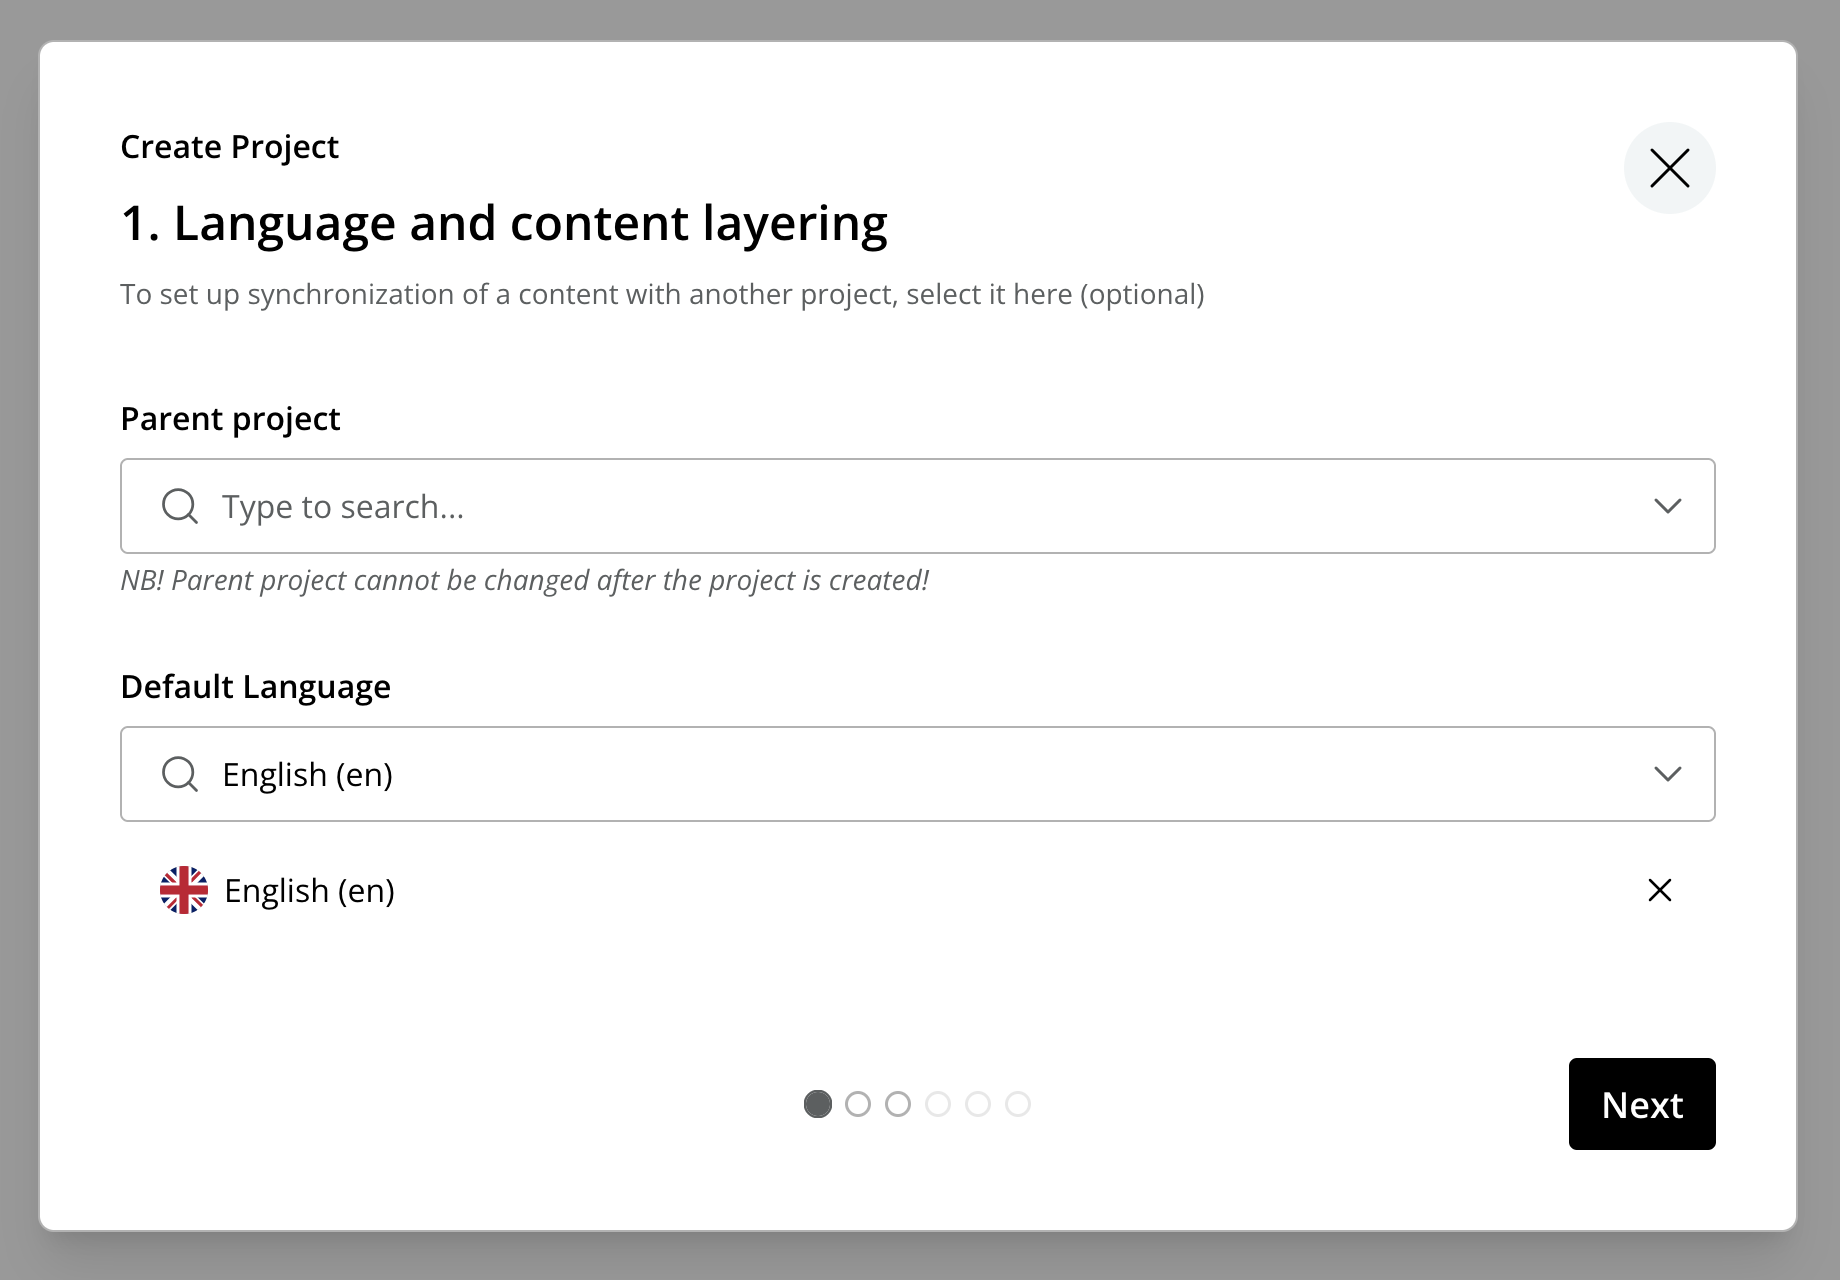
The parent project cannot be changed after the project is created. The default language can. -
Name your project
Give the project a display name. The identifier is auto-generated from the display name, but can be overridden. Only alphanumeric characters and "-" are allowed, the value is validated for uniqueness, and it cannot be changed later. Optionally, add a description.
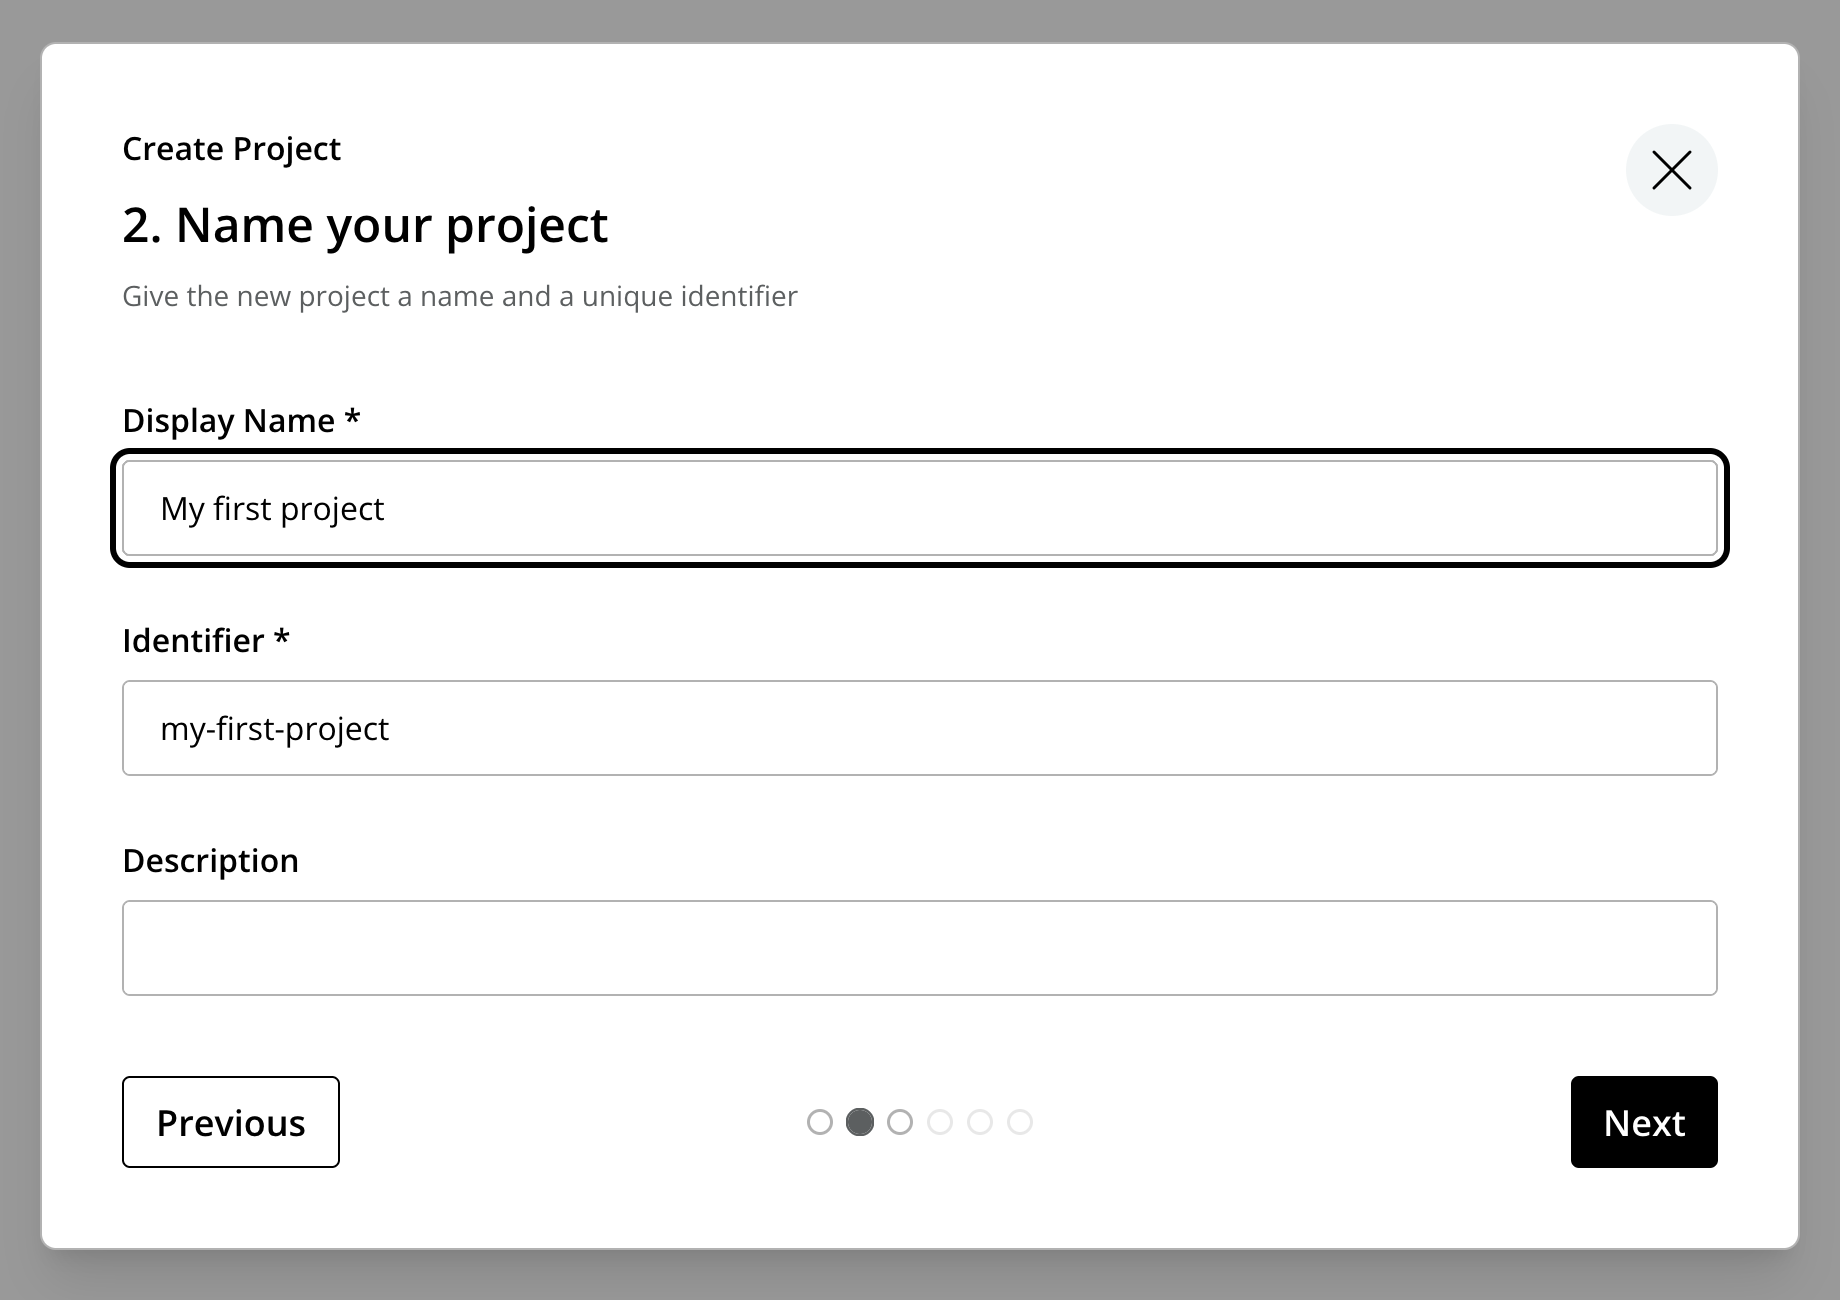
When creating a layer, the wizard will suggest display name and description based on the parent project and the selected language. -
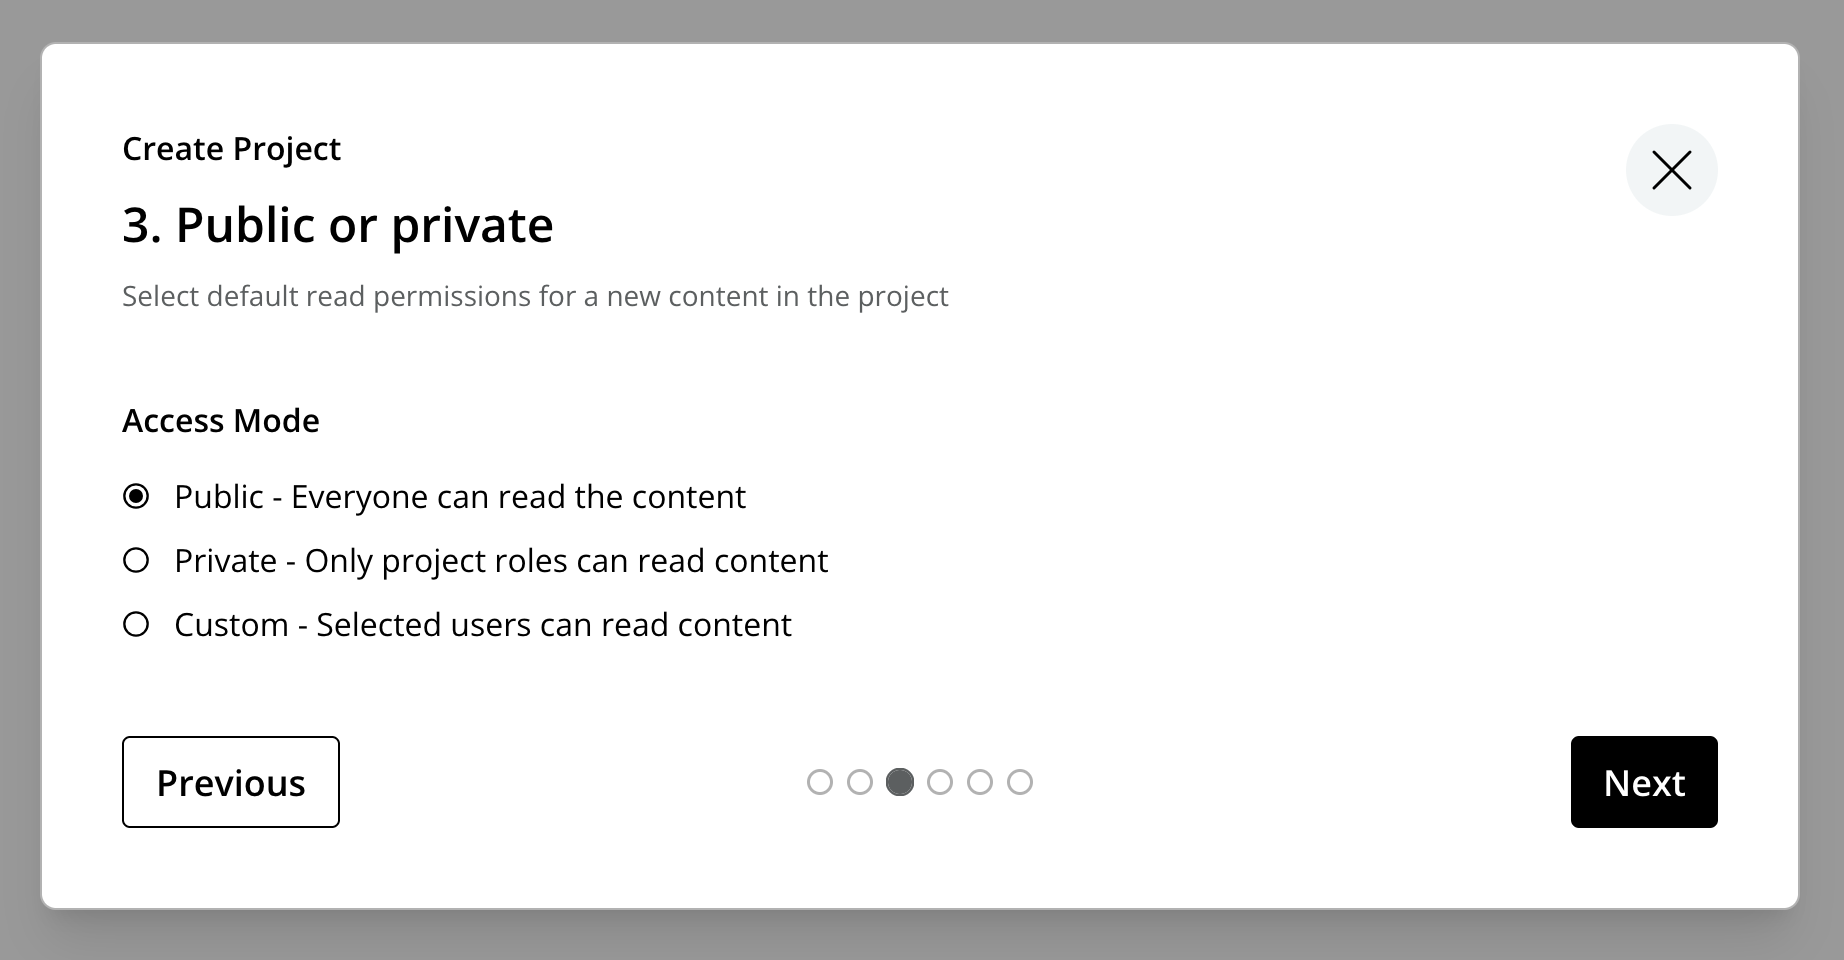
Public or private
Select the access mode — the default READ permissions for content in the project.
-
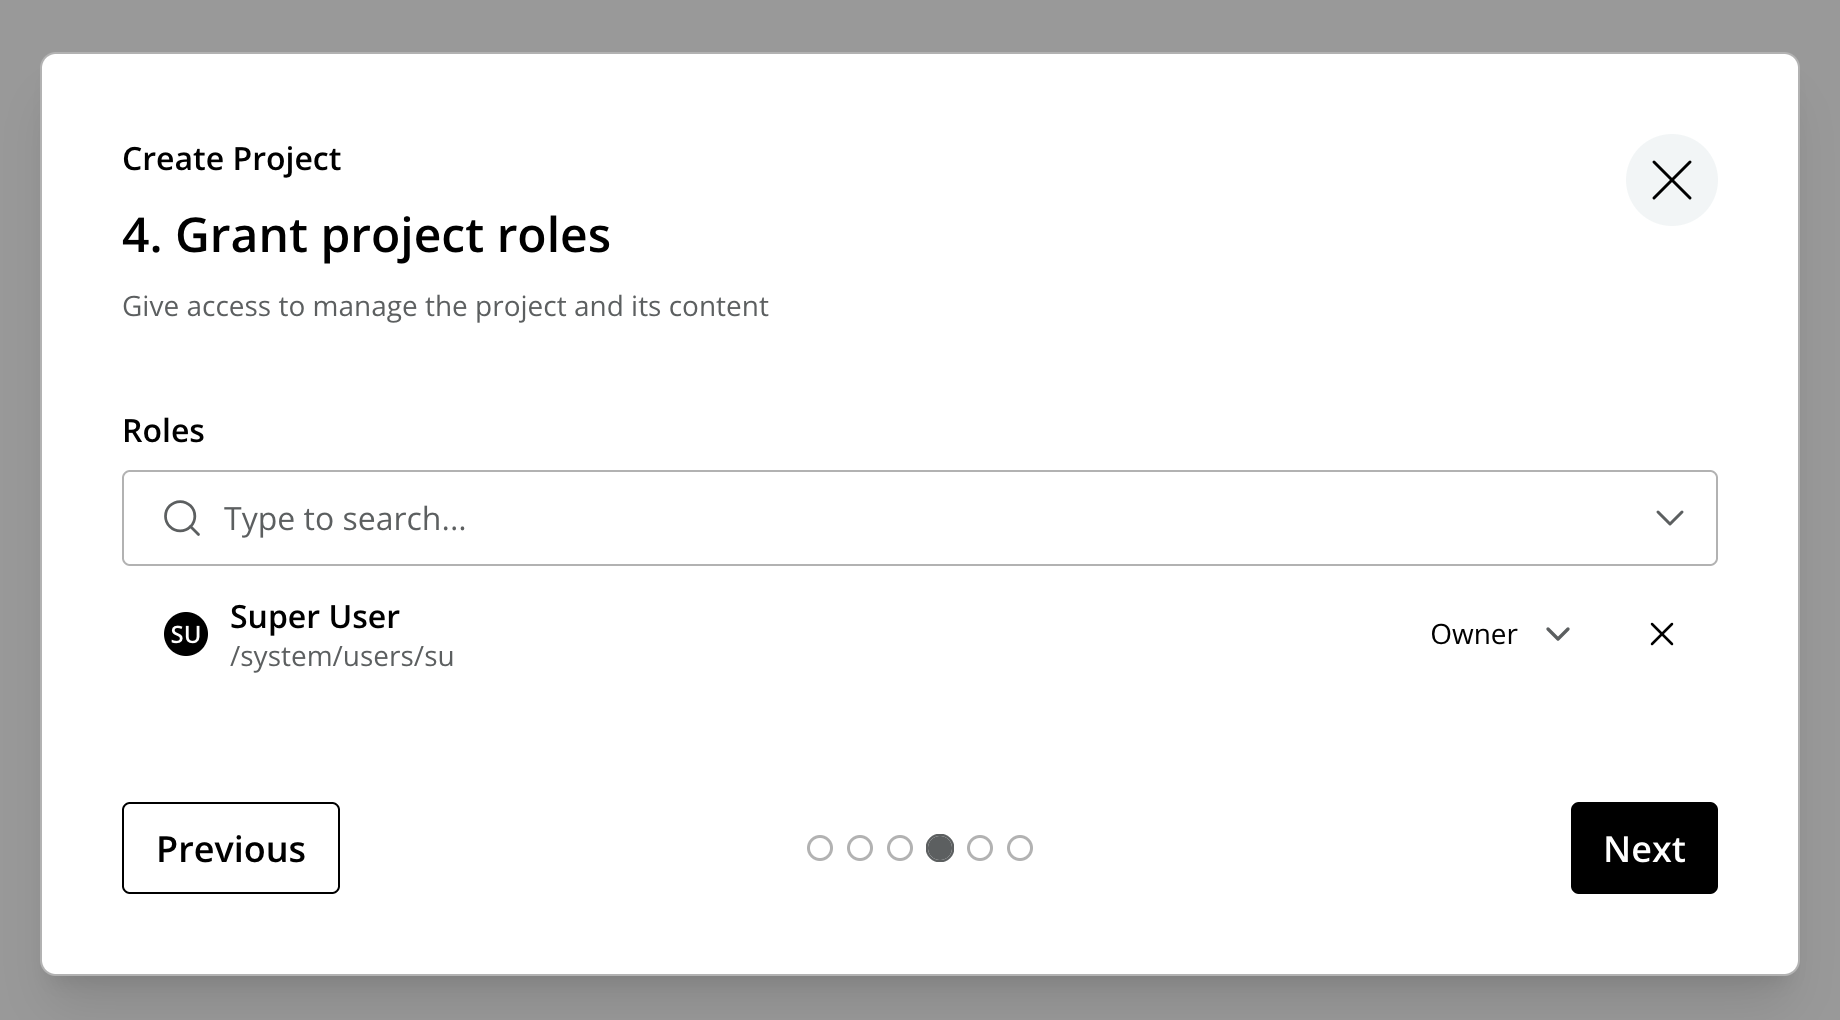
Grant project roles
Give users or groups access to the project by assigning project roles.
-
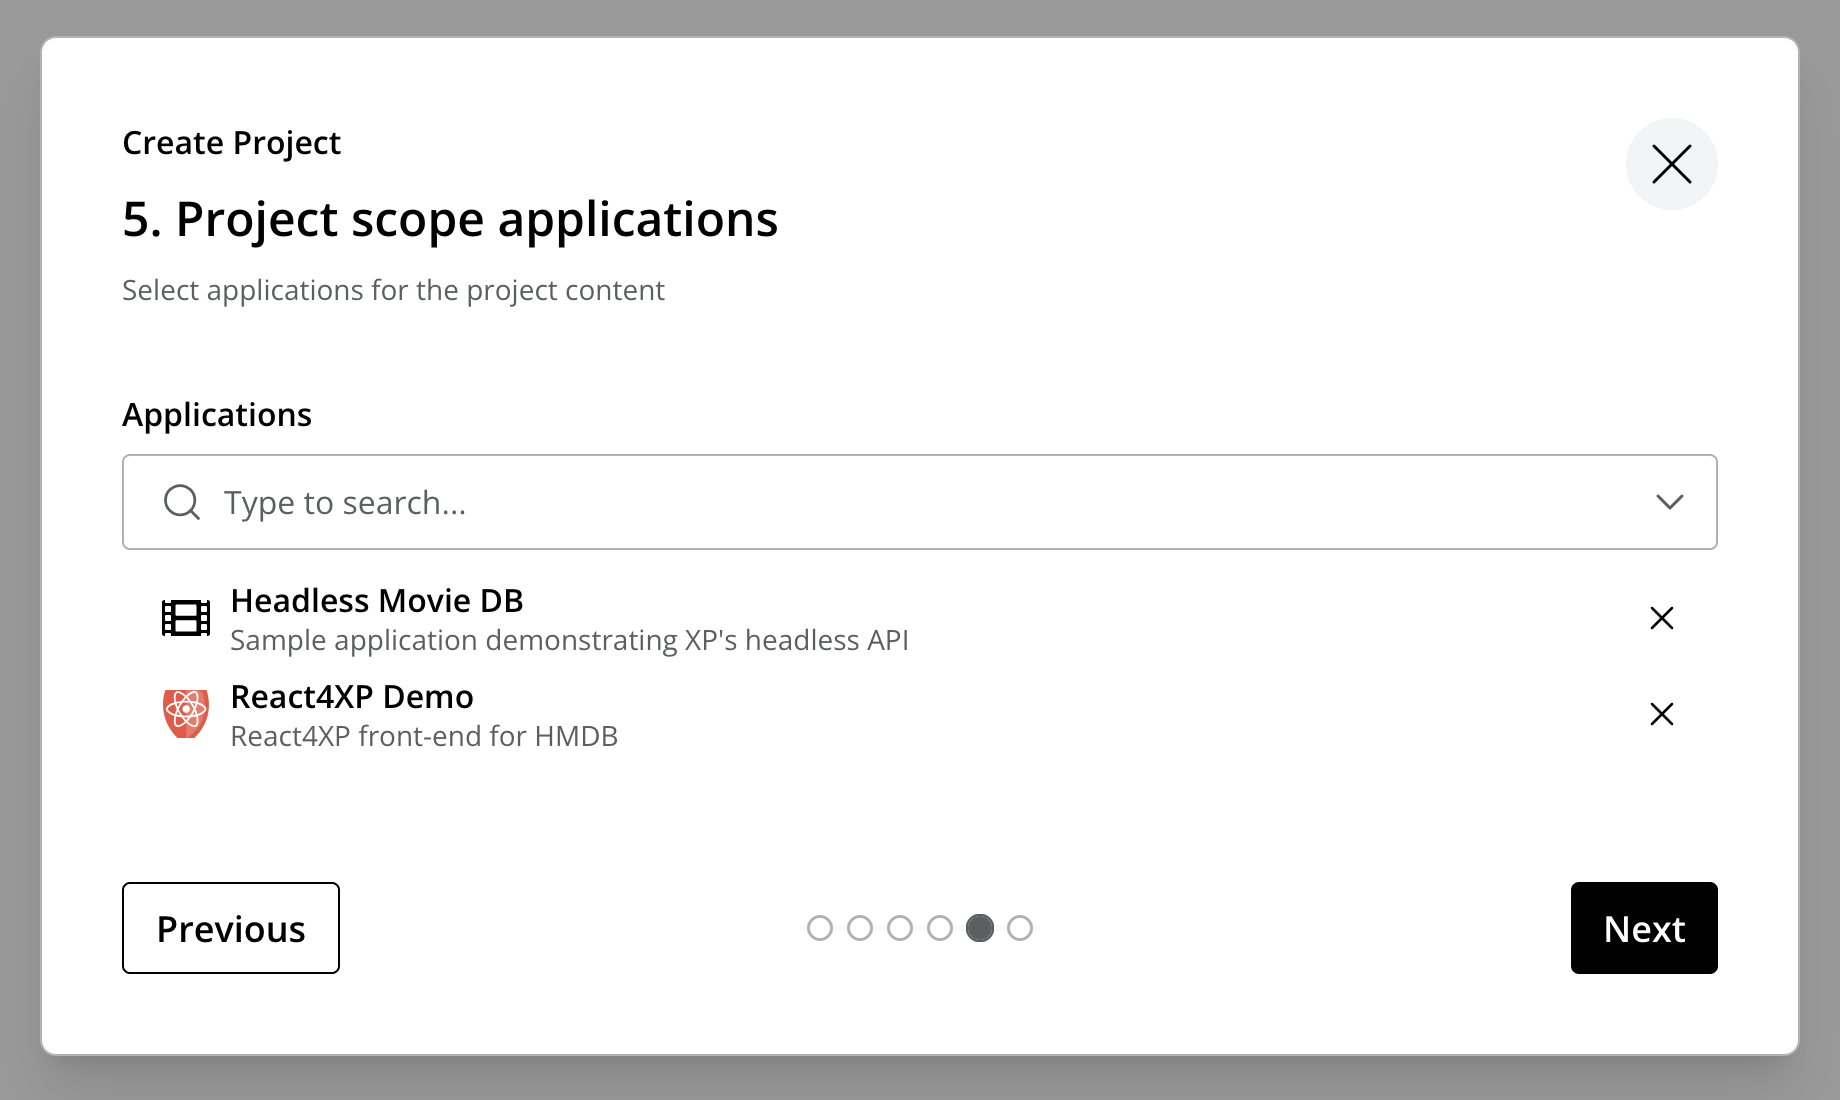
Project scope applications
Select the applications that should be available for the project’s content.
-
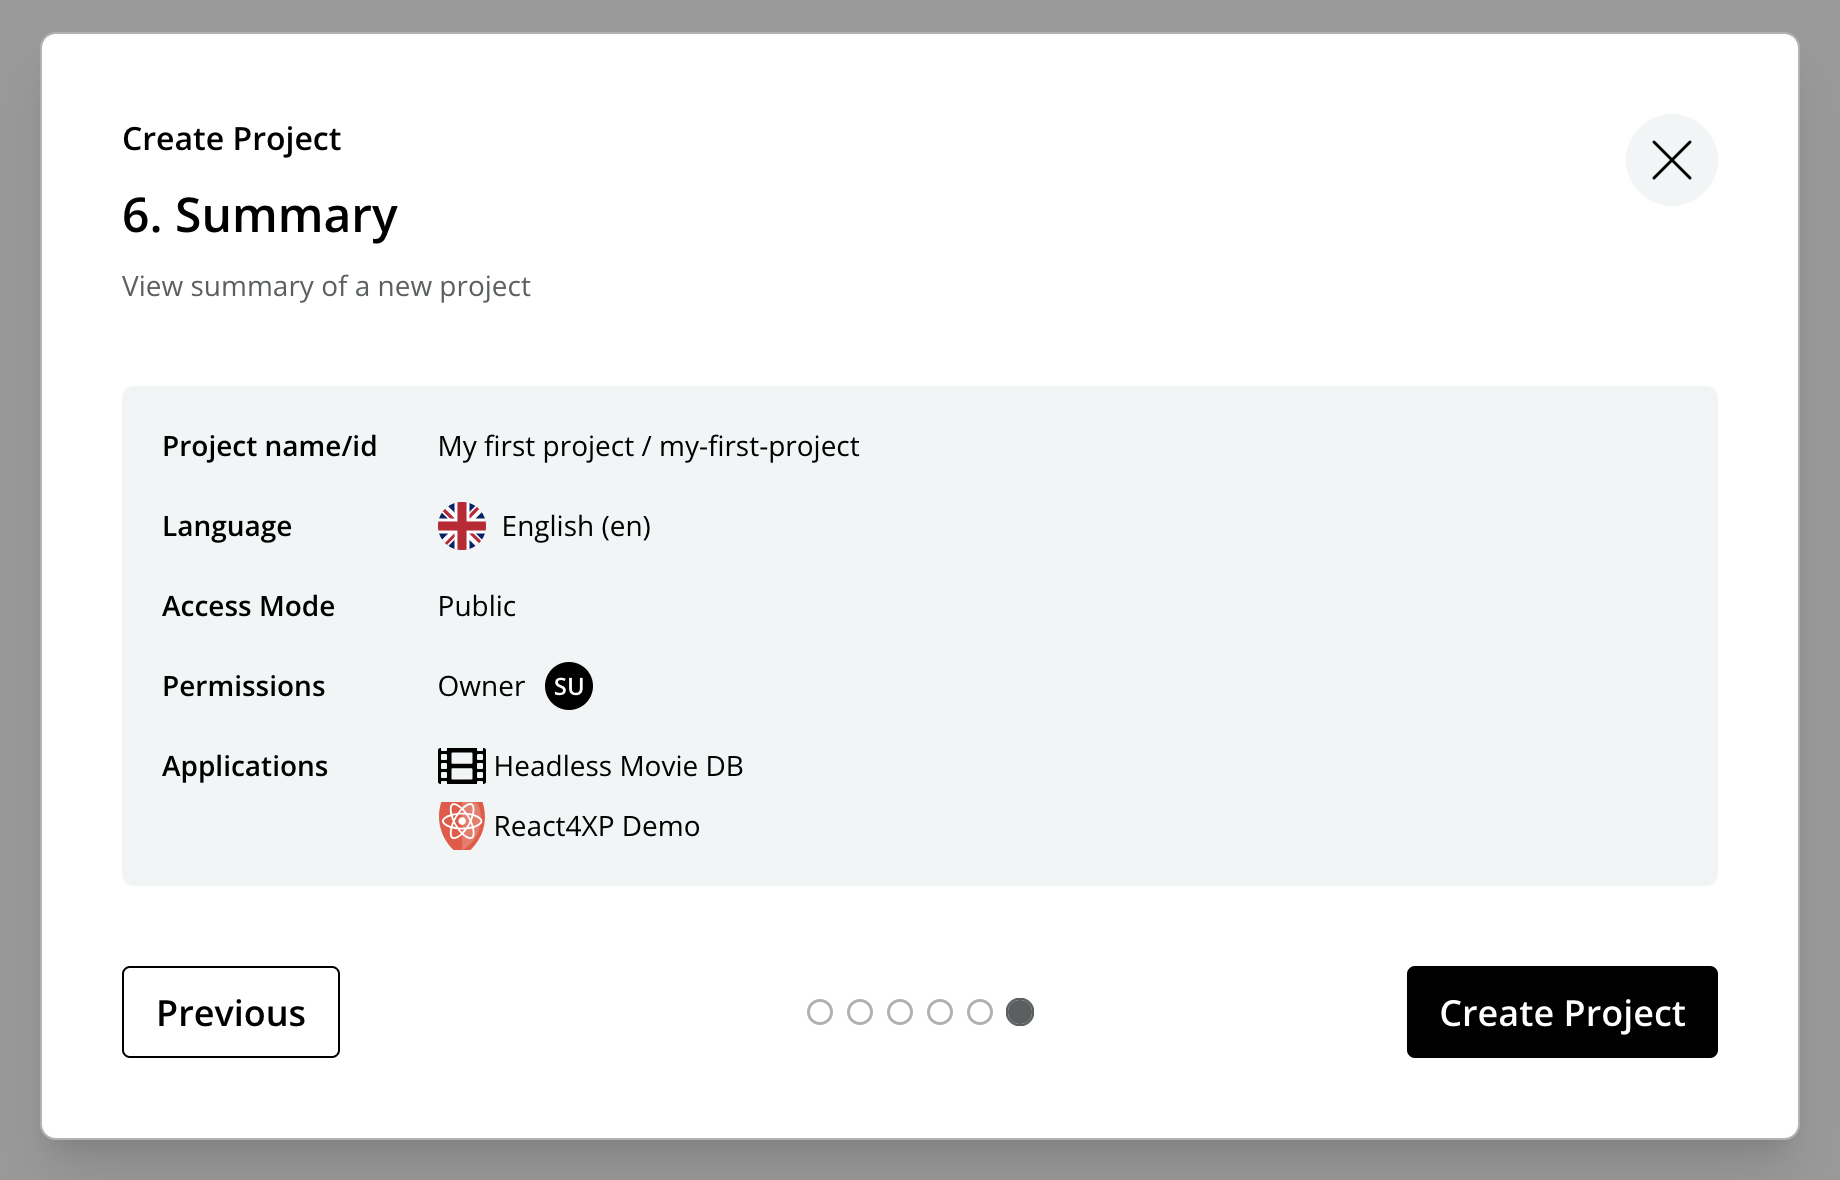
Summary
Verify the settings of the project you are about to create, then click Create Project.
| If you created a layer, a synchronization job will kick in and inherit content from the parent project. |
Edit a project
To edit existing projects, select a project and click Edit in the Settings toolbar, or simply double-click a project. Most of the wizard’s settings can also be changed on an existing project. Things to be aware of:
-
Icon — click the project thumbnail to upload a custom icon. This can only be done after creation, as the wizard has no icon step.
-
Default language — changing it only affects new items created after the project is saved; existing content items keep their language.
-
Access mode — changing to or from Public must be confirmed, since it updates permissions on every single content item inside the project.
-
The identifier and parent project can never be changed.
Delete a project
To delete a project, select it in the Settings grid and click Delete in the toolbar.
| Deleting a project will delete its repository and all the data inside. This action has to be confirmed and cannot be undone. |